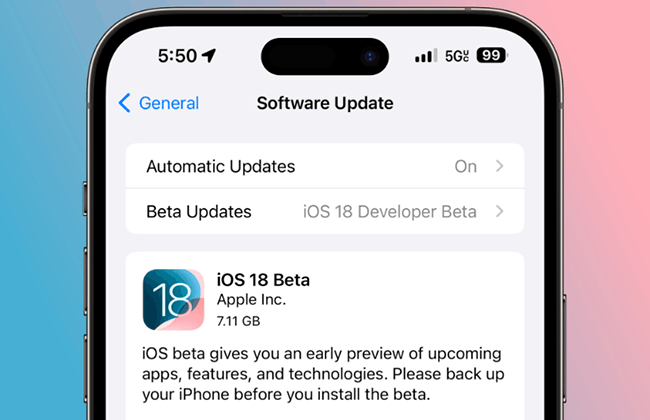
If your iPhone feels noticeably slower after updating to iOS 18, you're not alone. It’s common for software updates to impact performance as new features and optimizations are added. Fortunately, there are several ways to troubleshoot and resolve this issue to get your device running smoothly again. Here are some practical ways to help boost your iPhone’s performance post-update. Without dilly-dallying much, let's see why and how to fix iPhone slow after iOS 18 update.
 |
| iphone slow after ios 18 update |
Part 1. Why is My iPhone So Slow After iOS 18 Update?
1. Background System Tasks: After an update, your iPhone performs a variety of background tasks, like re-indexing files, re-optimizing apps, and syncing data. These processes can temporarily slow down your device, but the performance should improve after a few days once these tasks are completed.
2. Incompatible or Outdated Apps: Some apps may not be fully optimized for the new iOS version yet. If developers haven’t updated their apps to work efficiently with iOS 18, these apps could cause lag, crashes, or drain system resources, slowing down your phone.
3. Increased System Demands: iOS 18 could introduce new features and background processes that place a higher demand on your device’s CPU, memory, or storage. If you have an older iPhone model, these new demands may exceed your phone’s hardware capabilities, causing slowdowns.
4. Low Storage: iOS updates require space to install and function properly. If your device is running low on storage, it might struggle to perform optimally after an update. Clearing up some space can help.
5. Battery Health and Performance Throttling: If your iPhone's battery health has degraded, iOS might automatically reduce performance to extend battery life and prevent unexpected shutdowns. iOS updates often exacerbate performance throttling, especially if your battery is already in poor condition.
Part 2. How to Fix iPhone Slow After iOS 18 Update
To improve the using experience of your iPhone, it is urgent to find a solution to solve the problem of lagging on your iPhone. Here are some effective methods.
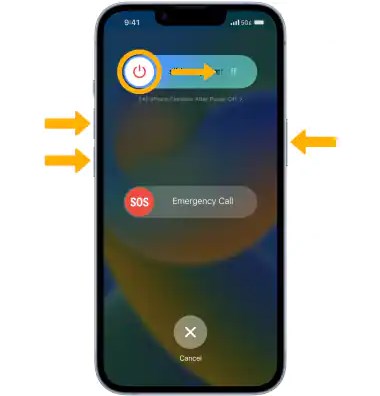
Fix 1. Restart Your iPhone
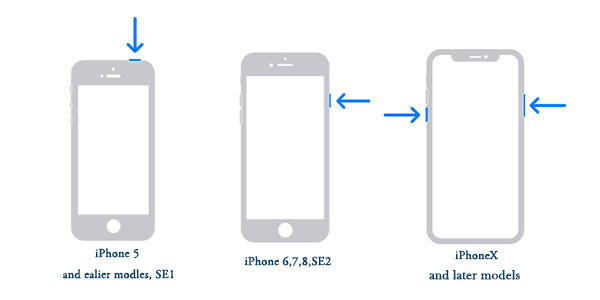
The first way when deal with sluggish performance is a simple restart. Sometimes, after a major update, the system needs to refresh and reset background processes that may have been affected. Restarting can often resolve temporary slowdowns without any further troubleshooting.
Step 1: Hold down the power button and one of the volume buttons at the same time until the power off slider is shown on the screen.
Step 2: Slide the power off slider to power off your iPhone.
Step 3: Hold down the power button until an Apple logo is shown on your iPhone screen.
Fix 2. Check Storage Space
If restarting doesn’t help, the next potential issue could be your iPhone’s storage. iOS updates often require additional space, and low storage can slow down performance. Verifying and clearing out some storage could lead to immediate improvements.
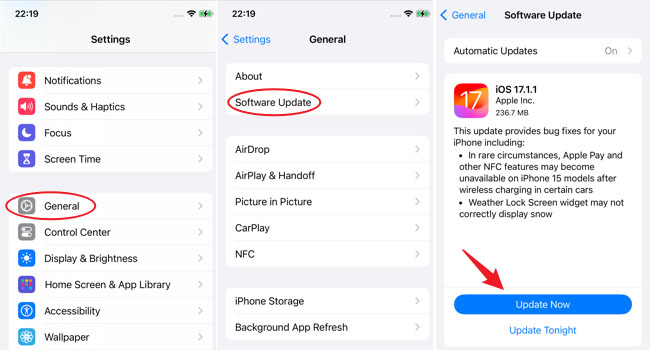
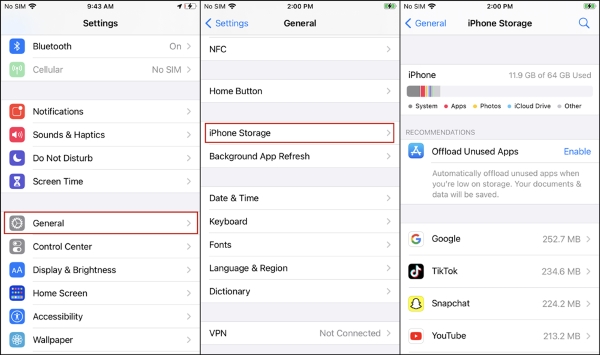
Step 1: Go to Settings app on your phone;
Step 2: Navigate to General > iPhone Storage to check the available storage. If your storage is full, try deleting unused apps, old photos, or offloading apps.
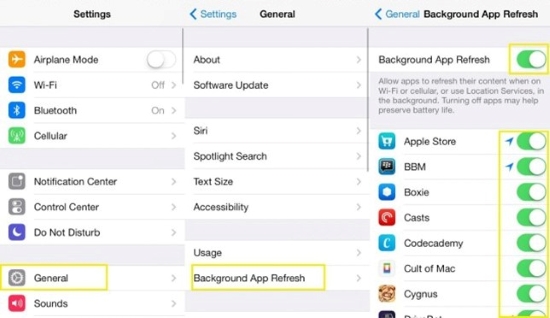
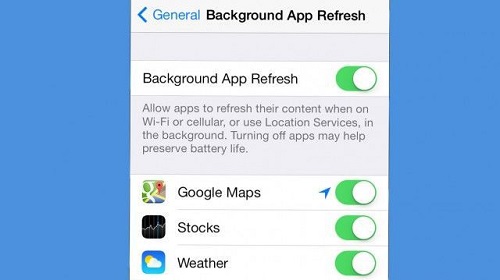
Fix 3. Disable Background App Refresh
The number of apps running in the background will also affect the speed of iPhone. Background App Refresh allows apps to update content even when you’re not using them, but it also consumes system resources. Disabling it for non-essential apps can free up processing power.
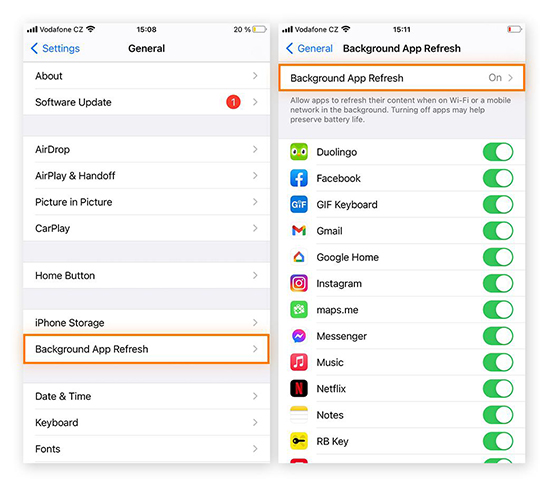
Step 1: Open your Settings app.
Step 2: Select General > Background App Refresh. Disable it for apps that you don’t need constantly refreshing can help improve performance.
Fix 4. Reduce Motion and Animations
While iOS’s sleek animations are visually appealing, they can also slow down performance, especially on older devices. Reducing or eliminating these effects can help your iPhone run more smoothly by cutting down the workload on the graphics processor.
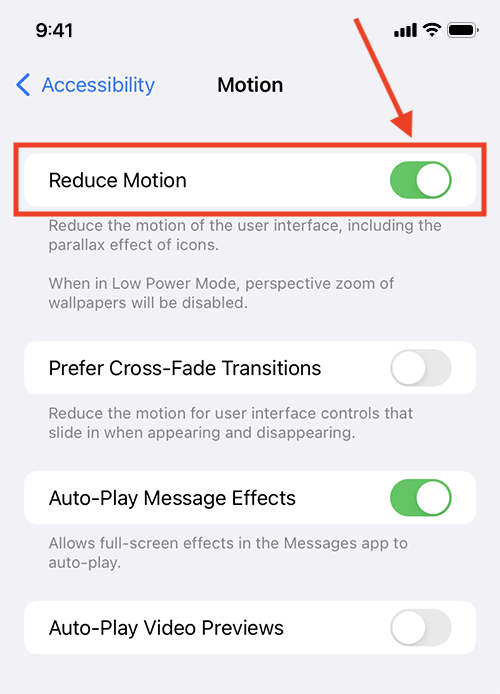
Step 1: Enter your Settings app.
Step 2: Go to Accessibility > Motion > Reduce Motion to reduce the animation effects, which can improve responsiveness on older devices.
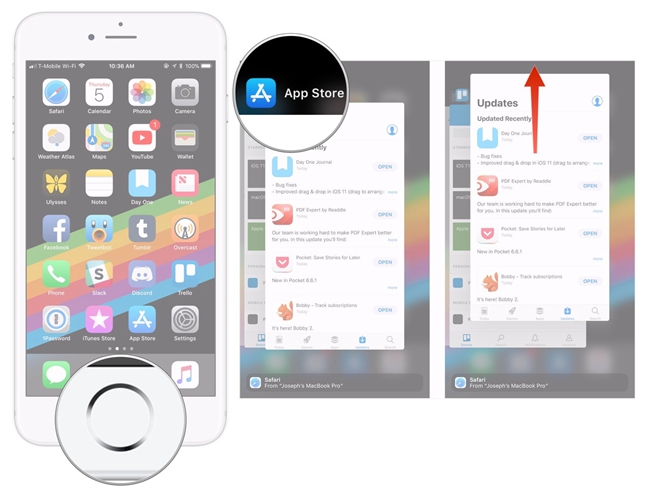
Fix 5. Update Your Apps
App performance can also be a factor, especially after a major iOS update. Developers usually release updates to optimize their apps for new iOS versions.
Step 1: Go to your App Store app.
Step 2: Find the app you want to update and then click the Update button to get the newest version.
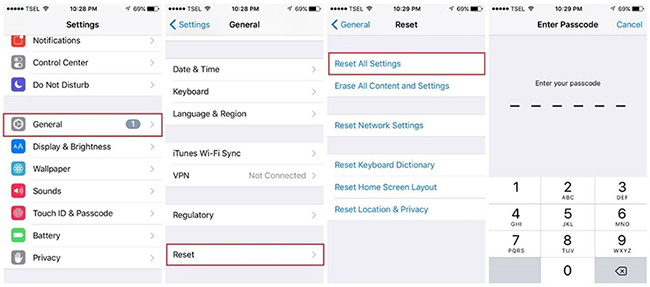
Fix 6. Reset Settings
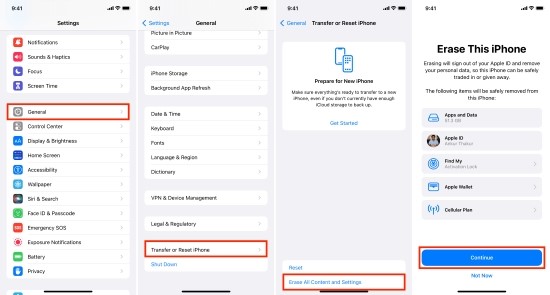
Sometimes, system settings and configurations from previous versions of iOS may not be fully compatible with the new update. Resetting the settings can eliminate these configuration issues.
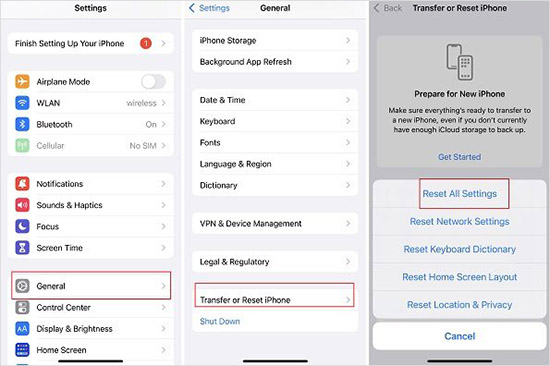
Step 1: Open the Settings app.
Step 2: Select General > Transfer or Reset iPhone > Reset > Reset All Settings.
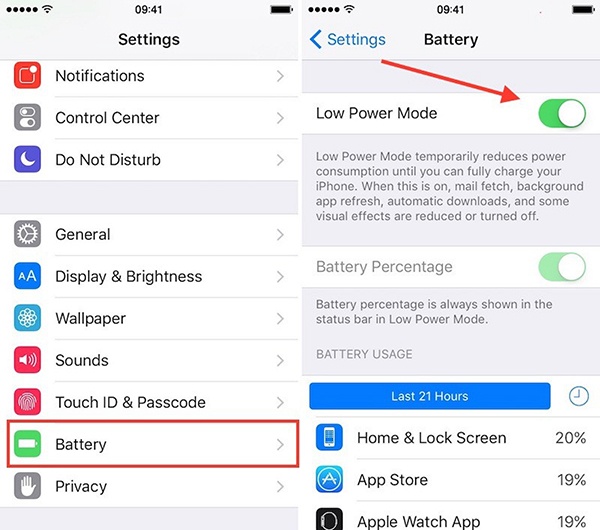
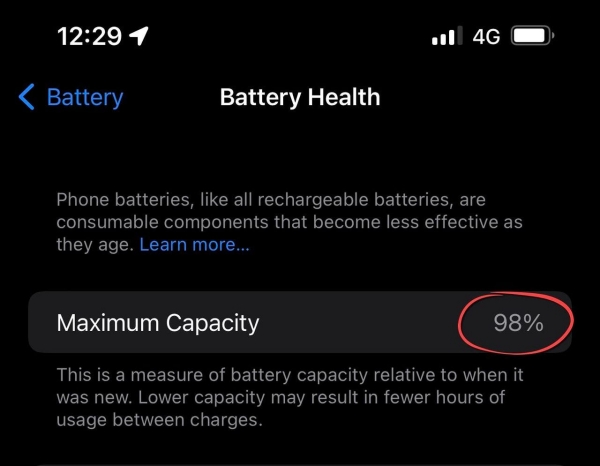
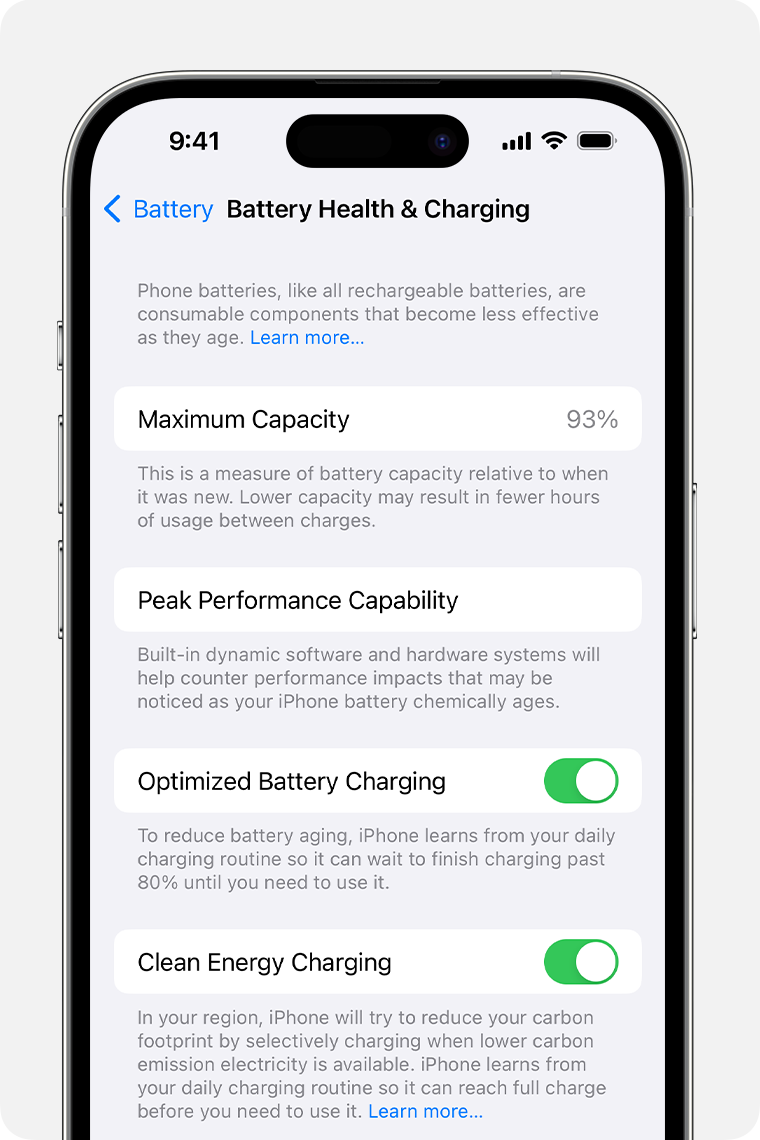
Fix 7. Battery Health and Performance Management
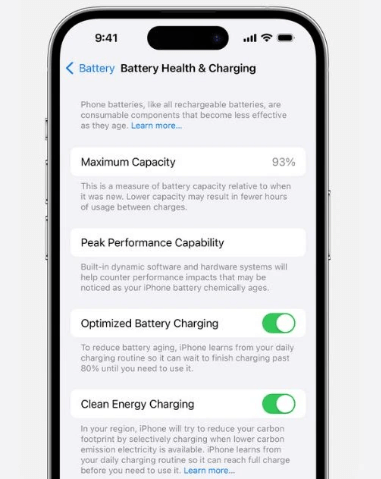
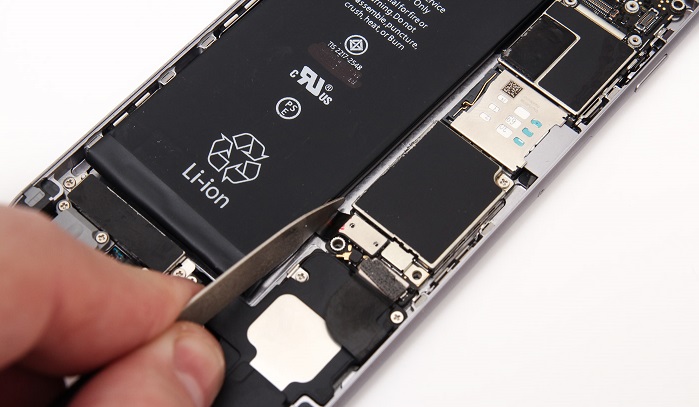
As batteries degrade over time, iOS may throttle the device’s performance to prevent unexpected shutdowns. Checking your battery health can help you determine if a battery replacement might restore lost speed. Go to Settings > Battery > Battery Health. If it is degraded, replacing the battery could restore the performance.
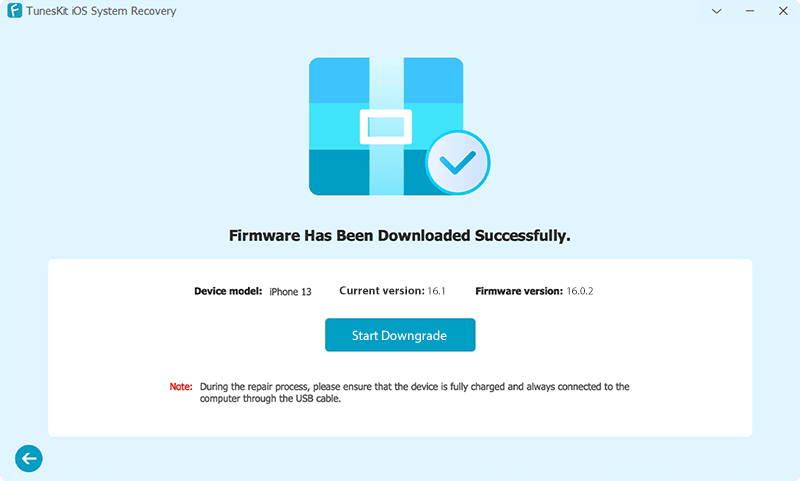
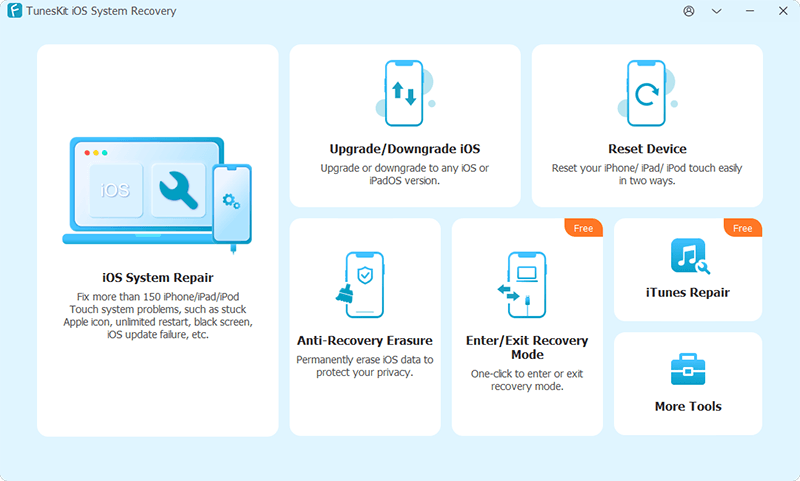
Fix 8. Fix iPhone Slow After iOS 18 Update in One Click
If all of the methods above are not working, you can try the third-party repair tool, TunesKit iOS System Recovery, to fix your problem. TunesKit iOS System Recovery is a comprehensive iOS system repair tool that can fix more than 180 iOS issues. Moreover, it can solve your problem in one click without any data loss.
How to fix iPhone lagging after iOS 18 update via TunesKit iOS System Recovery.
Step 1: Connect your iPhone to your computer
First of all, please download and install this software on your computer. Open the software and use a USB cable to link your iPhone to your PC. If the connection is completed, click the iOS System Repair option and the Start button.
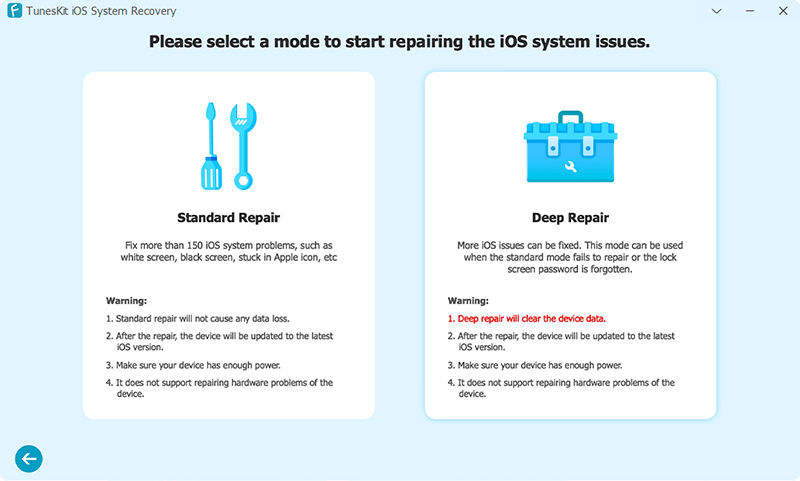
Step 2: Select repair mode
Standard Repair mode is recommended because it will not cause any data loss. However, the Deep Repair mode can fix deeper issues on your iPhone though it will clear all the data on your iPhone.
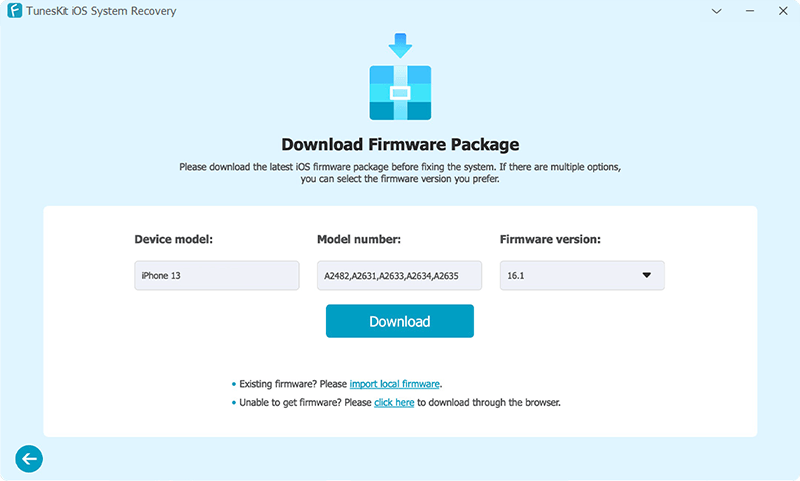
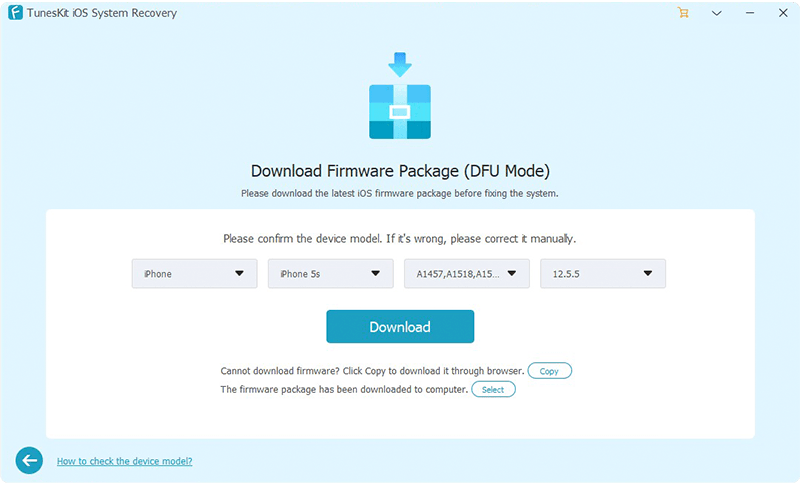
Step 3: Download firmware package
Before downloading firmware package, you should the information of your iPhone on the screen is correct. If not, please revise it and then click the Download button.
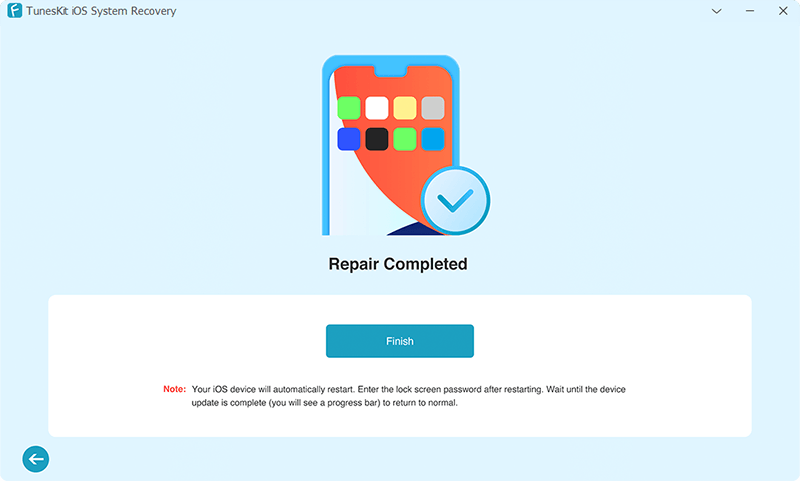
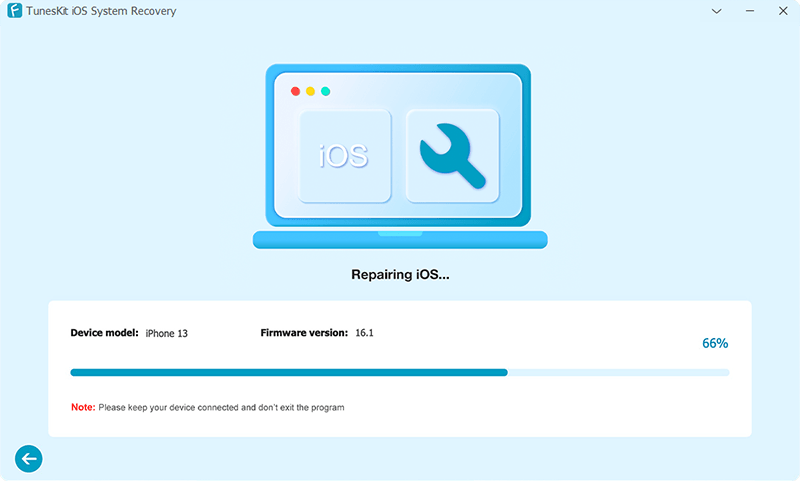
Step 4: Fix iOS 18 slow after updating
The final step is to enter repair process by clicking the Repair button. During the process, please keep the connection of your iPhone and PC.
Closing Thoughts
This article was first published on the TunesKit website:
https://www.tuneskit.com/ios-18/iphone-slow-after-ios-18-update.html