1. Ensure That You Hard Reset in the Correct Way
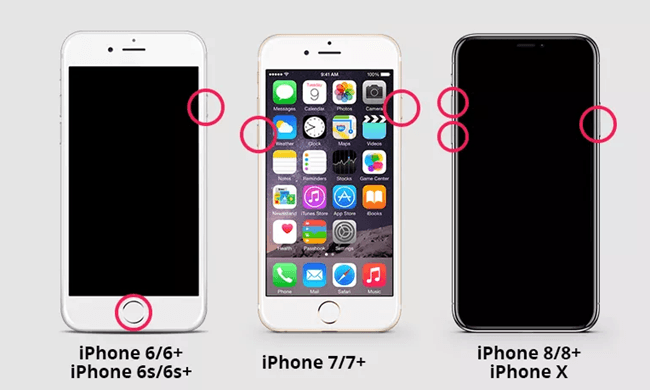
This usually happens to the users of old iPhones since they might take the old hard reset way for granted. Since the ways of hard reset vary among various models of iPhone, the method to hard reset iPhone 7 naturally won't work on iPhone 8 for instance. Therefore, when iPhone won't hard reset or turn off, the first thing you need to do is to follow the hard reset tutorial strictly.iPhone 6 or older models: Press the Home button and the Sleep/Wake button at the same time until the Apple logo shows up on the screen.
iPhone 7 or 7 Plus: Press and hold down the Volume Down button and the Sleep/Wake button until you see the Apple logo on the screen.
iPhone 8 or newer models: Press the Volume Up button first, and then the Volume Down button. Hold the Side button and release it as soon as you see the Apple logo on the screen.
2. Fix the iOS System with TunesKit iOS System Recovery
If the last solution fails to work, then you should definitely try this amazing iOS repairing program -- TunesKit iOS System Recovery. TunesKit iOS System Recovery is one of the best tools to fix the iPhone won't reset problem and other iOS issues such as iPad won't charge, etc. With this program, even amateur users of the iPhone can get rid of the problem in no time at all. The best feature of it is that the repairing process will cause no data damage to your device.Step-to-step Tutorial to Use TunesKit iOS System Recovery
Step 1: Download and install TunesKit iOS System Recovery from the links above. Launch the software, and connect your iPhone to the computer as instructed on the screen. By the time your device is recognized, press the Enter the Recovery Mode to put your iPhone into the recovery mode. Press the Start button to continue.

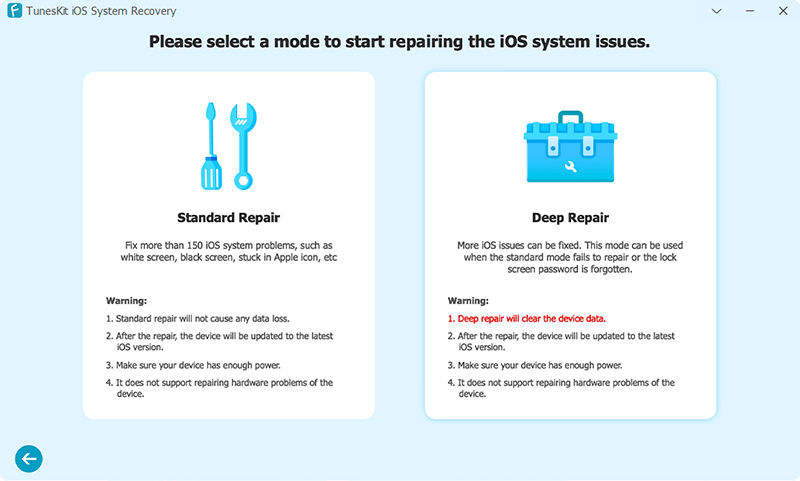
Step 2: In the next window, you will see the two boxes of choices, which are the Standard Mode and the Advanced Mode. This time, choose the Standard Mode and press the Next button at the bottom right of the window.
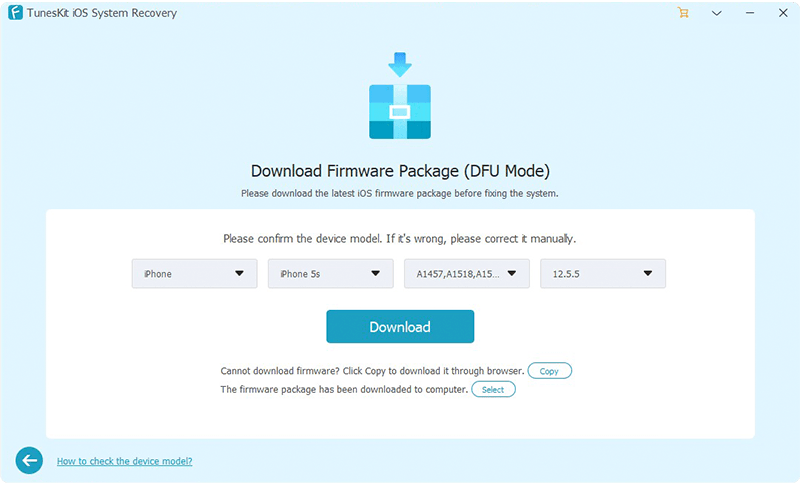
Step 3: Check whether the info of your device displayed on the screen is correct. If so, press the Download button to download the firmware.
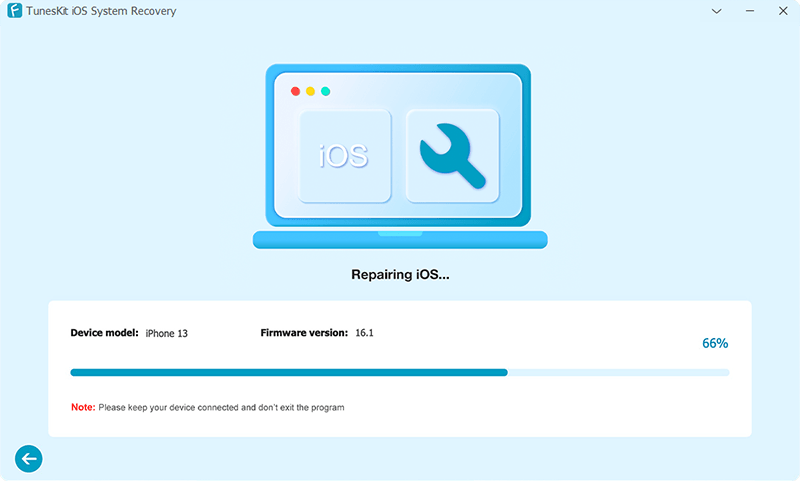
Step 4: After the firmware is downloaded, press the Repair button to unpack the firmware package and repair your iOS. By the time the repairing finishes, your device should be back to normal.
3. Restore iPhone with iTunesor Finder
In case you don't want to use third-party software, you might as well use iTunes, which is a toolkit made by Apple. It will help you update the iOS, backup the phone data, restore the iOS system to get rid of various problems. iTunes' counterpart on Mac is Finder. Although restoring your iPhone will erase all the data on your device and update its iOS to the latest version, it will resolve most of the problems, including iPhone won't reset problem. Just make sure you back up the data on your iPhone.To Restore iPhone with iTunes:
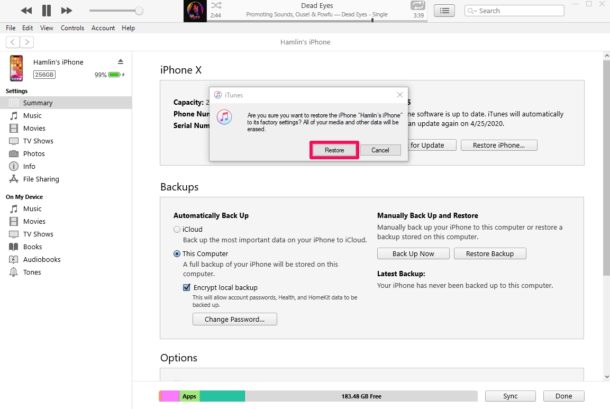
Step 1: Connect your iPhone to the computer. If you are asked to input your passcode or to trust the computer, follow the instructions on the screen to complete the process.
Step 2: iTunes should automatically prompt up on the screen. If not, open it manually and find your iPhone in the top menu bar of iTunes.
Step 3: Click the Restore [device] button to restore your iPhone and click the Restore button again to confirm the action.Now you just need to wait until the restoring process finishes.
To Restore iPhone with Finder:
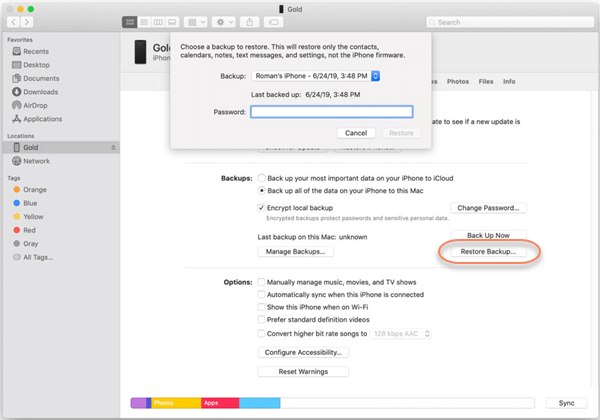
Step 1: Similarly, plug your iPhone into the Mac, and launch Finder in the Mac dock.
Step 2: Under the location tab on the left side of Finder, you will see the iPhone connected. Tap on it, then click on the Restore Backup button.
Step 3: A window will pop out. In the window, select the backup you want to restore to your iPhone. Enter your passcode and press the Restore button to initiate the restoring process.

No comments:
Post a Comment