Showing posts with label TunesKit. Show all posts

Mar 31, 2023

This iPhone was Lost and Erased? How to Fix It?

 "I have an iPhone 12 and I bought it 2 years ago. It works perfectly but yesterday when I woke up, I can't use my iPhone suddenly. It showed a message saying This iPhone was Lost and Erased when I tried to unlock it. What can I do now? How can I fix this problem?"

When your iPhone is lost or stolen, you can use the Find My iPhone feature to enable the Activation Lock on your iPhone to prevent illegal access. However, what if your iPhone shows This iPhone was Lost and Erased but you didn't put it in lost mode, or when you bought a second-hand iPhone from others, the iPhone can't unlock but tell you that the iPhone is in Lost mode? Today in this post, I will show you what to do if you see This iPhone was Lost and Erased.


The Reasons Behind This iPhone was Lost and Erased

Before learning how to bypass This iPhone was Lost and Erased on your iPhone, you can check why you will receive this message on your phone.

1. Hacker hacks your iPhone: If your iPhone is bought from Apple Store or authorized resellers, and the iCloud account on your iPhone is created by yourself, your iCloud account may be attacked by hackers. Someone hacks your iCloud account and removed your iPhone remotely.

2. It is a stolen iPhone: If you bought your iPhone from an online user, you might receive a stolen iPhone. You should contact the seller and send the phone back to the seller.

Solution 1. Fix This iPhone was Lost and Erased by TunesKit Activation Unlocker

When you see the iPhone was Lost and Erased message on your screen, the easiest solution you can use is to use TunesKit Activation Unlocker. TunesKit Activation Unlocker is an almighty iCloud unlocking tool that helps users to remove iCloud lock from iPhone, iPad, and iPod touch. By taking assistance from TunesKit Activation Unlocker, you can easily get your iPhone out of This iPhone was Lost and Erased. Besides, TunesKit Activation Unlocker supports turning off Find My iPhone feature without entering passcode and unlocking iCloud locked iOS device.

Now, let's see how to fix This iPhone was Lost and Erased by using TunesKit Activation Unlocker.

Step 1. Connect iPhone to Computer
Download and install TunesKit Activation Unlocker on your computer. Then, connect your iPhone to the computer and click on the Start button. Please read the risk tip and click on the Agree button if you agree.
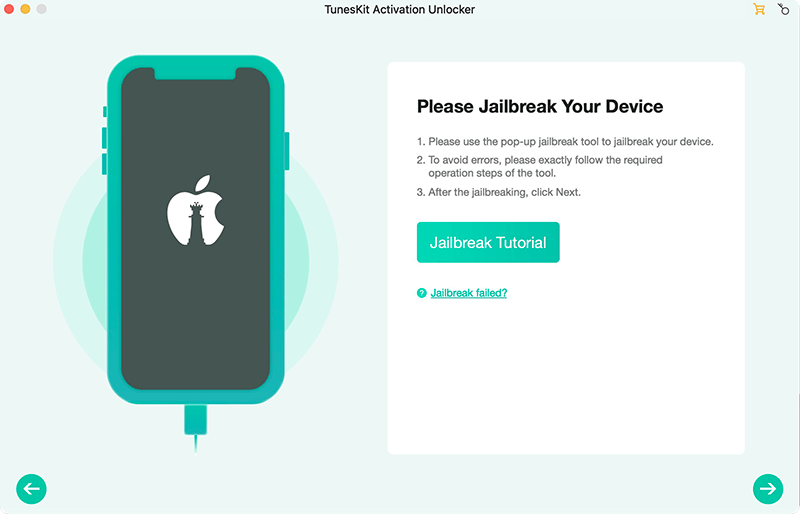
Step 2. Jailbreak Your iPhone
Here, you will need to jailbreak your iOS device. TunesKit Activation Unlocker will download a jailbreak tool on your computer. Please follow the below instructions to jailbreak your iPhone.
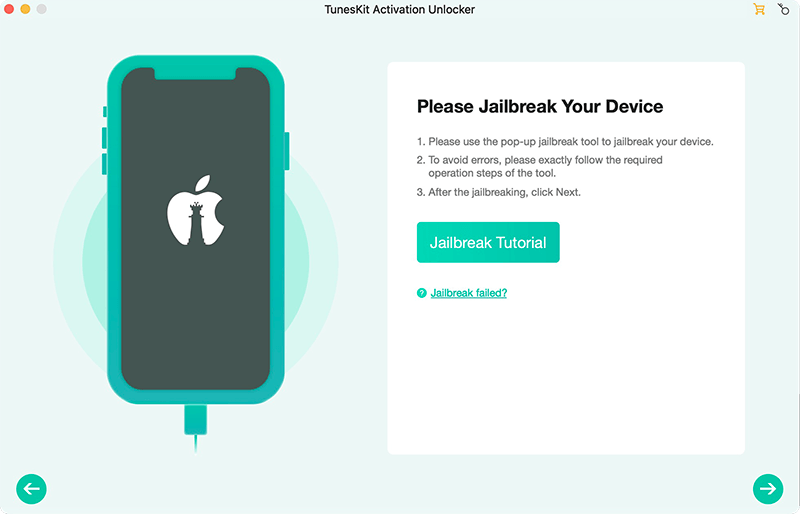
Step 3. Fix This iPhone was Lost and Erased
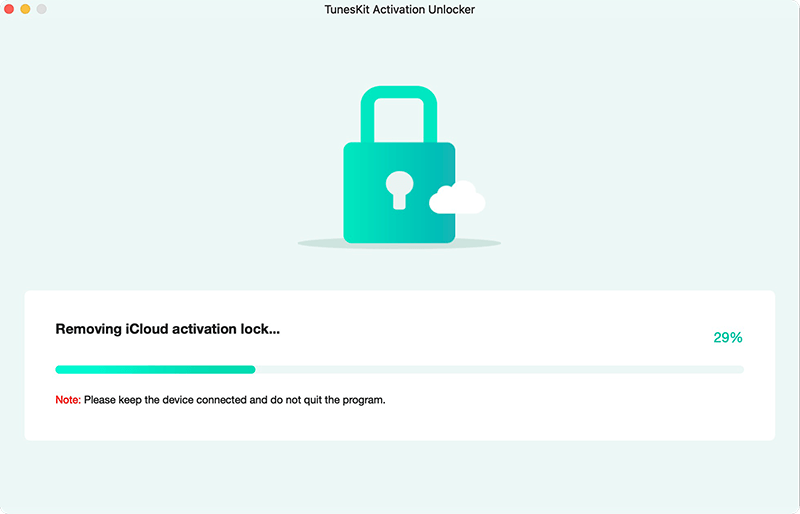
Check the device information and click on the Start to Remove button to remove the Activation Lock on your iPhone. After removal, you can access your iPhone again without facing the iPhone lost screen.
Solution 2. Fix This iPhone was Lost and Erased via iCloud if You Know Passcode
If you know the iCloud account and the correct passcode, you can use iCloud to turn off the Find My iPhone feature and Lost Mode on your iPhone. You can follow the steps below to make it.
Step 1. Open a browser on your iPhone, and then navigate to the icloud.com website.
Step 2. Log into your Apple ID account and then go to select the Find My iPhone option.
Step 3. Hit on the All Devices option and select the iPhone that you want to fix.
Step 4. Hit on Lost Mode and select the Stop Lost Mode option.

Solution 3. Use Find Password to Fix This iPhone was Lost and Erased
If you can't remember the correct Apple ID passcode to unlock your iPhone in lost mode, you can still use the email or security questions to change the passcode. When you set up a new passcode, you can navigate to solution 2 and fix your iPhone when you see This iPhone was Lost and Erased. Now, let's see how to make it.
Step 1. Open a browser and go to iforgot.apple.com.
Step 2. Enter your Apple ID and click on the Continue button.
Step 3. Enter your phone number to confirm that you are the owner of the Apple ID.
Step 4. Click on Continue and follow the onscreen instructions to set up your iPhone.
Step 5. After reset-up your iCloud passcode, go to iCloud and turn off the Lost Mode on your iPhone.

Conclusion
When your iPhone is set in Lost Mode, you should first check if your iCloud passcode was hacked and changed by others. If you don't know the correct Apple ID passcode to fix This iPhone was Lost and Erased, please try using TunesKit Activation Unlocker, which is a powerful iCloud unlocking program that can help you solve your problems with several simple steps.

Feb 21, 2022

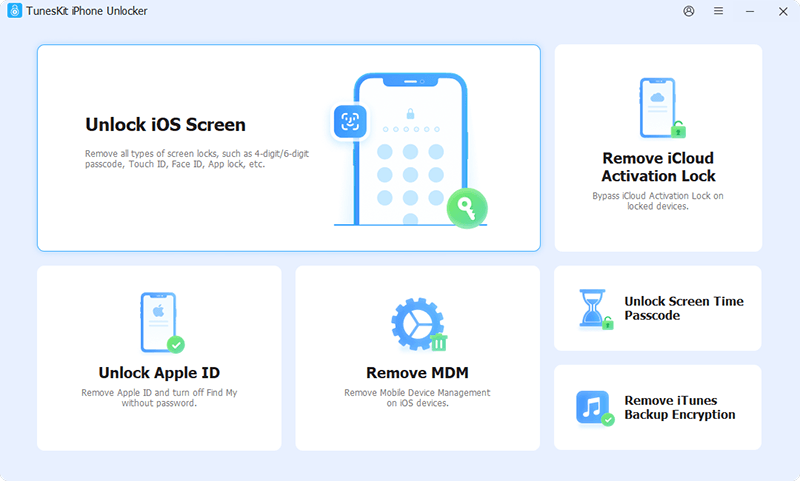
TunesKit iPhone Unlocker Newly Released to Unlock iPhone Without Passcode

 Hong Kong, Feb. 22, 2022 - Recently, the professional software provider TunesKit Studio has announced a new iOS utility named iPhone Unlocker. The program aims to help iPhone/iPad/iPod users unlock their iOS devices when forgetting the passcode, the devices are disabled, the screen is broken and can't enter the password, etc. Refusing redundant features, to unlock your iPhone/iPad/iPod screen passcodes is the only thing that TunesKit iPhone Unlocker will do for you.

iphone unlocker

Available on Windows and Mac, TunesKit iPhone Unlocker gives users a cross-platform guarantee. With expected features, this iPhone unlocking program will bring disabled iPhone/iPad/iPod back to normal within several steps. Also, it allows users to factory reset their iOS devices without entering the password. The purpose of the TunesKit iPhone Unlocker is to protect users' iOS devices from becoming a brick because of forgetting the password.
With no expert skills requirement, this program will lead you to the destination step by step. As a powerful unlocker, TunesKit iPhone Unlocker performs perfectly in most situations, including unlock screen broken iPhone, wrong password entering, second-hand locked devices, etc. However, like most other iOS unlock programs, using it to remove the lock will erase all the personal data on your iPhone, iPad, or iPod.

"Proud to introduce this anticipated product of TunesKit Studio to users all around the world. TunesKit iPhone Unlocker is now a potent member of TunesKit iOS utilities." Said William Garcia, the chief product officer of TunesKit Studio. "TunesKit devotes itself to multimedia and iOS supports. We are so glad that we can give service for the convenience of every aspect. The arrival of the TunesKit iPhone Unlocker fills our blank in iOS unlocking. Looking forward to the next surprise of TunesKit."

Video Demo: Unlock iPhone with TunesKit iPhone Unlocker


Price and Availability

TunesKit iPhone Unlocker has three different pricing plans to meet different needs. For a single computer, a license for a month at 19.95$ or a year at 29.95$ is recommended. For family users, there is a lifetime license at 49.95$ for up to 5 computers and an unlimited license at 299.95$ for unlimited computers. Though you can download TunesKit iPhone Unlocker for free, it is not free to unlock your iPhone, iPad, or iPod touch.

TunesKit iPhone Unlocker is now fully compatible with the latest iOS version. This program is also available on the latest macOS 12.2.1 and Windows 11. You can download TunesKit iPhone Unlocker for free here.

Media Contact

For any other problems or inquiries, please get in touch with TunesKit Marketing Team.

Andres Green

Marketing Manager

Email: support@tuneskit.com

About TunesKit

TunesKit Studio is a professional multimedia software and iOS utility developer. Including video editor, video cutter, screen recorder, media converter, iOS system recovery, iPhone data recovery, etc. All the products of TunesKit will bring users new experiences in the digital world. All products have superior quality. With users from more than 150 countries all around the world, TunesKit still wins widespread high praise.

Apr 15, 2021

How to Make Karaoke Video with Lyrics?

What would you do to relax or have fun with your friends on holiday? In modern life, karaoke is a nice choice for the youth. If you love singing, it can be a wonderful way to spare time. Except for the karaoke outside, have you tried to make a karaoke video with lyrics at home? A karaoke video is not only for singing but also can be useful for different purposes. With the song you like, you can make it a karaoke video with pictures and lyrics. Here is the step-by-step guide.

Use TunesKit AceMovi Video Editor to make a karaoke video with lyrics

Before that, I recommend a multifunctional video editor for you. TunesKit AceMovi Video Editor, as a comprehensive video editor, allows you to edit your video and unleash your creativity in several clicks. With TunesKit AceMovi, you can add black bars to video, make a cinematic video, add subtitles to video, etc. What’s more, you are able to finish all the professional video editing steps without expertise requirement. Let’s read the detailed tutorial about making a karaoke video with lyrics.

Step 1. Import video file

First of all, add the target video file to the TunesKit media library. You can click the File button, and hit the Import Media tab. Or you can drag and drop the media file to the track. When you are trying to make a karaoke video with lyrics, you are allowed to  add an image or a video as the background. Don’t forget to add the audio file to TunesKit AceMovi.

Step 2. Add the media file to the track

Drag the target video and audio to the track. Then hold and drag the edge of the file to adjust the duration.

Step 3. Mute the video file

If the background you added is an image, you can skip to Step 4. If you add a video as the background, you need to mute the video file. Select the video you added on the track, then hit the Audio tab on the top-right panel. You can slide the slider to adjust the audio volume.

Step 4. Add lyrics to the track

Once you have added the audio and video file to the track, you can add subtitles to the track to finish the karaoke video. Click the Text icon, drag the subtitle to the track. You can customize them in the top-right panel. Hold and drag the edge to adjust the timing. Next, find the lyrics of the song from the web, and then copy the lyric sentence by sentence, and paste them into the text box. Repeat the operations until you add all the lyrics to the track.

Step 5. Export the video

Once everything is done and the timing of the lyrics is adjusted to the correct point, you can hit the Export button to export the karaoke video. It should be easy to make a karaoke video with lyrics via TunesKit AceMovi. When the export process is done, you can enjoy your karaoke video. You are free to export your video to every popular format, as the TunesKit AceMovi supports.

Make a karaoke video with lyric online

As an online video editing tool, Kapwing, the online image, video, GIF, and audio editor for modern creators, always makes a good job. Using Kapwing can clip your video, trim your video, or join your video effectively. It would be a good choice for you to make a karaoke video with lyrics online. The advantage of an online video editing tool is that you don’t need to download anything to your computer. Read the tutorial in the following content.

Step 1: Click the Upload button to upload the video to Kapwing. As an online tool, it supports users to upload media by pasting an URL into the box;

Step 2: Then, click the Audio tab, paste the audio URL into the box or upload the audio you have downloaded to your device;

Step 3: Add subtitles as lyrics. You can copy the lyric from the internet, and paste them to Kapwing. You can customize the text to adjust the timing;

Step 4: Having done the editing, you can download and share the video with your friends or enjoy it yourself. You can upload it to YouTube, Twitter, or Facebook. You can also send the message to your friend so that they can watch the video via Kapwing.

Final word

Compared to TunesKit AceMovi, Kapwing comes with fewer features, and you must use it with an internet connection. If you don’t mind downloading video editing software, why not take a try with TunesKit AceMovi. As a comprehensive video editing software, TunesKit AceMovi offers features that can help you make a karaoke video with lyrics, add moving text to video, add music to GIF, and so on.

Read more: How to Make a Time-lapse Video?

Apr 13, 2021

How to Make a Time-lapse Video?

In a time-lapse video, you can watch the sunrise to sunset in a matter of minutes or even seconds. If you are new to the video editing field, you may think it is a difficult job to make it. In fact, you can make a time-lapse video easily with this tutorial. Let’s see how to make it step by step.

Capture a time-lapse video

In 2021, most of us can capture a time-lapse video easily. But if you need to capture some wonderful or great time-lapse videos, there is something essential for us to know.

Confirm your device

If you are going to capture a video as the moment you see or events happen, you need a device that has the built-in time-lapse feature. Nowadays, the phone you are using or a professional DSLR camera can capture a wonderful time-lapse video. You can use them to capture a time-lapse video easily.

Confirm the subject

Confirm that your device comes with a time-lapse capture feature. Then capture the subject under time-lapse mode.

Stars movement is one of the classic time-lapse recordings. Besides, sunrise and sunset, cloud movement, flower blossoming, city lights are also popular among time-lapse recordings. Capture a time-lapse video will cost a lot of time, before capturing it, get familiar with the area.

If you are heading for the best quality, you should prepare a tripod to stabilize your camera or phone. Don’t forget to record it in nice weather, this is crucial.

Use TunesKit AceMovi Video Editor to make a time-lapse video

What should we do that we are trying to convert a normal video to a time-lapse video? This method for you to make a time-lapse video without the requirement of professional devices but just a computer, video editing software, and the video file you would like to edit. I think that TunesKit AceMovi Video Editor can be the best choice for you, it is a comprehensive video editing tool that comes with several features for you. You can use it not only to make a time-lapse video but also can add transitions to videos, bleep a video, add captions to video, etc. TunesKit develops both Mac and Windows versions. And it can deal with videos with different formats, including MP4, M4V, MOV, MKV, MPG, etc.

Let’s see the step-by-step guide to make a time-lapse video.

Step 1. Import video file

Hit the File button, you can import your video media by clicking the Import media tab or drag and drop the video file to the TunesKit AceMovi media library.

Step 2. Add video to the track

Then, drag the video you added and drop it to the track. Find the speed button, which looks like a lightning bolt. With this feature, you can change the speed of the video.

Step 3. Speed up your video

To make a time-lapse video, speed up the video can finish it. Tap the Speed icon and then select Fast. There are 2X, 4X, 8X, 20X, 50X, and 100X you can choose from. Or you could click the Speed Custom to change the speed to what you want. What’s more, if you are trying to speed down your video, you can use click the Slow tap and slow down your video.

Step 4. Export your video

When the editing is finished, it’s time to enjoy your time-lapse video. Click the Export button to export your video. TunesKit supports you to export the video in most formats. You can choose formats, file name, location, and resolution in this pop-up window.

Final word

TunesKit AceMovi Video Editor is a better choice for normal users. As computer software, you can make a time-lapse video at home easily. Not only to make a time-lapse video, but TunesKit can also add a filter to the video, add animation to video, merge video files. You can edit your video files in several steps without expertise requirement.

Read more: How to Make a Cinematic Video?

Apr 9, 2021

How to Make a Cinematic Video?


If you are trying to make cinematic videos but don’t know how to do, you land in the right place. You can give your video a cinematic look in simple editing without expertise requirement.

The following is talking about what is a cinematic video and how to make it.

What is a cinematic video?

Before making a cinematic video, we should know what is a cinematic video looks like. A cinematic video means that the video in a film style. What should you do if you want to make your video looks like a film. Firstly, you need to add black bars to your video. Subtitles are necessary for a cinematic video. If you are trying to make your video looks like an old film, you can add some filters to it. It seems that a complicated process to make a cinematic video, so you need a tool to make it easy. In the following content, I’m going to share with you 2 beginner-friendly tips giving your video cinematic looks.

Use TunesKit AceMovi Video Editor to make a cinematic video

TunesKit AceMovi is a comprehensive video editing software, though you know nothing about video editing, you can make a cinematic video in several steps with TunesKit AceMovi Video Editor. As a multifunctional software, TunesKit AceMovi embedded with features like remove audio from video, add watermark to video, add filters to video. You can enjoy video editing with TunesKit AceMovi.

Here is the detailed tutorial on how to make a cinematic video with TunesKit AceMovi.

Step 1. Install TunesKit AceMovi and Add media files to it


This the main interface of TunesKit AceMovi Video Editor. The layout of its features is concise and you can use it easily. You can import your target media files by clicking the Import button or File button. You can also drag and drop your media files to the TunesKit media library.

Step 2. Add black bars to the video

Before it, please drag your video to the track.

Then, click the Elements icon. Choose Black and drag it to the track above the video track. You can also add other elements to the video if you are trying to make a different style.

You can adjust the black bars through the top-right interface, or you can change the position and size by moving the dotted box in the preview window. You can keep adjusting until you get the desired effect.

Step 3. Add subtitles to the video

As a cinematic video, subtitles or captions can be the necessary part. In this step, I’d show you how to add subtitles or captions to the video.

Click the Text icon. TunesKit AceMovi offers two kinds of font, one is static and the other one is dynamic, you can choose the one you like to add to your video. Drag the text you chose to the track above the black bars’. You can type words in the top-right interface, and you can change the position and size by moving the dotted box in the preview window. Besides, you can transform it through the top-right interface.

Step 4. Add filter to the video

If you want to make your video looks like an old film, you can add some filters to it.

Click the Filters icon. There are many different filters for you to choose from. Drag the one you like to the track above the text track, adjust it through the top-right interface.

Step 5. Export your video

In the final step, click the Export button to export your video. You can change the output file name and location, or change the resolution by clicking the Settings button. Click the Export button to start exporting, when the process is done, you can enjoy the cinematic video.

Video Tutorial: How to Make a Cinematic Video?


How to make a cinematic video online?

There is a way for you to make a cinematic video without downloading any video. Visit kapwing.com and you can make it online. Kapwing is a wonderful online video editing tool for users. The detailed tutorial:

Step 1: Upload your media file.

Step 2: Click the Elements button to add black bars to it.

Step 3: Click the Text button to add subtitles to it.

Step 4: Export your video by clicking the Export button

Summary

TunesKit AceMovi is a comprehensive video editing software that contains all the features of online tools, not only that, you can edit your video without uploading time, export your video more quickly than online tools. It can be the best choice for you to unleash your creativity. Making a cinematic video, adding subtitles, adding black bars, removing the watermark, etc., can be easy with TunesKit AceMovi.

Read More: TunesKit

Apr 6, 2021

How to Fix iPhone Calendar Not Working?

Have you come to a situation that the Calendar is not working on your iPhone? The alert is not working and you get no notification before the event important? How can we fix it? If you are troubled by the problem, you land on the right page. Here I will show you some tips to fix iPhone Calendar not working.

Tip 1. Reset the event and alert time

If you have no idea about the Calendar alert not working, reset the alert should not be a bad choice for you. You can open the Calendar and reset the event. You can click the button to manage your event. If your alert not working on your phone, delete it and add it to the Calendar again.

Tip 2. Restart your iPhone

Restart iPhone can help you solve the problem iPhone Calendar not working. Here are the detailed steps for the different models of the iPhone.

iPhone 6s or iPhone SE: Hold both the "Power" button and the "Home" button at the same time. When the Apple logo appears, release both buttons.

iPhone 7: Hold both the "Volume Down" button and the "Power button" at the same time. When the Apple logo appears, release both buttons.

iPhone 8,iPhone SE2,iPhone X, iPhone XS, iPhone XR, iPhone 11, or iPhone 12: Press and quickly release the "Volume Up" button, press and quickly release the "Volume Down" button, then press and hold the side button until the Apple logo appears.

Tip 3. Update iOS system

If your iOS system has not been updated for a long time, it may be the problem. I think it is necessary for iOS users to upgrade the system as soon as it is available. A new iOS upgrade patch contains bug fixes, new features, and so on. It should be effective to help you repair the Calendar not working.

Follow the following steps to update your iOS system:

Settings>General>Software Update>Download and Install/Install Now

Though I advise you to update your system, the latest operating system is not suitable for all models of the iPhone, please check that your iPhone is suitable for updating before you update your iOS.

Tip 4. Use TunesKit iOS System Recovery to fix iPhone Calendar not working

If the above ways are failed to fix your iPhone Calendar not working, it means that there are some unknown issues happened on your phone. A suitable iOS system recovery tool can solve the problem for you. TunesKit iOS System Recovery is the best choice for you. It is a professional iOS system recovery tool that can fix most of the common iOS issues. With TunesKit iOS System Recovery, you can fix your iPhone Calendar not working in several steps. Besides, Spotify not working, iPhone stucks on Recovery Mode, or other issues can be fixed by using TunesKit iOS System Recovery.
Let’s see how to fix your iPhone with TunesKit iOS System Recovery.

Step 1. Connect your iPhone with the computer

First, you need to connect your iPhone with your computer. It is the main interface of TunesKit iOS System Recovery, the fixing will be started if you click the Start button.

Step 2. Select the recovery mode

TunesKit iOS System Recovery offers 2 different recovery modes for users. Both modes can fix your iPhone Calendar not working, but it doesn't mean that you can choose the mode randomly. It would be better for you to choose Advanced Mode under the premise of the Standard Mode fixed your iPhone failed. Though Advance Mode can fix most of the iOS system issues, it will erase your iPhone data at the same time. If you have to use Advanced Mode, please back up your iPhone before it.
Step 3. Download firmware package.

Finish choosing the recovery mode, the next step is to download the firmware package. Please confirm the device model, make sure it is right before downloading. If not, please correct it manually.

Step 4. Fix your iPhone

This is the last step, you just need to wait for the fixing process done. After it, your iPhone is fixed and you can enjoy it now.

The bottom line

As an iOS user, TunesKit iOS System Recovery helps me a lot. It is my best assistant with solving the iOS common issues such as iPhone stuck on the Apple logo, Apple music not working, GPS not working, and so on. If you are an iOS user, you won’t be regret downloading TunesKit iOS System Recovery.


Read more: TunesKit official website

Mar 30, 2021

Easy Tutorial to Make a Video Slideshow

A well-made slideshow contains music, text, and transition. Can we make a video slideshow like that? If you are trying to make a video slideshow but don’t know how to, you are here at the right place. In this way, I’m going to show you some easy ways to make a video slideshow.


TunesKit AceMovi Video Editor

TunesKit AceMovi is a comprehensive video editing software. You can not miss it if you are trying to make a video slideshow. As a professional video editing software, making a video slideshow just one of the essential features. TunesKit AceMovi Video Editor can help you add subtitles, add music, add stickers, crop videos, etc. Besides, you can do professional editing without expertise requirements.

Step 1. Install and open TunesKit AceMovi Video Editor

image

This is the main interface of TunesKit AceMovi Video Editor

Step 2. Import your video file to TunesKit AceMovi Video Editor  

You can click the File, Import Media button to import your media file, or you can drag and drop your video file to the media box. TunesKit AceMovi Video Editor supports importing most of the video or photo formats.

image

Step 3. Drag the target videos to the track

image

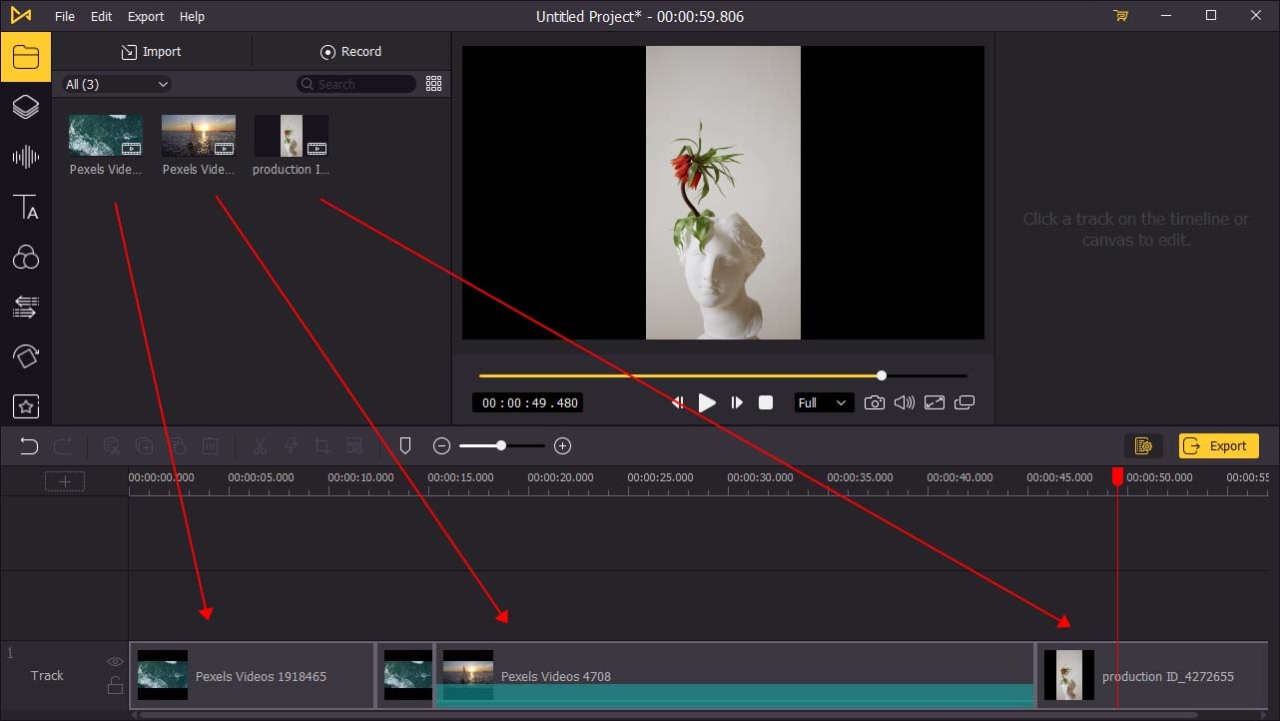
When you are going to make a video slideshow, what you need to do is drag the target media files to the track in order, or you can press Ctrl+A to select all the videos and drag them to the track, they will play in the order you placed them.

Step 4. Add transitions between videos

image

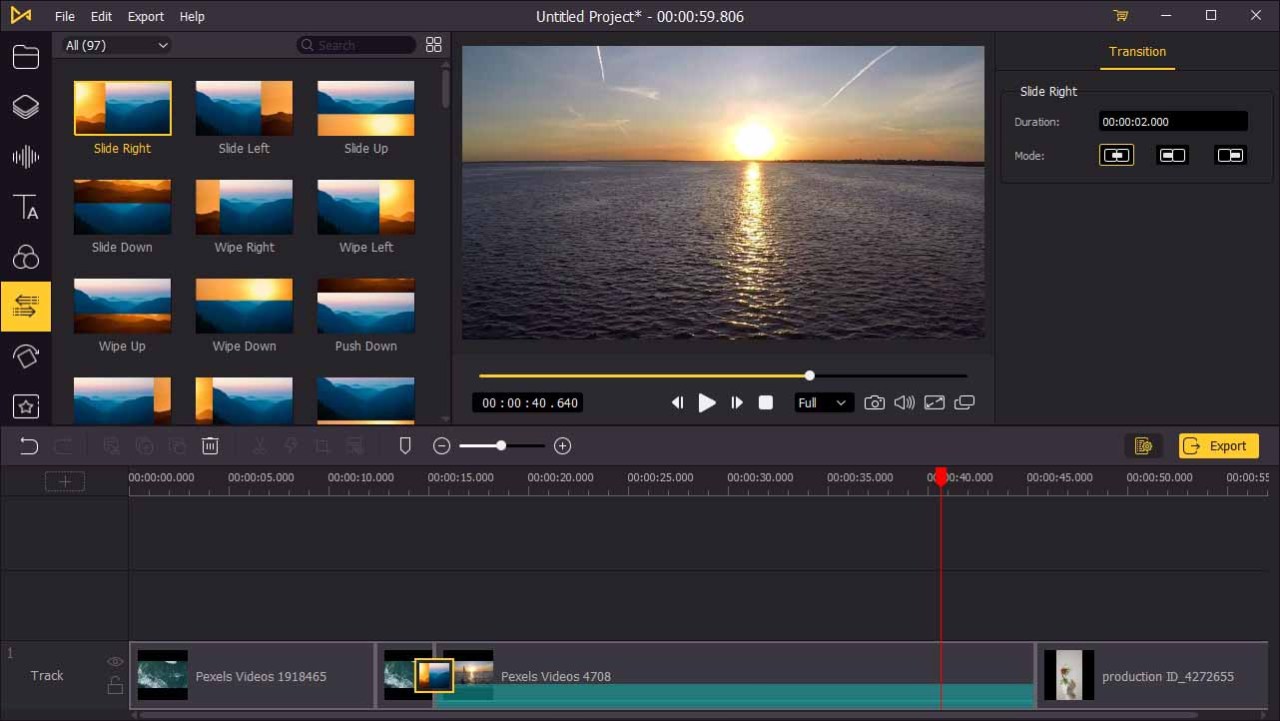
The standard video slideshow you have finished, but adding some transitions between the videos can make your videos switch smoothly. Click the Transition button, choose the one you like, and drag it to the video. You can adjust the transition on the top-right interface. There are more than 1 transitions you can add to the whole slideshow.

Step 5. Add split-screen to the video

image

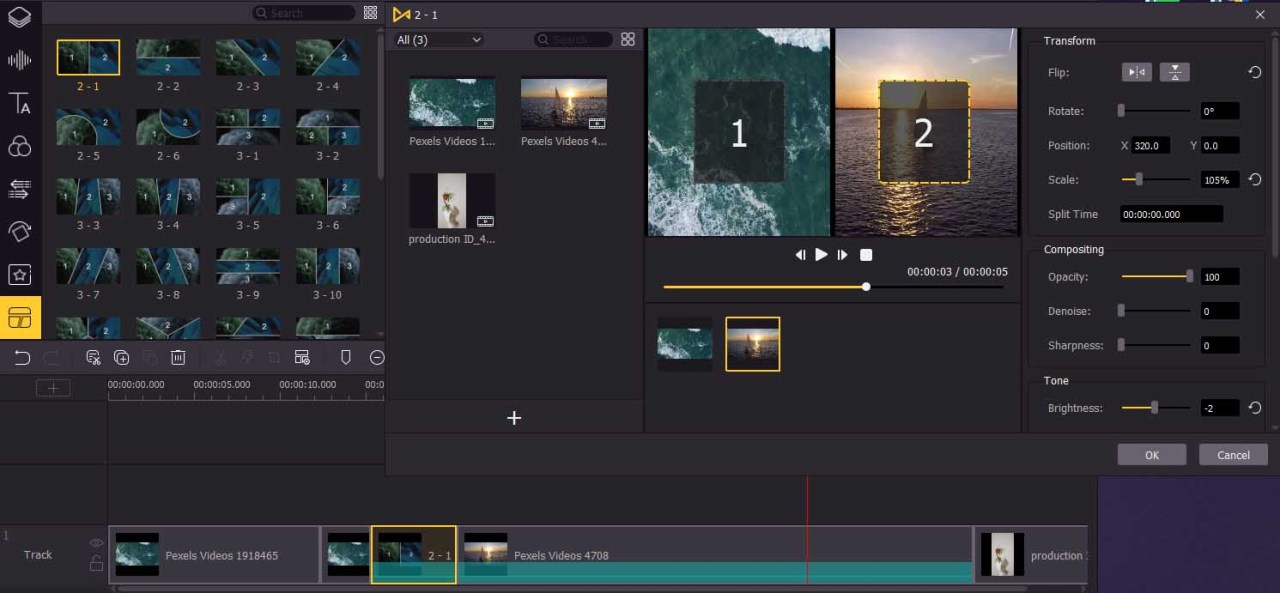
Split-screen is a wonderful feature for you to make a video slideshow. Click Split Screen, and there are so many effects for you to choose from. Drag it to the place you want and a new window will pop up. In this window, you can add videos so that they can play simultaneously. You can transform the flip, rotate, position, scale, and so on of each video you add to the split-screen.

Step 6. Add music to the video

image

An excellent video slideshow is always with nice music. You can use the import feature to add music to the slideshow, or you can click the Audio button to drag the music to the track from the TunesKit music library. Also, you can adjust the music on the top-right interface.

Step 7. Export your video

image

Done all the steps, you can click the Export button to export your video slideshow. You can change the output name, location, resolution, and format in this window. When the export process is done, you can enjoy your video slideshow. TunesKit AceMovi Video Editor is a multifunctional software for users to unleash their creativity. If you are a beginner who is trying to create or edit videos, TunesKit AceMovi is the one you can’t miss.

Animaker (online)

image

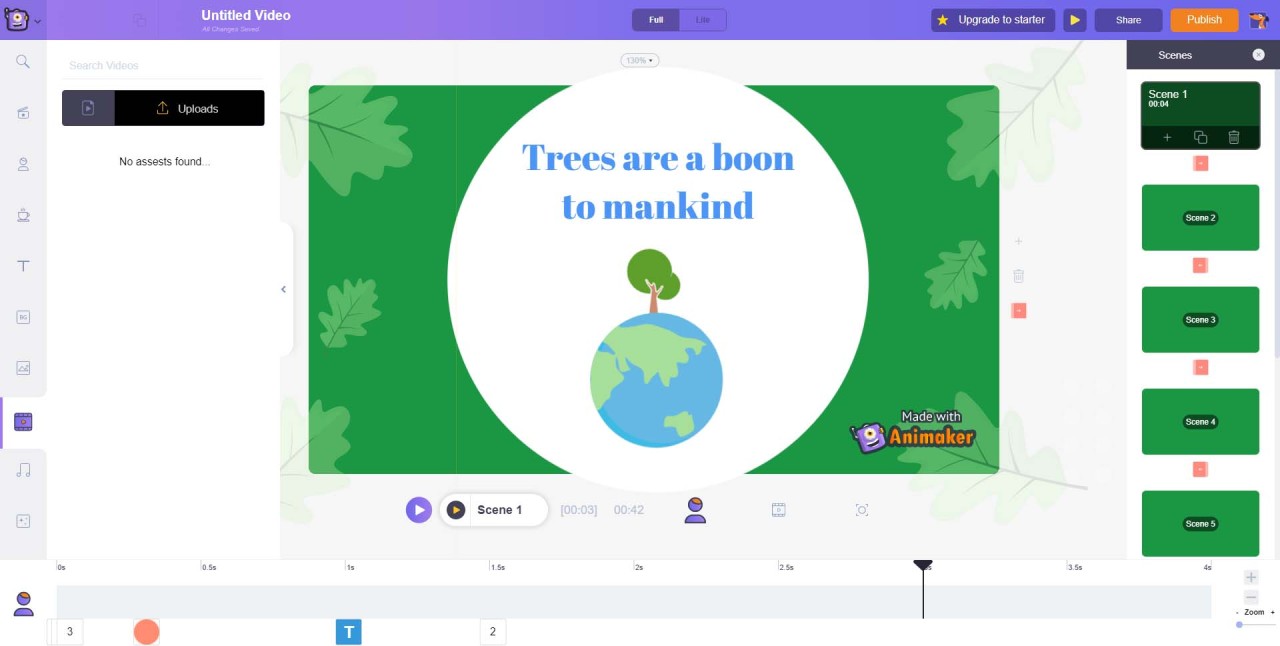
Animaker is an online tool for you to create video slideshow easily. You can find it the interface is concise. You can add videos to this website by the Uploads button. What you need to do to create a video slideshow in Animaker is just add the videos to it and drag them to the track in order. In addition to this, Animaker offers plenty of useful features for users. You can use the features to make your slideshow pleasing to the eye. As an online tool, Animaker contains fewer features but you can create your video slideshow as soon as you open the website.

TunesKit AceMovi Video Editor is a nice software and you you can download it for free. Though Animaker can make a video slideshow online, the limitations are obvious.

Read More: TunesKit