Sep 9, 2020

Play DVD on Huawei Phone?

Today, Huawei gradually becomes another popular phone like the iPhone and Samsung.  Among Huawei users, some people love DVD so much just like me. But how can we play DVDs on Huawei and enjoy them at any time? To achieve this goal, we just need a DVD ripper. 


Why We Need a DVD Ripper?

Is it really have magic? Of course not. A DVD ripper is a kind of software which is designed for rip DVD to other formats. You can only play DVDs on a DVD player or computer with a DVD drive for the limitation of formats. DVD rippers enable us to play DVDs at other devices after the conversion. If you want to play DVDs on iPhone or other Apple products, you can convert DVD to MP4, which belongs to Apple, too. If you want to play DVD on Chromebook, you can convert them to WMV. So, what kind of formats should you select when you want to play DVD on Huawei phone? You need to know what formats Huawei supports first.

Formats Huawei Phone Supports

If you are going to watch your DVD movies on Huawei, you need to find out the formats it supports. You can easily find out that on the product page of Huawei or other places on the internet. It supports DivX, H. 264 MP4, XviD, WMV. Other formats that are usually seen are not supported by Huawei, such as MOV, M4V, MKV, and the like.

Select a Good DVD Ripper

It is known to us that most commercial DVDs are encrypted to protect the copyright of their company. The second challenge to watch DVD on Huawei phone is how to remove the copyright protection of DVD. There are some DVD rippers that can only rip the homemade DVDs since they do not have the function of decrypting commercial DVDs. If your DVDs are not homemade, you need to choose another kind of DVD ripper.


TunesKit Video Converter is a DVD to Huawei phone ripper which can eliminate copyright protection as you want. You cannot know how versatile it is! It is able to convert DVD or other videos to 250 + formats at 60X faster speed. The formats it supports include MP4, MP3, TS, MOV, MKV, AVI, and the like. And there is no quality loss. That means you can see the same picture as what you see in your DVD player. It can support 68+ devices such as Huawei, iPhone, Samsung, Apple TV, iPad, and others. It is an all-in-one product since it can edit DVD videos as you like, too.

Only 3 Steps to Rip DVD to Huawei Phone

Step 1 Open TunesKit Video Converter and Add DVD

Before everything, input your DVD into the computer with the DVD drive. You can use double-click to open TunesKit. You will find three icons on this page. Select the first one to load DVD.


Step 2 Choose the Target Format

Choose the target format (Choose WMV here according to the former part telling about the formats Huawei supports). Click the Format button and you will see several formats. Tap the Encoding Mode. Click WMV after you choose the General Video. At last, tap the OK button.

Step 3 Click the Convert Button

Look at the Output button. You can also open it if you want to know where your DVD will be preserved. Click the Convert button, which is the final step. Wait for a while. But do not worry. It is very fast. Use the Converted button and find out your converted DVD videos.

Conclusion

This article provides the best and necessary way to play DVD on Huawei phone.  That is ripping DVD with a DVD ripper like TunesKit. Using this software, you can easily decode them and transfer them to other formats without quality loss. You already get it. Go and play DVD on your Huawei phone now! 

For more: https://www.tuneskit.com/video-converting-tips/play-dvd-on-huawei-phone.html

Sep 8, 2020

5 Solutions to Fix Firmware Not Compatible with iPhone/iPad/iPod

 Do you familiar with this message that reads like "the iPhone/iPad could not be restored because the firmware file is not compatible"? This issue is owing to the situation that the IPSW file is not matched with your device or the iTunes cannot recognize the firmware file. How to fix this issue? Check out the following ways.

Solution 1: Restart the computer

When your iPhone or iPad says the firmware is not compatible, the first thing you need to do is to restart your computer. Because by doing this, some temporary glitches will be removed that may cause this problem. After restarting the computer, connect the iOS devices and open iTunes to see whether the restoring is possible.

Solution 2: Check for updates for iTunes

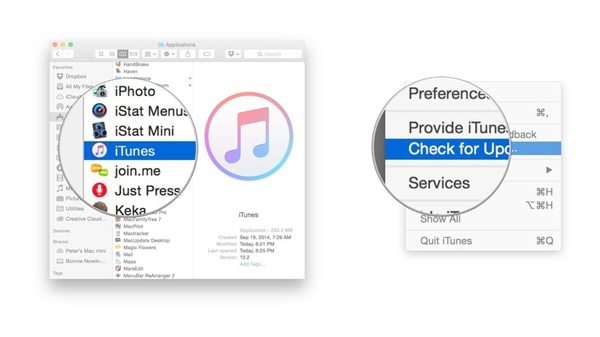
After restarting your computer, you have to check the version of iTunes. Without the latest iTunes, it might not recognize the firmware file. So in order to fix this issue, launch iTunes and go to Help > Check for Updates for Windows users, while for Mac customers, head to the System Preferences > Software update. After completing these orders, install the latest iTunes again to delete some malfunctioning files from the software.

check for updates for itunes

Solution 3: Download the right firmware file

If the problem of iPhone/iPad/iPod firmware not compatible has not yet resolved, then you are suggested to make sure you have downloaded the right firmware file. To do that, visit IPSW Downloader and choose the device you are willing to download for, then tap the right IPSW file corresponding with the device and iOS version to download. After finishing the right firmware file downloading, follow below steps to update or restore your iPhone/iPad/iPod.

Step 1: Connect your iOS device with the computer and open iTunes.

Step 2: Hit the device button and tap Update or Restore while pressing the Shift key at the same time.

Step 3: Choose the IPSW file you have downloaded before, then restoring or updating will get started.

download right firmware

Solution 4: Disable antivirus software

Also, you can turn off the antivirus software temporarily to settle iOS 13 firmware not compatible. Why does this method work? As this program sometimes will blocks some files to protect your computer. Thus try to disable antivirus before restoring iPhone, iPad, etc.

Solution 5: Use iOS system repair tools

Besides the above possible ways, there is another simplest and most efficient method. That is using professional iOS system recovery tools such as asTunesKit iOS System Recovery, an application to get rid of the iPhone firmware not compatible problems for good.

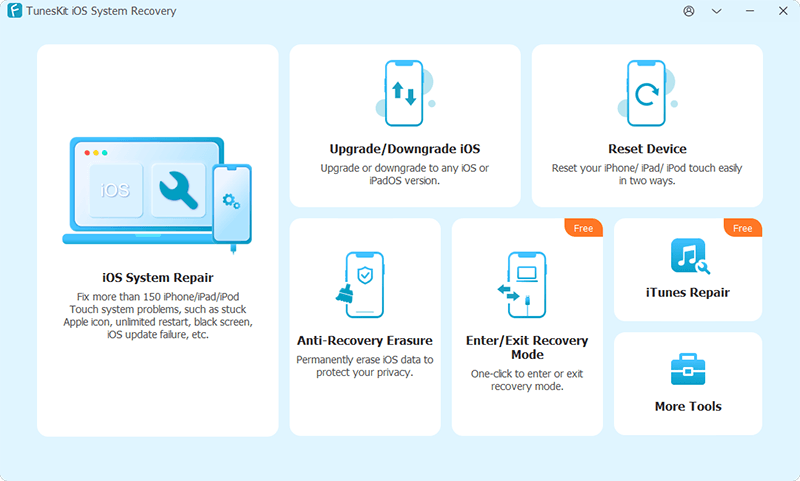
Step 1: Launch TunesKit iOS System Recovery for Windows on your computer. Then connect your iPhone/iPad/iPod until they are being detected. Next, click the "Start" button and select the "Standard Mode". After that, choose your device connected. Then follow the instructions from the interface and let your device is into DFU mode. lastly, tap the "Next" button.

connect ios device

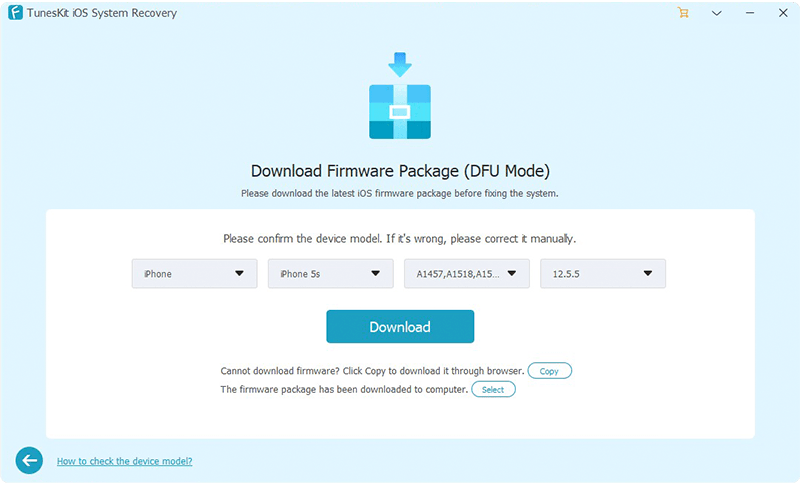
Step 2: At this time, the software will begin to download the firmware package according to your device. But you need to check the device info is correct before, such as the model version, iOS version, etc. If nothing goes wrong, hit the "Download" and it will start downloading and verifying the firmware.

download firmware

Step 3:
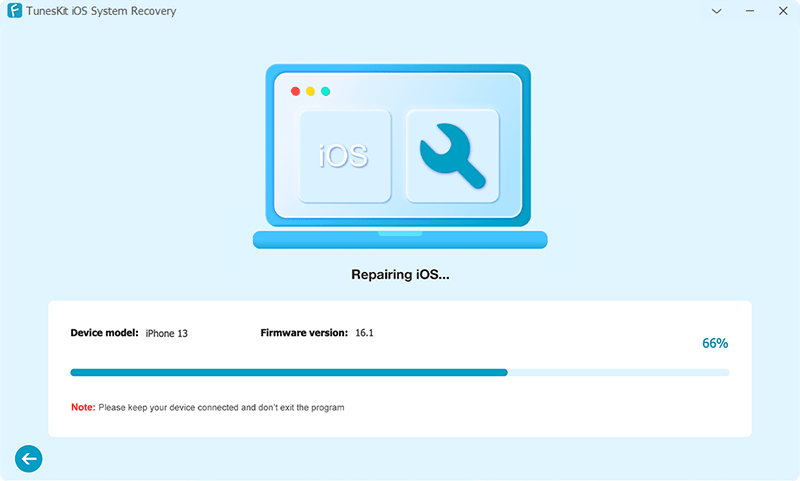
When the firmware has been downloaded successfully, you just click the "Repair" button and the program will automatically begin to fix your iOS devices. Don't disconnect your device until the process is completed. Otherwise, the device might become bricked.

fix iOS

Conclusion

These are the five feasible fixes to resolve the firmware file is not compatible with the iPhone, iPad, or iPod. If you have more questions, please be free to leave your comment below.

5 Best Ways to Recover Lost WeChat Messages on iPhone

 We often use WeChat on the iPhone to send messages to our friends and family, so the application saves a lot of our important messages. But if one day these data are deleted by mistake or lost for no reason, how do we get them back completely? Well, this page gonna introduce 5 best methods to recover lost or deleted WeChat messages on iPhone.

Part 1. "Recover" deleted Wechat messages from another iPhone

Among all the Wechat restoring situations, one general case could be that you changed the iPhone and need to recover the Wechat history from the old device to the new one. Then how to achieve that? First, you have to switch on Wechat Migration. You can try the following steps.

Step 1: Open Wechat app on iPhone and click Settings.

Step 2: Tap General and find the Chat Log Migration.

Step 3: Click Select Chat Transcript.

After turning on Wechat migration, you should scan the QR code that appeared on the interface with another iOS device to log in to your Wechat accounts. Finally, your previous Wechat messages and history will be transferred to another iPhone successfully.

Part 2. Restore lost Wechat chat history with backup

If you don’t have another iPhone you trust yet have data backup on iPhone by lucky coincidence, then following fixes are worth trying to recover lost Wechat chat history and messages on iPhone.

2.1 Recover from iPhone immediately

To retrieve erased Wechat pictures, videos and the like on iPhone through this method, you need to have backup related data before. If you did, please follow below steps.

Step 1: Turn on Wechat app on iPhone and click Me button.

Step 2: Tap Settings>Chat>Chat history.

Step 3: Click Backup/Restore Chat History.

Step 4: Tap backup file and restore.

2.2 Restore from iTunes backup

Additionally, you can also get lost Wechat data like photos and messages on iPhone back from iTunes backup, if you previously made backup of your iPhone on computer via iTunes. Here’s how to restore the iPhone backup with this way.

Step 1: Open iTunes on computer and connect iPhone to computer.

Step 2: Tap Device button on the left.

Step 3: Click Restore Backup in Summary and then the process will get started.

2.3 Retrieve from iCloud backup

Similar to restore from iTunes backup, if you have backed up iPhone on iCloud, bringing back deleted Wechat messages and other files on iPhone through iCloud backup can be possible. Followings are what you should do.

Step 1: Open iCloud official website on your computer and sign in it by entering your Apple ID and password.

Step 2: Tap Settings.

Step 3: Then many files including Wechat messages and chat history will appear. In this case, choose the data you would like to recover.

Step 4: Click Restore files and then wait until the recovery finishes.

recover lost data from ipod by icloud

Part 3. Retrieve erased Wechat data on iPhone without backup

However, what if unfortunately you don't have your Wechat data backup, which cannot recover lost Wechat pictures and chat history via iTunes or iCloud backup? In this case, you are supposed to use professional iOS data recovery tools likeTunesKit iPhone Data Recovery. This program can quickly restore lost data, including even encrypted files. Apart from recovering Wechat messages, it can also get back other kinds of data on the iPhone. No matter what reasons that result in data loss including mistaken deletion and unexpected loss, TunesKit iPhone Data Recovery can rescue them. Moreover, it supports many kinds of iOS devices including iPhone 11 Pro Max, iPhone Xs, iPhone 8 Plus, etc. Previewing required data before recovery and full compatibility to the latest iOS 13 are essential parts, too. Last but not least, this software can retrieve erased data while causing no data loss.

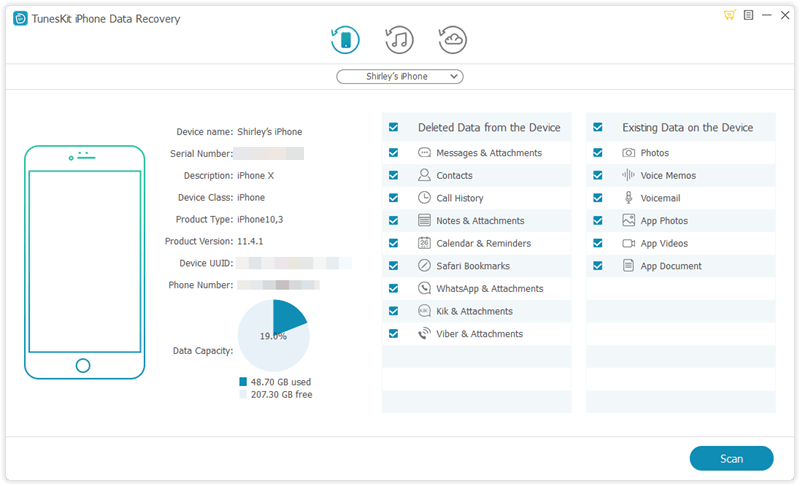
Step 1: Open TunesKit iOS Data Recovery software on your computer and make your iPhone and the computer connected. Then choose "Recover from iDevice" from the top column. If it is the first time for you to use the program to recover data, you have to click trust to the computer.

connect iphone to pc

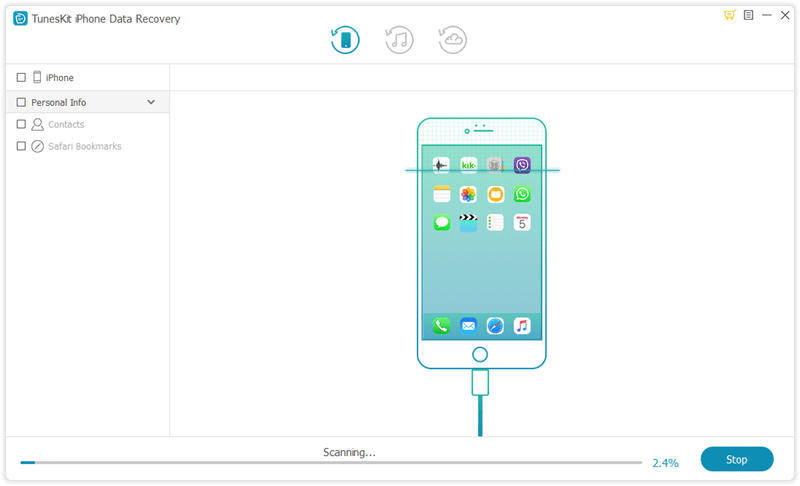
Step 2: After the device and different files appear on the interface, choose the categories on the right column that need to be scanned. Then click the Scan button and the program will begin scanning. At this time, you will see the percentage it is scanning.

scan dead iphone

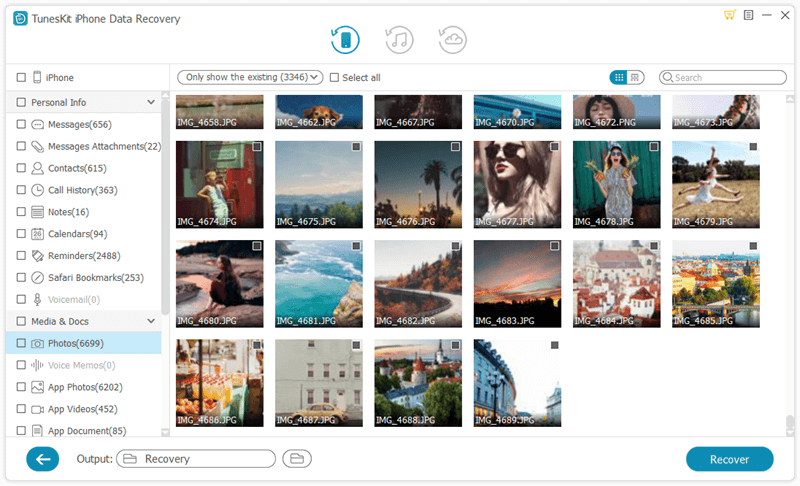
Step 3: Then all files scanned will be shown on the left. Before you click the Recover button, you can preview the Wechat message, chat history, or other files you want to retrieve from the "App Documents", "App Photos" and "App Videos" column. After that, the software will start to bring your data back. Besides, you can set the formats of output files on the left corner.

Final thoughts

In the end, I want to stress again that the best way to retrieve lost or deleted WeChat messages on iPhone is by using professional iOS Data Recovery tools such as TunesKit iPhone Data Recovery. Come and give it a try.

Sep 4, 2020

[2020] 5 Popular DVD to MP4 Rippers


If you want to convert a large number of files or just large files then this is the topic that you must read on. The intimidating task of converting large files with slower programs or converters can be daunting. It wastes time and resources.


In this article, you will get to know the best programs that will make the task easy for you. This is also important that during the conversion of such files there are no errors that occur as they can make the process even longer. All the programs that have been mentioned in this article are proven to be the best in the business.

  1. TunesKit Video Converter

The process that is used by TunesKit Video Converter is easy to use and performs the perfect results. It also means that you will be able to get the results that are highly efficient and effective. The interface and the use of the program are too easy and it also means that you get the overall awesome usage experience. TunesKit Video Converter has become a brand made in the market and it means that the converter has all the features that are required to rip any DVD into different formats. With TunesKit Video Converter consider that the DVD ripping is done with ease.


Pros
  • The program has an interface that is not overwhelming and therefore it is easy to use.
  • Not only the conversion is done but you can also crop and polish the videos.
Cons
  • The program has been reportedly stuck on large files.
  • The audio ripping is not as advanced as it should be as compared to other programs on the market.

Video Guide: How to Rip DVD to MP4 with TunesKit


  1. Freemake Video Converter

It is one of the best and the most advanced video converter that you can use to make sure that the videos are converted losslessly. It is one of the best and the most used video converters that support up to 150 formats. It is regarded as the best DVD ripper to mp4 as it is easy to use and has all the features that make it one of the best converters. With the best interface and speed, the Freemake Video Converter has made its place in the market.


Pros
  • The installation process is too simple to perform and requires no additional tech knowledge.
  • The use is also simple and you can easily get the work done without any help.

Cons
  • It is only available for Windows users only and hence the scope is limited.
  • The subtitles cannot be added to the video which means that you need another program to do so.

  1. Handbrake

It is another DVD to mp4 converter that makes sure that you get the best and the easiest conversion with ease. For the last decade, this program has been one of the forefronts of the DVD ripping. It is regarded as the best DVD to mp4 converter as the functions are too much to handle. The speed is fast and you also get the best quality of conversion with perfection. The manual selection of all the ripping sections will further make sure that you get the best results. Each section can also be manually selected for ripping with ease.


Pros
  • It not only converts the video files but also rips the DVDs with ease and perfection.
  • There are ready-made presets which means that the use is overly simplified.
Cons
  • The interface is too complex for a normal user to understand and therefore the handling is too difficult for them.
  • The speed is not as fast as the other programs on the internet that way too fast.

  1. MakeMKV

It is another best DVD to mp4 converter Mac that has garnered highly positive reviews and therefore it is one of the most used programs as well. With this program, it is too easy to make sure that the best results are garnered. You need to be extra cautious with the configuration and it also means that if they are not up to the mark then you might face issues. With MakeMKV it is too easy to make sure that the DVD is converted to mp4 with ease and on any OS that you are using.


Pros
  • It is extremely easy to use and it also means that even a non-tech user can easily use it with ease and perfection.
  • The best part is that it also works with Blu-ray disks.
Cons
  • The customization options are not as much as they should be.
  • The DVD ripping is not as fast as it should be which means that your time is wasted on the process.

  1. WinX DVD Ripper Free Edition

It is another DVD ripper that will make sure that the conversion to not only mp4 is done but the other formats are also supported with ease and perfection. It is easy to use and the speed is awesome. This is a free edition so make sure to read the manual before it is downloaded. With this program, you can easily get the work done with perfection. The program also takes the ISO images and rips them if required and this makes it one of the most advanced programs.


Pros
  • The program has a built-in analyzer and it makes sure that the process underway is analyzed with ease.
  • There are ready-made profiles so it means that the conversion is fast and easy.
Cons
  • As it is a free edition it lacks some advanced functionalities with ease.
  • The handling of data discs is not as high as it should have been.

Conclusion

I have provided you with the best software programs that will make sure that your task of DVD ripping becomes easy to perform. You can select any tool as per your requirement as all have proven to be the best ones depending upon the tasks that are assigned to them.

If you want the best DVD to MP4 converter then there is none other than TunesKit Video Converter. It is fast, efficient, and reliable in providing you with the output that is desired. It supports multiple formats and has an easy to use interface. TunesKit Video Converter is simply an easy to use tool that is super fast and provides you with a complete solution of converting from one format to another.

You may also like:

How to Restore iPhone from DFU Mode

When your iPhone gets stuck on DFU mode, what you can do to restore the data on the device. Well, this blog will give you the top 2 quick ways to restore the iPhone from DFU mode.


Way 1: Restore iPhone from DFU mode with iTunes

iTunes, which is particularly designed by the Apple company for the iPhone/iPad/iPod, is effective for these iOS devices. As it can recover lost and deleted data, and factory reset the iPhone when it has some problems like freezing and disability. Many people rely on this program to manage their iOS devices, so it is natural that what first occurred to them is using iTunes when it comes to restore iPhone from DFU mode.

To restore your iPhone, iPad or iPod from DFU mode with iTunes, you can follow steps as presented here.

Step 1: Install the latest version of iTunes.

Step 2: Launch iTunes and turn off the iPhone/iPad/iPod.

Step 3: Connect the iOS devices to the computer.

Step 4: Press the Home button until the DFU mode in shown on the main screen.

Step 5: Let go of the Home button.

Step 6: Wait iTunes detect your iOS device, which is in DFU mode.

Step 7: Tap the Restore iPhone/iPad/iPod button on the message appeared on the iTunes screen.

Step 8: Finally confirm the Restore order and then iTunes will begin to restore your device from DFU mode by itself.

Step 9: After the restoring is finished, your iPhone/iPad/iPod will restart automatically.

However, restoring the iPhone from DFU mode with iTunes will lead to data loss. Yes, this method will indeed remove all of your data saved on the device. If that happens, you have to recover the data from a previous iTunes backup, which doesn't contain the most recent data.

Way 2: Restore iPhone from DFU mode without iTunes

Yet apart from restoring with iTunes, there is another useful method that doesn't require iTunes and most importantly, it won't cause any data loss. That is employing iOS system recovery software likeTunesKit iOS System Repair to restore the iPhone from DFU mode. In addition to that, even if your iPhone gets stuck on the apple logo, or meets other iOS issues, TunesKit iOS System Recovery is able to solve these problems and make your device function normally. Besides fixing more than 50 kinds of iOS errors, this application also supports resolving tvOS system issues. And it is fully compatible with iPhone, iPad, iPod and other iOS devices, and even the latest iOS system. Last but not least, with 2 smart recovery modes and simple operations, it has been warmly welcomed by many users around the world.

Now let us look at how this safe and fastest iOS recovery program restores iPhone from DFU mode.

Step 1: Download TunesKit iOS System Recovery software and install it on the computer. Then open this program and connect your iPhone to PC with a USB cable until the device is being detected. Next, choose the repairing mode and click the "Start" button.

Step 2: If your iPhone has already been in the DFU mode, then it will require you to check the device-related information including version and model. Then you have to hit the "Download" button on the right corner of this tool's screen. After that, the firmware package corresponding to your device will start to being download.


Step 3: After it successfully downloads and verifies the firmware package, just tap the "Repair" button and it will begin to repair your iOS system by itself. Finally, when the fixing process is completed, you succeed in restoring your iPhone from DFU mode. Don't disconnect your iPhone during the whole process, otherwise, you have to try it again and some other problem may occur.

Bottom line

In conclusion, the above two methods can restore the iPhone from DFU mode with or without iTunes. Next time, when the problem occurs on your iPhone, just give it a try and you will receive a surprise.


Sep 3, 2020

5 Solutions to Fix iPad Stuck on Apple Logo

 You may be wondering why the iPad will become stuck at the apple logo. Actually, there are 5 reasons that can explain it. The first is the system crash that is due to update failure. Secondly, the process of the iOS update was interrupted. Thirdly, software corruption occurs when there is a bug. Then it can be attributed to hardware problems. Last but not least, some wrong background operations may also lead to iPad stuck on the Apple logo. 

Now that we have made clear of the causes, let's look at the solutions.

Fix 1: The top-rated one

Employing iOS system recovery tools such as TunesKit iOS System Recovery is the first way, which is also the best way to fix the iPad stuck on the Apple logo issue. Why?
It fixes all iOS system issues including stuck in Apple logo, headphone mode, boot loop screen, and activation error, etc. Besides, it repairs the system without any data loss with standard mode. Moreover, it supports different devices like iPad, iPhone, iPod touch, and all iOS versions. With the highest success rate and fastest speed, TunesKit iOS Repair can resolve the Apple logo problem on iPad and doesn't take your much time. Here we go.

Step 1: Launch TunesKit iOS System Recovery for Windows. Then you have to connect your iPad with the computer. After the device has been detected, click the "Start" button. Next, select the "Standard Mode". You have to choose which device you've connected to. Then follow the instructions and let your device is into DFU mode. After that, click the "Next" button.


Step 2: Check if your device info including the model version, iOS version, etc.is right, correct it if there's anything wrong. If all information is correct, click the "Download" button and the firmware package corresponding to your device will be downloaded. Then verify the package quickly.


Step 3: When the firmware has been downloaded successfully, you just click the "Repair" button and the program will automatically begin to fix your iPad. Don’t disconnect your device until the process is completed. Otherwise, the device might meet other issues.

Fix 2: Force restart your iPad

If you want to try other methods, then you can solve the iPad stuck on the Apple logo by rebooting the device. Though force restarting the iPad also won't take too much time, it will erase all your data. Thus you had better back up your data on the iPad before.

For iPad with Home button users, please hold the Home and Power buttons down till the Apple logo shows.

For other iPad models customers, quickly press and release the volume up and down buttons respectively, then press the top button until the Apple logo is displayed on the screen.

Fix 3: Put iPad into recovery mode

Putting your device into recovery mode may also do the trick in dealing with iPad gets stuck on the Apple logo screen. But similar to the second solution, this can also lead to data loss. So you are suggested to have a backup of your iPad data.

Step 1: Launch iTunes.

Step 2: Connect the iPad to the computer. For iPad with Face ID, press the power and volume down buttons till the power off slider is shown. Then switch off the device and hold the power button until the recovery mode screen appears.

For the iPad with a home button, just hold the power button and turn off the device. Then press the home button until you see the recovery screen.

Step 3: Hit "Restore" or "Update" appeared in iTunes.

Fix 4: Restore the device in DFU mode

If letting the iPad into recovery mode doesn't settle this issue, then you can follow the below steps of restoring the device in DFU mode.

Step 1: Hook up the iPad with the computer, then open iTunes and simultaneously hold the Power and Home buttons.

Step 2: Release the Home button for a few seconds while keep pressing the Power button.

Step 3: Lose the Home button and when the screen becomes black, the iPad entering the DFU mode gets successful.

Step 4: Recover the iPad in iTunes again to see whether the problem still exists.

Fix 5: Go to Apple store

If you have tried every possible means but your iPad still keeps staying at the Apple logo screen, you had better go to the nearest Apple center, and let the Apple technicians resolve this problem.

Advice

We sincerely hope you can get some value from this article about resolving the iPad stuck on the Apple logo. The above 5 methods are useful and effective. They are all worthwhile trying out.