Showing posts with label ipad pro. Show all posts

Sep 3, 2020

5 Solutions to Fix iPad Stuck on Apple Logo

 You may be wondering why the iPad will become stuck at the apple logo. Actually, there are 5 reasons that can explain it. The first is the system crash that is due to update failure. Secondly, the process of the iOS update was interrupted. Thirdly, software corruption occurs when there is a bug. Then it can be attributed to hardware problems. Last but not least, some wrong background operations may also lead to iPad stuck on the Apple logo. 

Now that we have made clear of the causes, let's look at the solutions.

Fix 1: The top-rated one

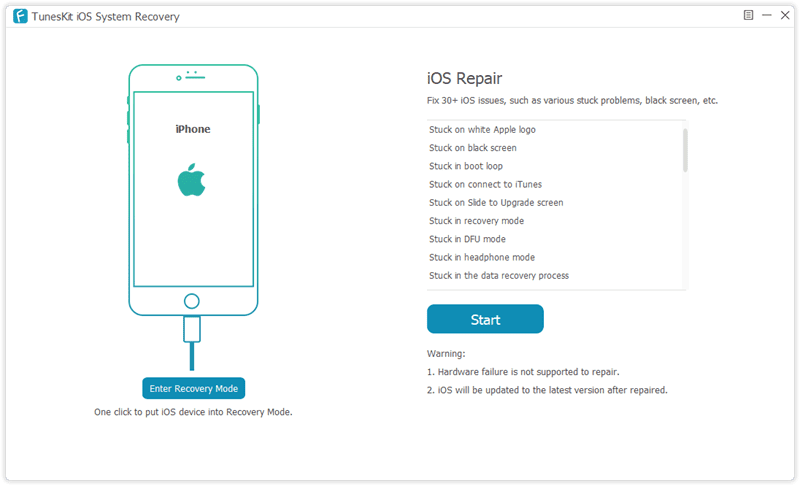
Employing iOS system recovery tools such as TunesKit iOS System Recovery is the first way, which is also the best way to fix the iPad stuck on the Apple logo issue. Why?
It fixes all iOS system issues including stuck in Apple logo, headphone mode, boot loop screen, and activation error, etc. Besides, it repairs the system without any data loss with standard mode. Moreover, it supports different devices like iPad, iPhone, iPod touch, and all iOS versions. With the highest success rate and fastest speed, TunesKit iOS Repair can resolve the Apple logo problem on iPad and doesn't take your much time. Here we go.

Step 1: Launch TunesKit iOS System Recovery for Windows. Then you have to connect your iPad with the computer. After the device has been detected, click the "Start" button. Next, select the "Standard Mode". You have to choose which device you've connected to. Then follow the instructions and let your device is into DFU mode. After that, click the "Next" button.


Step 2: Check if your device info including the model version, iOS version, etc.is right, correct it if there's anything wrong. If all information is correct, click the "Download" button and the firmware package corresponding to your device will be downloaded. Then verify the package quickly.


Step 3: When the firmware has been downloaded successfully, you just click the "Repair" button and the program will automatically begin to fix your iPad. Don’t disconnect your device until the process is completed. Otherwise, the device might meet other issues.

Fix 2: Force restart your iPad

If you want to try other methods, then you can solve the iPad stuck on the Apple logo by rebooting the device. Though force restarting the iPad also won't take too much time, it will erase all your data. Thus you had better back up your data on the iPad before.

For iPad with Home button users, please hold the Home and Power buttons down till the Apple logo shows.

For other iPad models customers, quickly press and release the volume up and down buttons respectively, then press the top button until the Apple logo is displayed on the screen.

Fix 3: Put iPad into recovery mode

Putting your device into recovery mode may also do the trick in dealing with iPad gets stuck on the Apple logo screen. But similar to the second solution, this can also lead to data loss. So you are suggested to have a backup of your iPad data.

Step 1: Launch iTunes.

Step 2: Connect the iPad to the computer. For iPad with Face ID, press the power and volume down buttons till the power off slider is shown. Then switch off the device and hold the power button until the recovery mode screen appears.

For the iPad with a home button, just hold the power button and turn off the device. Then press the home button until you see the recovery screen.

Step 3: Hit "Restore" or "Update" appeared in iTunes.

Fix 4: Restore the device in DFU mode

If letting the iPad into recovery mode doesn't settle this issue, then you can follow the below steps of restoring the device in DFU mode.

Step 1: Hook up the iPad with the computer, then open iTunes and simultaneously hold the Power and Home buttons.

Step 2: Release the Home button for a few seconds while keep pressing the Power button.

Step 3: Lose the Home button and when the screen becomes black, the iPad entering the DFU mode gets successful.

Step 4: Recover the iPad in iTunes again to see whether the problem still exists.

Fix 5: Go to Apple store

If you have tried every possible means but your iPad still keeps staying at the Apple logo screen, you had better go to the nearest Apple center, and let the Apple technicians resolve this problem.

Advice

We sincerely hope you can get some value from this article about resolving the iPad stuck on the Apple logo. The above 5 methods are useful and effective. They are all worthwhile trying out.

Aug 20, 2020

Easily Fix iPad White Screen in 5 Ways

 iPad getting stuck on the white screen is one of the common issues among diverse kinds of iOS problems. There are many reasons behind it, for example, iOS update failure, software errors. But despite the causes that lead to this matter, it is fixable and next we are going to introduce the 5 most effective and useful solutions to work out this trouble.

Way 1: Hard reboot your iPad

Generally speaking, force restarting your device is a simple yet effective method to solve iOS stuck problems. iPad stuck on a white screen is no exception. You can simply hold the Power button and Home button simultaneously for about a few seconds until the Apple logo shows up. It will restart again and you can check whether the problem is solved.

Way 2: Try the three-button trick

This method is not always working, according to the reports from many iOS users. But it still worth a try, what if you succeed? The steps are very simple. Just press and hold the Home button, Volume Up button, and then Power button for a while and wait until the white screen on your iPad disappeared. 10 seconds later, the Apple logo will appear and your iPad will reboot again.

Way 3: Use TunesKit iOS Repair with almost 100% success rate

After trying to hard reset your device by using the two methods above, if the white screen problem still exists, you can consider using a professional iOS system recovery tool to fix it. TunesKit iOS System Recovery is such a comprehensive and efficient iOS repair program that is specially developed to fix up to 30 iOS-related issues. These problems include iPhone stuck on the white Apple logo, iPad won't turn on, iPhone black screen of death, blue screen, red screen, etc. The most powerful characteristic of this tool is that you will never worry about the data loss when using it to fix iOS system problems. What's more, it supports all iOS including the latest iOS 12 and almost all models of iPhone, iPad, iPod touch.

Step 1: Launch TunesKit iOS System Recovery program and use a USB cord to connect your iPad to the computer. Then click the Start button and choose the Standard Mode which will not cause any data loss. Press the Next button to continue.
Step 2: Now your need to check your device info such as model name, iOS version, etc. If nothing is wrong, you can simple hit the Download button to ask TunesKit to download the firmware package you need.

Step 3: Once the download and verification of firmware package is completed, you can start fixing white screen problem by clicking the Repair button. Wait until the process bar ends. Remember not plug your device during the process, or your device may get bricked.

Way 4: Put your iPad into recovery mode

Another solution to fix the iPad stuck on the white screen is to try restoring your iPad with iTunes. It will reinstall iOS on the iPad, so all the data your device will be effaced, but you can use TunesKit iPhone Data Recovery to get them back. Or if you don't mind, you can follow the quick steps below.

Step 1: Open iTunes and update it to the latest version. Connect iPad to your computer via a USB cable;

Step 2: Since your iPad is in a white screen state, it can't be detected by iTunes. You need to put it into the recovery mode. You can first hold the Power and Home buttons at the same time for about 10 seconds, and release the Power button and only hold the Home button until you see the Apple logo. Keep holding it until the Connect to iTunes icon appears;

Step 3: Once your device entered the recovery mode successfully, choose Restore iPad and wait until the process is finished. You can now set up your iPad as a new device.


Way 5: Restore your device in DFU mode

Alternatively, you can also put your iPad into the DFU (Device Firmware Update) mode and then use iTunes to restore it. Also, all the data on the iPad will be erased. Here is how to fix the iPad white screen problem using this method.

Step 1: Connect iPad to the computer and then launch iTunes;

Step 2: Switch off the iPad and hold the Power button and Home button simultaneously for 10 seconds. Then release the Power button and keep holding the Home button. If you see the "Plug into iTunes" message, you need to repeat the process; if the screen turns black, your iPad has entered the DFU mode now;

Step 3: iTunes will ask you to Restore the iPad and confirm the action. After it's done, your problem should be solved.

Verdict

Now you have known the best and most full solutions to fix your iPad screen becomes white problem, quickly give it a shot, and if you have any questions or confusion during the process of repairing, welcome to connect us or leave your comment below.


Aug 17, 2020

6 Proven Methods: Fix iPad Screen Flickring

The Apple company launches the iPad as its the "smartest" tablet computer in the world. Thus it has become wildly popular among many people, as they enjoy its beautiful design, powerful performance, and convenience. However, there are also glitches such as iPad screen flickering that occurred on this electronic device. Did you meet with this issue before? If you did, take it easy, in the following, we will guide you on how to solve this problem step by step.

Tip 1: Restart your iPad

Rebooting is one of the most common fixes for a variety of iPad problems as well as any other computers. Restarting helps one override the software glitches that may be inhibiting normal software functioning which may be the core of your iPad screen flickering problem.

For iPad with a home button: simply press and hold the Home button and Top button simultaneously until an Apple logo appears then release both buttons.

Other models: Press and quickly release the Volume Up button, repeat the same for the Volume Down button and then press and hold the top button until an Apple logo appears then release the button.

Tip 2: Check if it is in a particular app

If your iPad mini screen flickering problem is not fixed by restarting, then you should proceed to check if the iPad flickers when running a particular application. The flickering could be as a result of a 'misbehaving' application. If you find such an application, force quitting the application is highly recommended. So, how do you force quit?

For iPads with Home button, you only need to press the Home button to open the app switcher then swipe away the particular application.

For iPads with no Home button, slide your finger from the bottom to open the app switcher then swipe away to force quit the application.

Try re-launching the application and if the flickering persists you can proceed to uninstall the application and install it later on.

Tip 3: Check auto-brightness feature

Usually, iPads have an auto-brightness feature that facilitates screen light adjustment according to light in your environment. If enabled the screen could appear to flicker depending on the change of the surrounding light. However, this may not be issued. To be sure, you need to disable the feature. To disable follow the following steps;

Step 1: Click on "settings" on the interface.

Step 2: Scroll down to tap the "Accessibility" button. 

Step 3: Select 'Display Accommodations' from the options.

Step 4: You will find the auto-brightness feature, move the slider to disable. After disabling the screen light will remain constant.

Tip 4: Reduce motion and transparency

In any case that the iPad Pro screen flickering problem is not solved by disabling the auto-brightness feature, you should proceed to disable the motion and transparency feature. It goes a long way in improving the performance of the iPad. To disable follow the following steps.

Step 1: From the main screen click on 'Settings'.

Step 2: Select 'General' and then 'Accessibility'.

Step 3: Select 'Increase Contrast' and then move the slider forward to enable 'Reduce Transparency'.

Step 4: Go back to the 'Accessibility' and move the slider in front to enable 'Reduce Motion'. This way, the iPad screen flickering on and off may stop.

Tip 5: Use iOS system recovery tools with no data loss

If all the above-stated solutions do not work to resolve your iPad screen flickering won't turn on, then the TunesKit iOS system recovery tool is your best chance to resolve the issue once and for all. TunesKit iOS Repair is designed to help you resolve both common and serious iOS errors without losing any data from your iPad. The screen flickering issue at this point maybe as a result of iOS failures. The software provides you with two repair modes namely Standard Mode and Advanced Mode. It is also compatible with all iOS and iDevices including iPads, iPhones among others.

All you need is to download TunesKit iOS System Recovery and then follow the following steps to fix the problem.

Step 1: Connect Device and Select Repair Mode
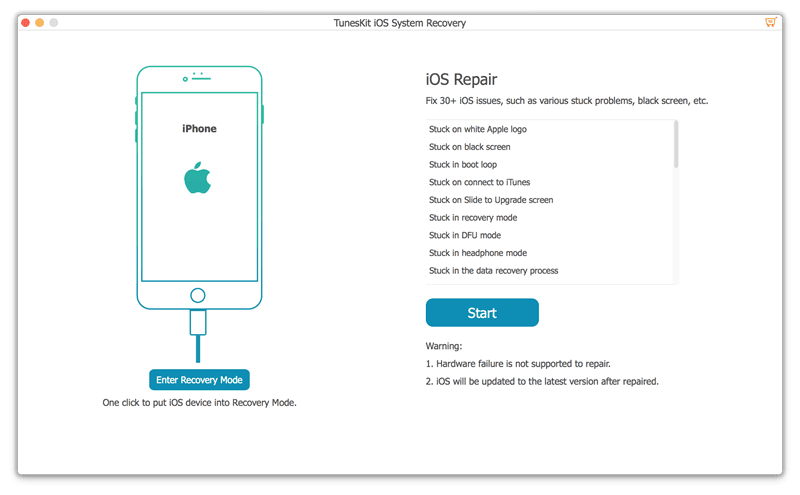
Launch the application on Mac and then proceed to connect your iPad to the computer. Once it is detected, click on the 'start' tab to proceed to the next window. Select 'Standard Mode' as your repair mode and click 'next'. You will be requested to put your iPad on DFU or recovery mode. Follow the instruction and click 'Next'.
Step 2: Download the Latest Firmware Package
Here, the program will proceed to download the latest firmware package to recover the iOS back to normal. It is crucial that you confirm the device info to make sure it is correct. If not, you can manually correct it. Proceed to hit 'Download' to download.
Step 3: Recover and Fix iOS System
Once the download is complete, click on the 'Repair' button on your screen to initiate the repair process. Make sure your iPad is connected during this time. The repair will only take a few minutes. If the Standard Mode does not work you can proceed to use the Advanced Mode using the same procedure.

Tip 6: iPad screen repair

If at this juncture, your iPad is still flickering then there must be a hardware problem. It is possible that the gadget was dropped on a hard surface or fallen into the water. iPad screen repair is quite a complicated process and hence it is highly recommendable that you seek a professional assistant. Equally, you can visit the nearest Apple service shop for assistance. They will definitely help you out.

Conclusion

The above methods listed are of great significance to fix iPad screen flickering. When you or your friends come across such a problem, you can use these fixes to resolve this issue. But the best way, as far as I am concerned, is still to employ professional iOS system repair programs like TunesKit iOS System Recovery.


Aug 16, 2020

Top 4 Ways to Recover Photos from Locked iPad

 "How to recover my photos from a locked iPad?" Did you search these words on the Internet? When this situation occurred to many people, they will hard reset their iPad. However, this method will delete all your data on the iPad. So after you happened to this problem, don't worry and be hasty, as there are other ways to retrieve your photos from a locked iPad. Check the following 4 simple fixes.

First, you will need an iPhone Photo Recovery tool. It is essential to back up your iOS devices in case a similar case may occur again. But if you are unfortunately to be one of the victims, just stay calm, recovering photos from a locked iPad is easy to accomplish on the condition that you get TunesKit iPhone Data Recovery, one of the most efficient iOS data recovery tool that allows you to preview all the missing files one by one in the original form before the recovery. In addition, this program also implements selective recovery which means that you can choose specific files to recover after it scans all recoverable data, making the recovery more flexible and precise. Moreover, it recovers over 20 types of data including photos, videos, contacts, call history, iMessages, notes, etc. Finally, Supports a wide range of iOS devices including iPhone XS, iPhone 8, all models of iPad Pro, iPad Air, iPad mini, iPad, and more.

1. Retrieve locked iPad photos from iTunes backup

If you only want to recover photos on your locked iPad instead of the entire iTunes backup file, then you can take this method to achieve the goal. Simply follow the detailed steps below to learn how to recover photos from a locked iPad via iTunes backup with TunesKit iPhone Data Recovery.

Step 1: Select iTunes backup files
Start by downloading the program on your computer. Install it and select the second mode "Recover from iTunes Backup" from the main window.


itunes backup

Step 2: Scan lost photos
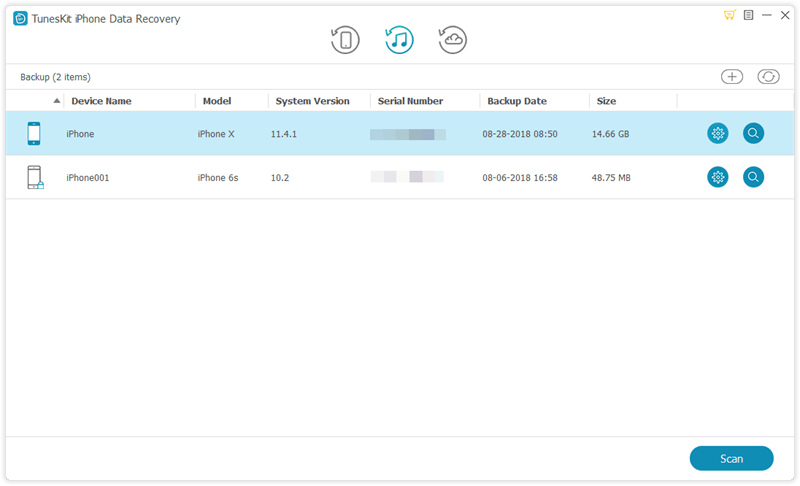
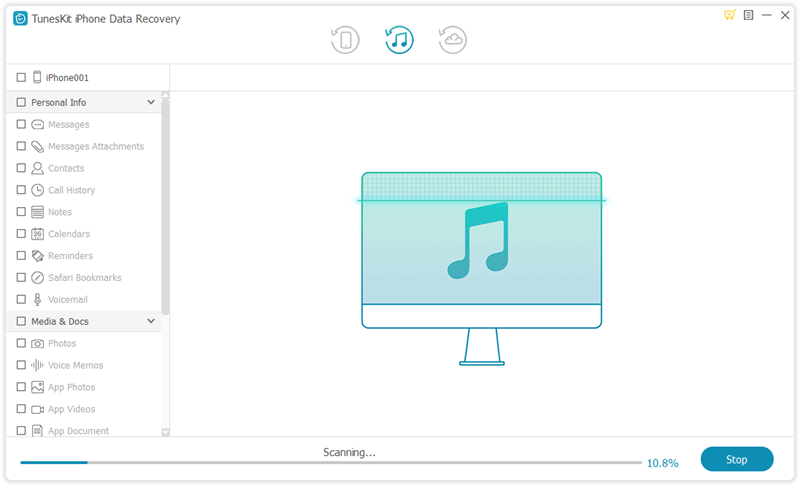
The program will start to detect all the iTunes backup files on your computer. Select the one that contains the lost photos and then tap the Scan button to let the program extracting the backup file for your lost photos.

scan itunes backup

Step 3: Recover photos from iTunes backup
You can preview all the recoverable files one by one after scanning. Select the photos you want and click the Recover option to revert them to your computer at once.

recover iphone data from itunes backup

2. Get them back from iCloud backup

If you have backed up your iPad to iCloud in advance, then you can take this method. Simply follow the instructions below to learn how to retrieve photos from the iPad after restore via iCloud backup with TunesKit.

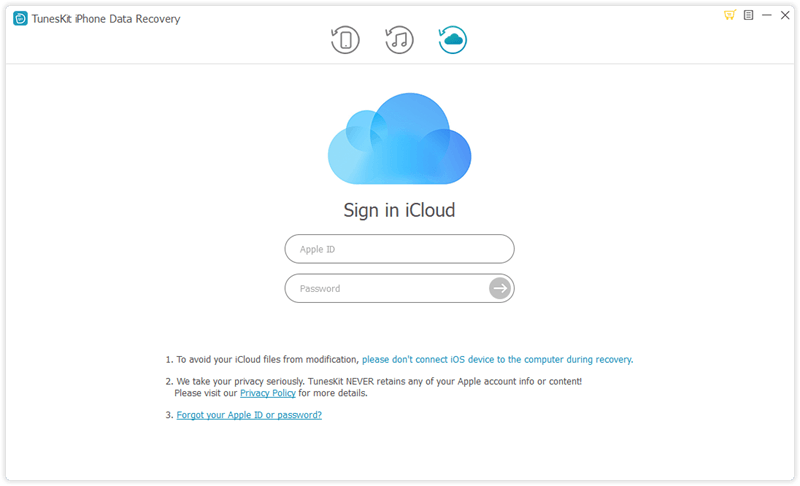
Step 1: Log into the iCloud account
Open TunesKit iPhone Data Recovery on your computer and choose "Recover from iCloud Backup" mode. Enter your Apple ID and password to log into the iCloud account.

sign in icloud

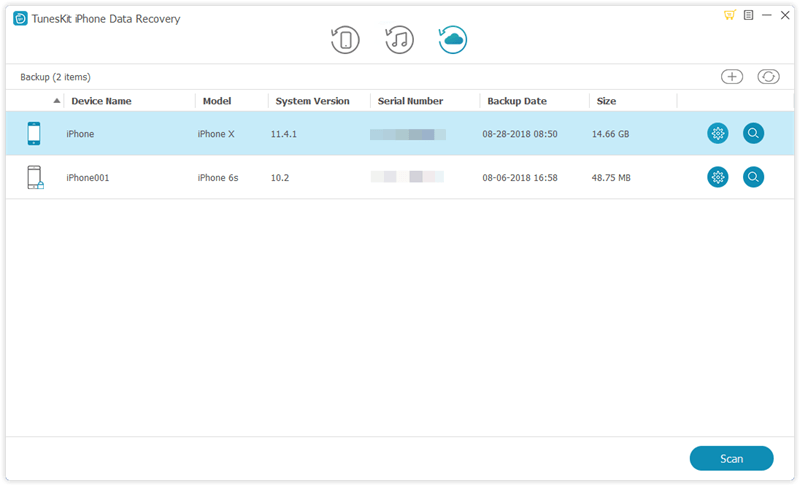
Step 2: Download iCloud backup file
All the iCloud backup files will be shown in the resultant window. Select the appropriate one that contains the lost photos and tap the Download button. From the new pop-up, choose the Photos and then click the Next button to download them.

download icloud backup

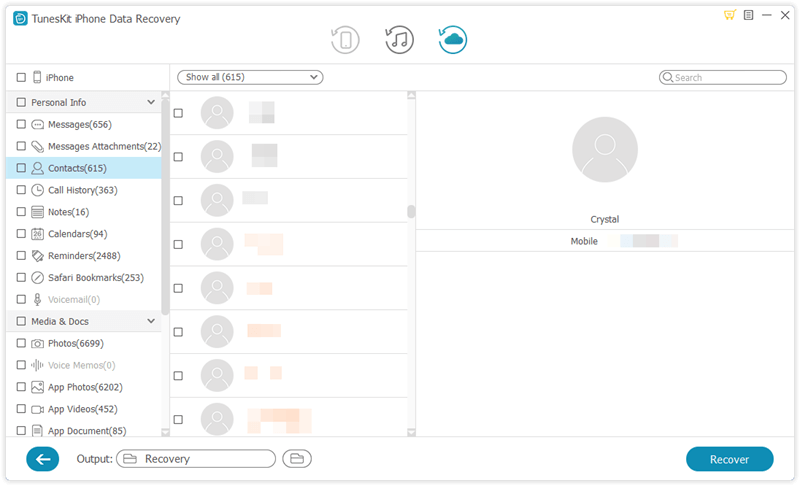
Step 3: Recover photos from iCloud backup
As soon as it finishes scanning, all lost data will be displayed under different categories. Choose the photos you want and then hit the Recover button to get them back instantly.

recover iphone data from icloud backup

3. Reset the locked iPad and recover photos through iTunes

There is another solution to recover photos from a locked iPad which needs you to erase your device before restoring the entire iTunes backup. Here's how to do it.

Step 1: Launch iTunes on your computer and connect your iPad to it with a USB cable.

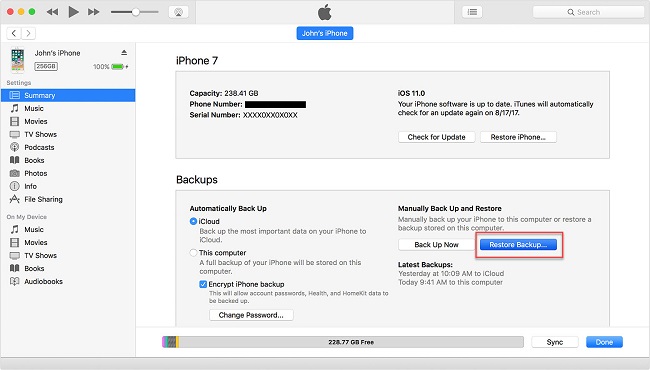
Step 2: Wait until iTunes sync your device successfully. Tap the Restore iPad option and then follow the prompts on your iPad, next select Restore from iTunes Backup in the interface.

Step 3: Choose the exact backup you want to restore your iPad.

restore from itunes backup

4. Reset l the locked iPad and recover photos by iCloud

Now that your iPad was locked, you can use iCloud to remove the password and restore it if you have enabled Find my iPhone Feature on your device. Follow the instructions below to do it.

Step 1: Visit the website www.iCloud.com and log into your iCloud account as required.

Step 2: Tap on All Devices button at the top of the interface, select the locked device you want to erase.

Step 3: Tap Erase iPad and the password will be removed, so do the device data. Of course you can restore the device from a backup later.

recover icloud backup

Verdict

Finally, we sincerely hope that this post can help you and you can get a lot of value from it. When you meet with this issue of recovering photos from a locked iPad next time, you can use this reliable iPhone data recovery tool to bring them back.


Sep 14, 2015

[Spec Showdown] iPad Pro vs Surface Pro 3: Which Should You Buy

Rumors have been swirling about Apple’s plans for a larger iPad for quite a while, but at the September 2015 event the real deal was finally rolled out. The new iPad Pro is the largest and most advanced tablet Apple has ever produced and faces stiff competition from the likes of Microsoft’s Surface line. So how does Apple’s latest and greatest stack up against Microsoft’s very own hardware?

Design


When it comes to look and feel, the Surface Pro 3 and the iPad Pro have a lot in common. The physical size and weight difference between the two is minimal, despite how strongly Apple will stress that .2 inch thickness advantage.


The devices even look fairly similar, especially when you match both up with their respective detachable keyboards. Outside of looks, which are a personal preference, the Surface 3 has a MicroSD slot for extra storage or file transferring, but otherwise the two are almost identical.

Winner: Tie


Display


Unlike the design, there’s a clear difference between the screens on the two devices. The iPad Pro has a .9 inch size advantage, but the real gains are seen in the resolution. The 1440p display in the Surface Pro 3 is already strikingly high definition, with a 216 PPI rating, but the iPad Pro’s retina display boasts a boosted 265 PPI.

Whether that actually makes a noticeable difference remains to be seen, but Apple has a long history of excellent displays.

While both the iPad Pro and Surface Pro 3 offer a 10-point multi-touch display with stylus support, Apple has added some special features specifically for stylus users. Pressing the stylus to the screen doubles the polling rate and touch accuracy, allowing you to write naturally and comfortably. It also opens up new software features, like annotating emails, or drawing in your notes.

Winner: iPad Pro


Performance


Without clear information on the RAM in the iPad Pro, or concrete information about its processor, it’s hard to determine which device will come out ahead on performance. Apple claims the new 64-bit A9X CPU is 1.8 times faster than the previous A8X chip, with twice the memory bandwidth and storage performance. The brand also claimed the chip is faster than 80 percent of portable PCs in terms of performance, and if that’s even close to true the iPad Pro will be impressively quick. The demo explains that the iPad Pro is capable of editing three 4K video streams at once as well, which isn’t something most PC notebooks and 2-in-1s can claim.


The Surface Pro 3, on the other hand, offers your choice of Intel Core i3, i5, or i7 processors, but they’re all dual-core chips, and none of them have a base clock of over 2GHz. That surely places the Surface Pro 3 in the 80 percent of portables that the A9X chip beats out, even if you go with the highest-end chip available, the i7-4650U.

This one is hard to call. On paper, the Surface Pro 3 may end up with an advantage here or there, but iPad Pro’s focus on graphics, and its slimmer operating system, will make a difference.

Winner: Probably the iPad Pro, but further testing will be needed


Features


One of the possible pitfalls for the iPad Pro lies in the operating system. While iOS has become an incredibly popular platform for mobile devices like the iPhone and iPad, there are concerns that it won’t translate well to a high-performance device.


Apple has made some changes to iOS specifically for the iPad Pro, improving multi-tasking functionality, as well as adding in specific software options to some applications. The Surface Pro 3 has the benefit of the doubt when it comes to operating system, since it runs full Windows 10 Pro, a time-tested, fully featured OS.

Outside of that, the feature set between the two devices is quite similar. Both the iPad Pro and Surface Pro 3 offer detachable keyboards and styluses, both as separate purchases on top of the starting price.

Winner: Surface Pro 3


Conclusion


If the high-end convertible tablet is a market that appeals to you, the good news is you’re no longer stuck picking whatever flavor of Surface fits your budget. The iPad Pro is a competitive and relevant offering from Apple — one that may help revitalize a shrinking tablet market.

There are still a lot of unanswered questions about the upgrades to iOS 9 and the performance, but at least on paper, the iPad Pro should be enough to keep your from buying a Surface tablet until there are some hands on reports of the new iPad.

More over, at the same price point, the iPad Pro is a serious challenger to the long-suffering Surface line, and one that’s bound to share not only in Apple’s iPad market, but also take a chunk of entry-level MacBook sales.

Winner: iPad Pro


Read source: http://www.digitaltrends.com/computing/ipad-pro-vs-surface-pro-3/

Read More: How to Transfer iTunes Movies to Surface Pro 3

Unlike iPad Pro which is authorised to play movies downloaded from iTunes store, Surface Pro 3 is not able to play any iTunes movie or TV episode due to Apple's DRM protection. In this case, you may wonder whether it's able to transfer and watch iTunes movies on your Surface Pro 3 or not. Fortunately, there is an efficient way to get it done by removing the DRM lock from the movies with some exclusive iTunes DRM remover, such as TunesKit DRM M4V Converter. By using this smart iTunes DRM remover and video converter, you can easily bypass the DRM from any iTunes movies and convert the protected videos to commonly used format such as MP4 with lossless quality preserved. For more details, you may refer to this guide: How to Convert iTunes Movies to Windows Phones & Tablets >>