Mar 17, 2021

How to be a Skilled YouTube Video Creator? It can help!

Sometimes when we watched YouTube videos, we would like to make videos by ourselves. It is a wonderful experience for us that the imagination becomes a video and post it to YouTube to share with others.

But, how to create a video for beginners? As we all know that editing a video requires professional skills. If you had never used video editing software before, it will cost you a lot of time in learning professional skills.

The first step to becoming a YouTube video creator is to find a beginner-friendly video editor. An easy-to-use video editor will help you to become a better YouTuber. A well-made YouTube video not only for your interest but also could earn money for you.

Nowadays internet, users can download video editing software everywhere. Though it is free to use, it should be noted that if the software is abundant in functions and tutorials for users.

TunesKit AceMovi Video Editor is a powerful yet beginner-friendly video editing software. I recommend it for you because of its high-cost-performance, well-designed interface, and powerful features. With a nice video editor, making an imaginative video not a difficulty anymore.

This is the main interface of TunesKit AceMovi Video Editor. With these useful functions, users can unleash their creativity, and free to create a video. Drag the video from the computer folders that you would like to edit, or record your windows screen. Then, you can start to trim or merge your video segments.

Besides cropping videos, there are many features for users to make their video looks better.

Through this menu, users can add a background, edit audio, add subtitles, split-screen, add filter effects, add transitions, and add animations. These various functions can enhance the video you create and your video will look much more skillful than before. The most important is that they are very easy to use, all the operations can be done in some clicks.

TunesKit AceMovi Video Editor offers users numerous stock resources so that if you are going to add some effects, you have choices and you don’t need to be worried about how to find the wanted stock effects, AceMovi can meet all that you want.

The split-screen function allows users to play 2 or more videos on one screen at the same time. You just need to drag the videos toward different areas split. It is very easy to make it, isn’t it?

In this part, you can add transition effects between segments. After adding the transition effects, videos can look more lively. A video without any transition effects would be tedious.

Finish editing your video, you can export your video in any format and resolution you want. It is a convenient feature for those who use different devices.

Conclusion

As a video editing beginner, it must take time to practice how to create an interesting video. When we watching YouTube, we would prefer to subscribe to the YouTubers who make well-made videos. With TunesKit AceMovi Video Editor, you can add many advanced effects without the requirement of professional skill. Not only the software, the TunesKit website offers tutorials for beginners, click to read more about how to use TunesKit AceMovi Video Editor: 

https://www.tuneskit.com/video-editing-tips/

Let’s download TunesKit AceMovi Video Editor and enjoy your editing!


You may also like:


Mar 11, 2021

Listen to Audible Audiobooks on Chromebook

Compared with other laptops, Chromebook is lighter and more portable. Using a Chromebook to listen to audiobooks seems to be a nice try. But how to play Audible audiobooks on Chromebook? You can try my methods in this passage.


Install Audible to Chromebook

Some Chromebooks are compatible with Android apps such as the HP Chromebook 14 CB3, Samsung Series 5 Chromebook. For these Chromebooks, you can install Audible on them. To get started, you can update your Chromebook system first. Then you can follow the steps to sign in to the Google Play Store and install Audible to play Audible books.

1. Click the account photo and click 'Settings' button on your Chromebook.

2. On the Play Store section, find out and turn on the option 'Enable Google Play Store on your Chromebook'. Please note this option will only show on compatible devices.

3. Then follow the screen instruction to choose and accept the agreement and sign in to the Google Play account. After that, you can search for the Audible app and download it to your Chromebook.

4. On the Audible Manager, please sign in and then go to the library to download the Audiobooks and start listening.

Convert Audible AA/AAX to Chromebook

However, as aforementioned, some Chromebooks don't support the Android app, so you may not be able to use the solution above if you, unfortunately, got such an old one. In addition, Audible audiobooks are protected, and some possible server errors or lacking internet connection may cause you to fail to play Audible audiobooks. So, you can try the alternative solution to convert Audible audiobooks to common audio files by an audiobook converter from TunesKit.

TunesKit Audible Converter makes it easiest ever to convert any Audible audiobooks you throw at it. The converting speed could reach up to 100X and no other products come close to it. By using the latest deciphering technology, the audio files won't be touched during conversion so that the quality will be kept 100%. What makes it even better is that TunesKit offers a free trial version and 30 days money-back guarantee if the software doesn't work as advertised.


Tips to convert Audible audiobooks to Chromebook

1 Load Audible files

The best way is to drag and drop the Audible audiobooks from your computer folder to the TunesKit software main screen. If you haven't downloaded the Audible audiobooks yet, you can follow this instruction: How to Download Audible Audiobooks.

2 Set the parameters of the Audible audiobooks

The media files supported by Chromebook are WAV,3PG, AVI, MOV, MP4, M4A, MP3, MKV, OGV, OGM, OGG, OGA, WebM, so please pick up one compatible format. MP3 is highly recommended.

3 Convert Audible files

When everything is ready, you can simply click 'Convert', TunesKit will convert your audiobooks. Depending on the number of files you convert, the time it takes may vary. But in general, it should be very fast.

4 Transfer converted audiobooks to Chromebook

After you converted the MP3 files, you can transfer them to your Chromebook via a USB flash drive and then open the media files by clicking the Files app and start playing them with ta media player.

Conclusion

Those are the two solutions to listen to Audible audiobooks on Chromebook. Check them and try them. Install Audible app or convert Audible to LG TV, PS4, Chromebook, or any other devices.

More details: https://www.tuneskit.com/audiobook-tips/listen-to-audible-books-on-chromebook.html

Top 6 Remedies to Fix Apple TV Could not Sign in

Now, Apple TV has grown into a popular device and widely used by people. It can receive digital data for visual and audio content and play it on a connected television.  But in some cases, this smart device will get stuck in some serious issues. Apple TV could not sign in is one of the issues. If your Apple TV fails to sign in, this will prevent you from watching your favorite TV shows or movies.  

To solve users' questions, here we sort out several ways to fix Apple TV could not sign in. If you are facing this issue, do not miss it and just keep reading. In this tutorial, you can always find a way up.

Fix 1: Restart your Apple TV 

To restart your device, just refer to the following steps:

• Press and hold the Menu and Home (for 3rd generation and earlier, tap Down) buttons on the Siri Remote until the Apple TV status light blinks rapidly;

• Disconnect Apple TV from the power outlet, wait five seconds, then reconnect it;

• As for Apple TV 4K or 4th Generation, just Go to Settings, choose System and then click Restart. But for the 3rd generation and earlier, just go to Settings > General > Restart.


Fix 2: Reset your Apple TV 

If restarting can not fix Apple TV stuck on could not sign in, then you may try to reset your Apple TV. To achieve this, you simply need to go to Settings > System > Reset. If you are using Apple TV 3rd generation and earlier, just select Settings > General > Reset.

Fix 3: Disable two-factor authentication

• Open the iCloud;

• Select Apple ID and then Password & Security;

• Turn off the 2-factor verification option and log into iTunes.

Fix 4: Use verification code

The issue may occur on older Apple TV, especially if you are using two-factor authentication. To fix it, you may follow the guide below:

• Get an iPhone/iPad and the Apple ID;

• Go to Settings > iCloud > your iCloud > Password & Security > Get Verification code;

• Next, enter the six-digit code.

Fix 5: Restore Apple TV with iOS system recovery software (No Data Loss)

If all the solutions above fail to help you, we guess your Apple TV may suffer more serious issues. In this situation, users may download a professional iOS system recovery software to fix Apple TV stuck on could not sign in. This kind of tool takes the success rate and effectiveness at its centers. Whenever your devices, it will deliver an impressive result.

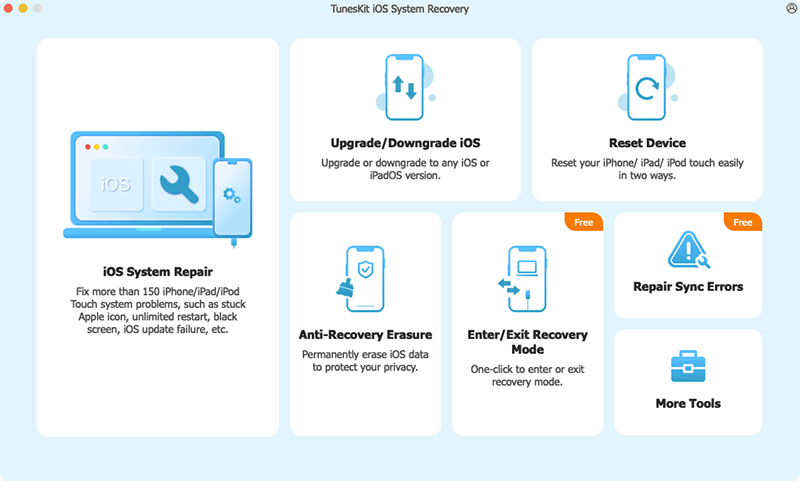
Among different software, TunesKit iOS System Recovery can always take a leading place in the market. In general, it is can fix over 30 system issues of iPhone, iPad, iPod Touch and Apple Watch. In terms of the Apple TV problem described in this tutorial, TunesKit can fix it at a faster speed and ensure a higher success rate. Besides, TunesKit can also be an effective tool when your Apple TV is stuck on Apple logo, black screen, airplay screen, etc. 

A step-by-step guide:

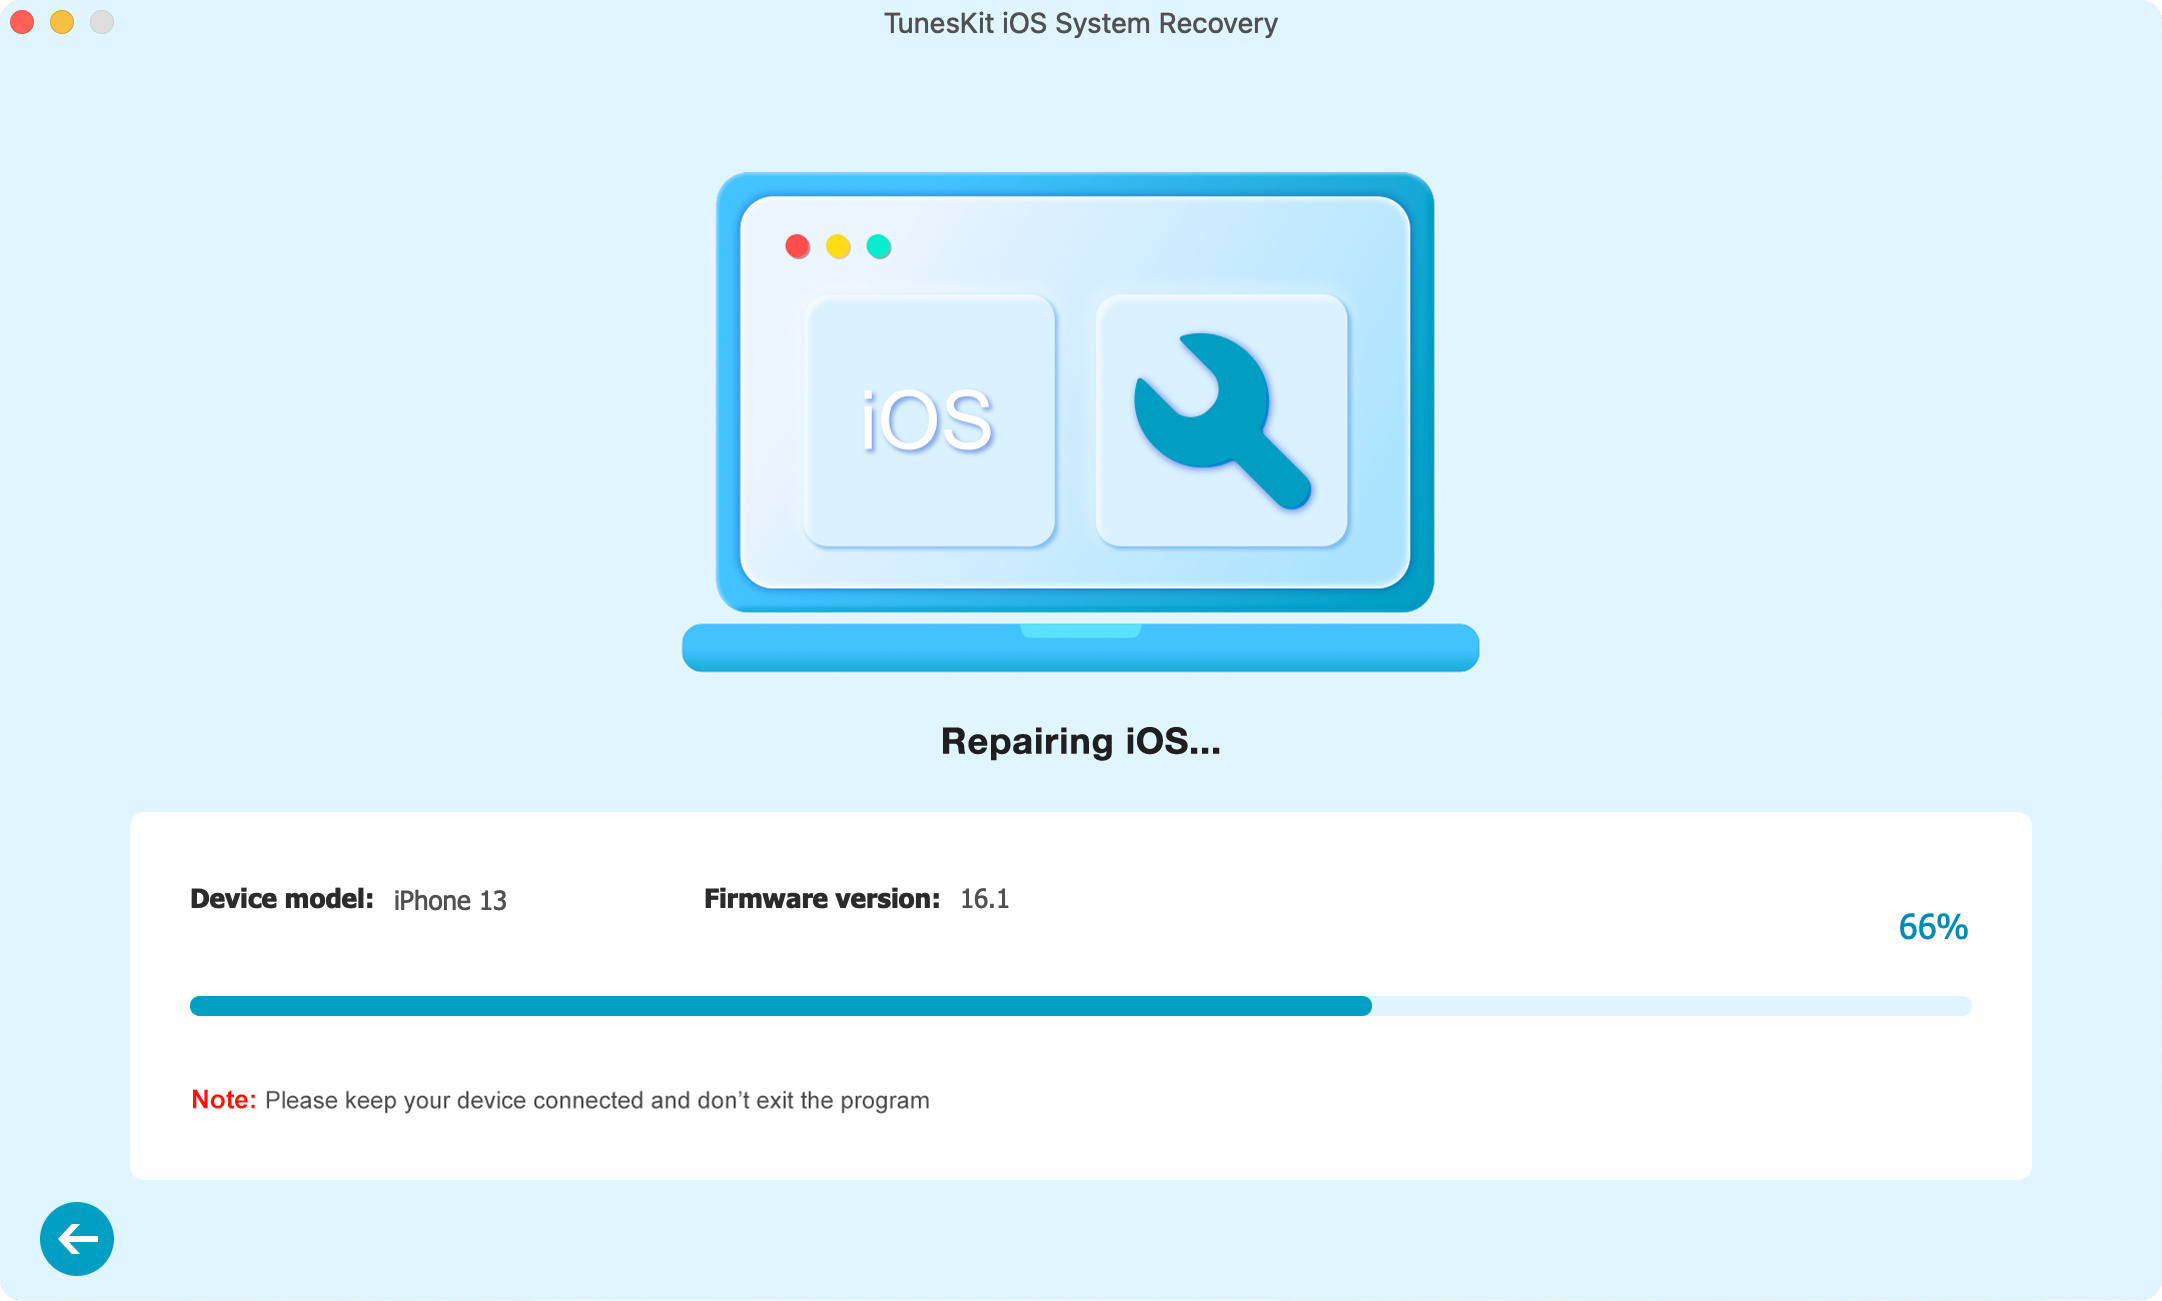
Step 1: : When TunesKit is launched on your computer, you need to use a USB cord to connect your Apple TV to the computer. TunesKit will detect your device. Next, you need to tap Start. 

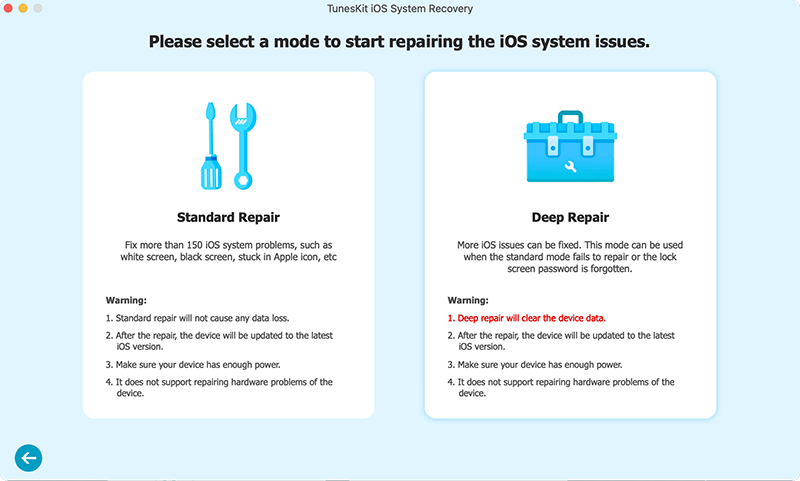
Step 2: Now, it is time to select a mode (Standard Mode is recommended). Next, just click Next. 

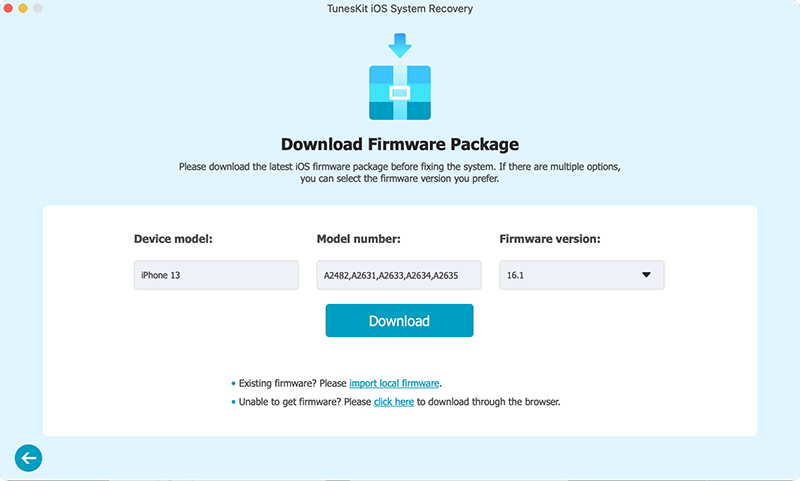
Step 3: The final step is to download the firmware package. Before downloading, you can choose to check the device mode to see if it is wrong and then click Download. The download process will not require a long time. When downloaded, you can click Repair to fix your Apple TV. 

Fix 6: Restore Apple TV with iTunes (Data Loss)

Using iTunes is another solution to fix Apple TV system issues. Resorting to iTunes to restore means that your Apple TV will be subject to factory settings and lose all data. To use this method, you need to download the latest version of iTunes on your computer. If necessary, you need to back up all of your data.

• Unplug the power and HDMI cables from Apple TV, and open the latest iTunes on your PC;

• Plug the Apple TV power cable back in (3rd and 4th generation only). If you have a 2nd generation Apple TV, leave it disconnected from the power source;

• Wait for some time to let iTunes recognize Apple TV. If the summary page appears, just select Restore Apple TV;

• After the restore process is completed, you can disconnect the Apple TV from the computer and power it on. This Apple TV is now restored to factory settings, and you can check if your Apple TV becomes normal.

Final Words

With all these thorough fixes, we hope that this article can give you a hint to fix Apple TV could not sign in. You can try these ways one by one. If using TunesKit, you can no longer need to leave your home to fix your Apple TV. The benefit is that this tool can fix your device stuck in any system issues at any time. 

Mar 9, 2021

How to Fix Twitter Not Working on iPhone

 Twitter not working on iPhone could result from various situations including the app itself, software or system glitches and poor internet connectivity. Do you have this problem? Well, in this problem-solving guide, we will introduce you some simple and advanced ways to get it resolved. 

Easy and Quick Fixes for Twitter Not Working on iPhone

1. Close out all of running apps

Apart from the Twitter app, closing out all other running apps is recommended. By doing so, you may fix the Twitter issue more effectively. To close out all of running apps, just follow the guide below:

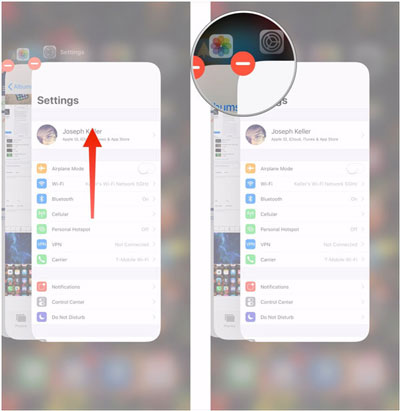
• Double-press the Home button to open the App Switcher (for iPhone SE, iPhone 8 and earlier), or from the Home Screen, swipe up from the bottom of the screen and pause in the middle of the screen (for iPhone X and later);

• Use your finger to swipe up on the app’ s preview until it disappears from the App Switcher.

2. Clear cache and data on Twitter

To clear the cache and data on Twitter, you need to:

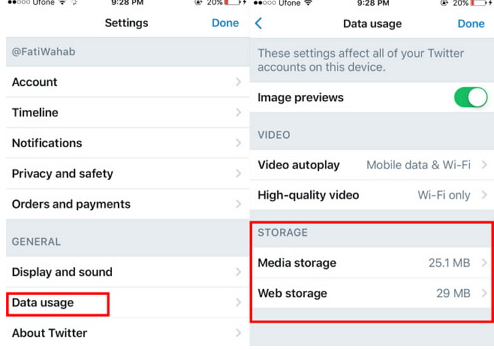
• Open the Twitter app and click the Me button in it;

• Click Settings > Data Usage > Media Storage one by one, then clear the cache;

• Next, choose Web Storage and clear the cache.

3. Update the app

To fix some app issues, software developers would release the updated version. Therefore, you may need to update the app to let it work normally.

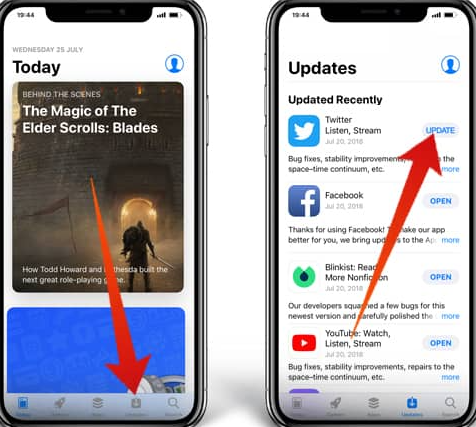
To check if you have the latest version of Twitter, open the App Store and tap Updates to see a list of the apps that can be updated. If there’s an update available for the Twitter app, tap the blue Update button.

4. Delete and reinstall the app

If all of the three solutions above are not useful, you can try to delete and install a new Twitter for your iPhone.

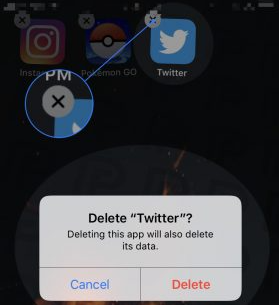
To delete the app: From your home screen, press and hold your finger on the Twitter app icon. An x will appear in the top left corner and then tap the x. Next, Tap Delete.


To reinstall the app: Open App Store, tap the search tab at the bottom of your iPhone, and type in Twitter. Next, click Get and then Install.

Advanced and Effective Methods to Solve Twitter Not Working on iPhone

If the app troubleshooting solutions listed above cannot fix Twitter not working on iPhone, you may try the remaining methods below one by one.

5. Use an iOS system recovery software to repair without data loss

In some cases, the Twitter app itself does not have any issue, so there is a possibility that your iPhone system is in trouble. While iOS system recovery software is just used to repair your iOS system.

TunesKit iOS System Recovery is a well-known desktop software that can easily fix your Twitter not working on iPhone due to system glitches. Besides, the main function of this software is to fix your iPhone stuck recovery mode, white and black screen, or boot loop. Of course, if your other Apple devices including iPad/Apple TV/iPod Touch are stuck in similar issues, TunesKit can help you. And users do not need to worry about its reliability, as TunesKit will ensure 100% security.

Characteristics of TunesKit iOS System Recovery:

1. Fix Twitter not working on iPhone without data loss.
2. Repair different tvOS/iOS issues at home.
3. Fix iOS system issues at a fast speed.
4. Easy to use with friendly interface.

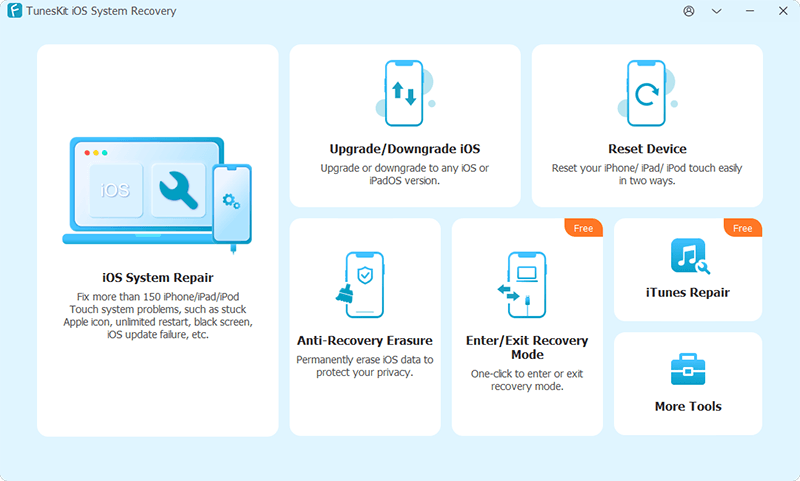
Step 1: Open Tuneskit and use a USB cord to connect your iPhone to the computer. If TunesKit detects your device, just click Start.


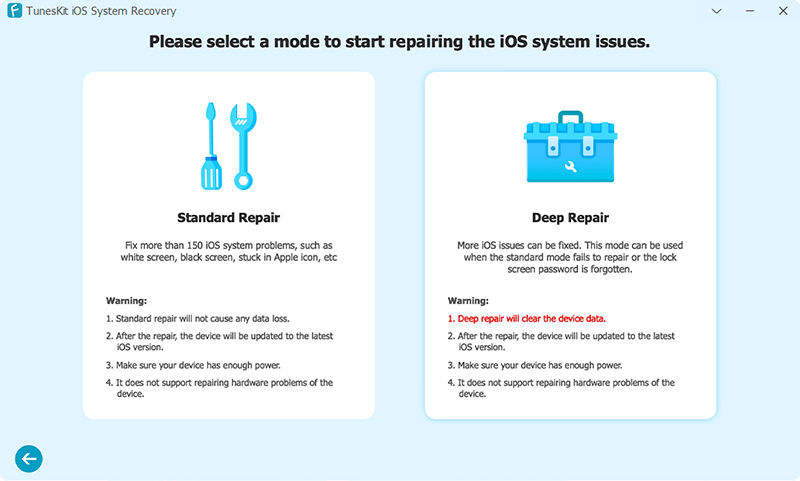
Step 2: Now, according to the software hint, select a mode (Standard Mode is recommended) and click Next.


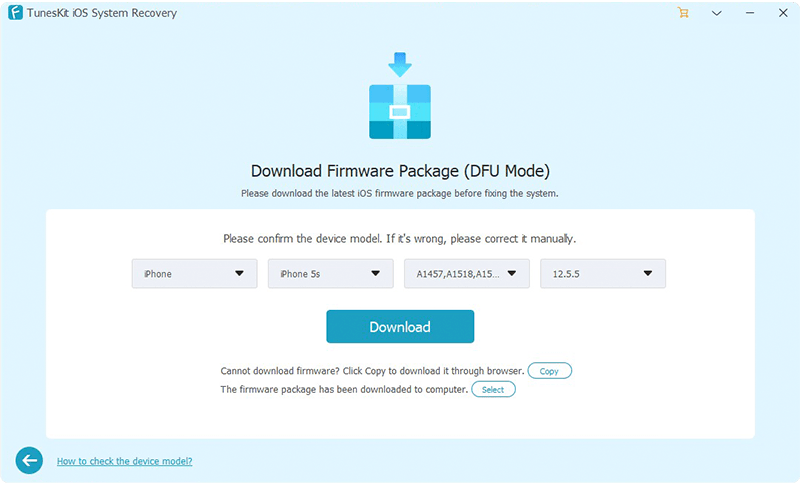
Step 3: Lastly, you only need to download the firmware package. Wait for a while and then click Repair to fix your device.


Note: If you do not fix the issue, there is another Advanced Mode offered for you. But this may erase your data, so be careful that you need to back up your data before using this mode.

6. Power off and power on your iPhone

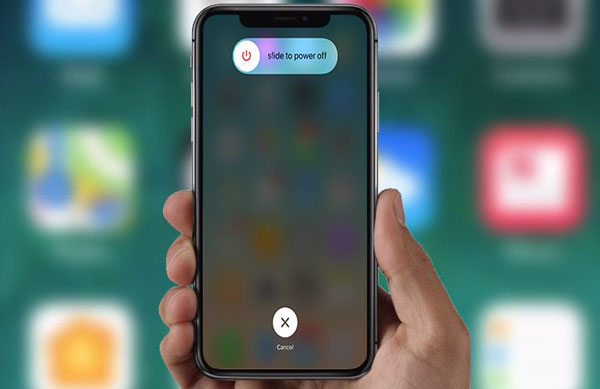
To restart your device, press the Power button (also Sleep/Wake button), and release the button when Slide to power off and the red power icon appear near the top of the screen. Swipe the icon from left to right to turn off your iPhone. Wait for a couple of seconds, and then press and hold the Power button until you see the Apple logo appears.

7. Update to the latest OS

When your iPhone may suffer from specific software issues, your device could be addressed by updating to the latest iOS version.

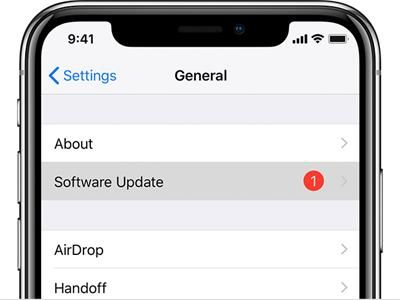
You need to tap Settings > General > Software Update. If you see an update, tap Download and Install.

8. Check internet connection

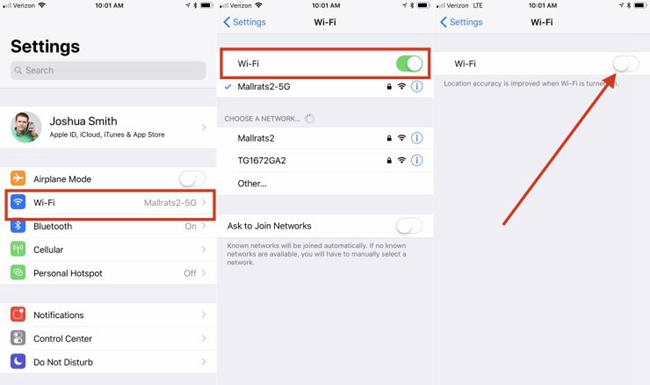
• Turn off and turn on WiFi: you can turn it off in the Control Center by tapping the WiFi icon. Or you may tap Settings > WiFi and then toggle on the button to turn it off. Wait for a while and turn it on again.


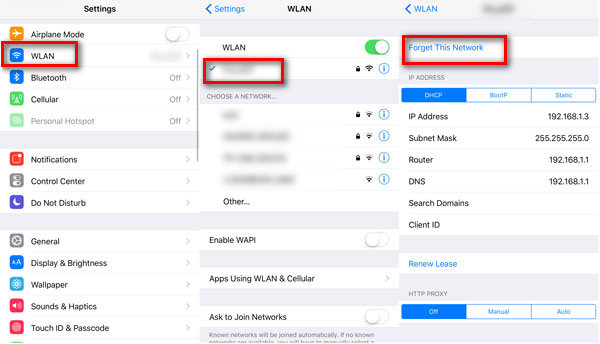
• Forget WiFi network: Tap Settings and then WiFi besides the WiFi network you want the iPhone to forget, tap more information (look like blue “ i ” icon), and then select Forget This Network. After you’ve forgotten the WiFi network, wait for a while and reconnect WiFi again.


• Connect a different network: Try to connect to a friend’s Wi-Fi network, or visit your local library, Starbucks, or restaurants to connect to free public WiFi.

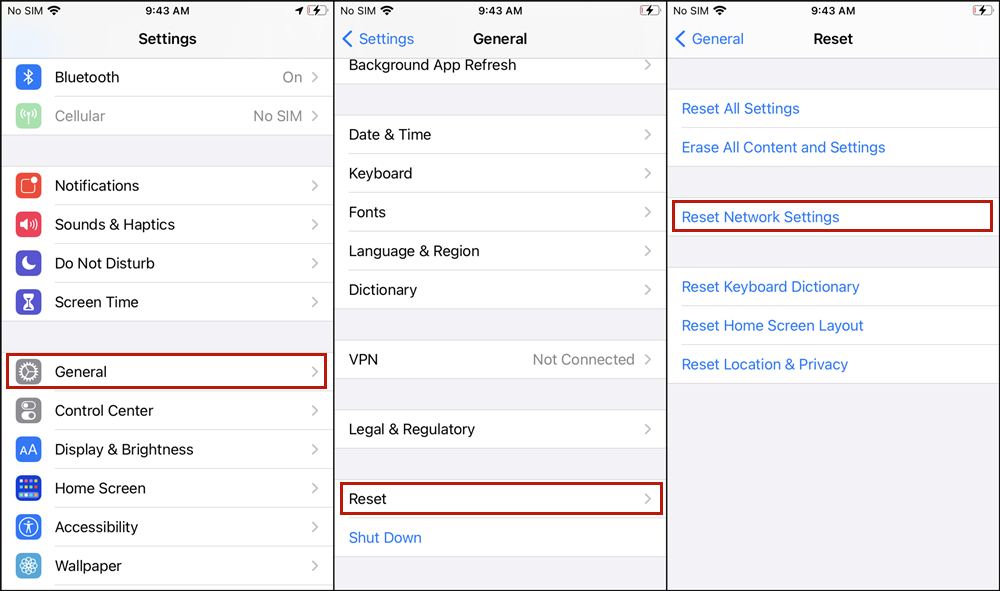
• Reset network settings: Launch Settings > General > Reset. Then, choose Reset Network Settings and enter your passcode. (Before doing so, make sure your WiFi passwords are noted.)

Conclusion

Whenever the Twitter app won't work on your iPhone, you can check the real solutions from this tutorial. All the fixes are easy, but TunesKit is well-positioned to fix the Twitter app not working on iPhone quicker. So download TunesKit is not a bad thing, and it can help you whenever you have a need.

Mar 4, 2021

Convert Audible AA/AAX Audiobooks to WAV

Want to convert Audible AA/AAX to WAV? If you want to convert the Audible audiobook files to other formats to play on some devices, it is not easy. This article will tell you some benefits of converting AA/AAX to WAV and the method to do this.


Why Convert Audible AA/AAX to WAV

Some users may ask why convert Audible audiobooks to WAV files? One of the top reasons is that AA/AAX which is owned by Audible is not recognized by other third-party players without authorization. By converting to WAV, it is possible to get access to the audiobooks on other devices as well as keeping 100% quality.

1. WAV file contains not only the audio part but also the metadata info including the bit depth, sample rate, channels, number, or tracks. It will keep all the nuanced details of your audiobook files after converting.

2. WAV supports lossy compression internally; you can use software such as Audio Compression Manager to compress it. But normally it is used uncompressed by default. You won't lose any quality by converting Audible books to WAV audio files. Also, editing is very easy as it doesn't require encoding or decoding.

3. WAV is derived from the Resource Interchange File Format (RIFF), which is a generic container for storing sound in chunks. As a result, it is supported by Windows, Mac, and Linux system, etc. you don't need to struggle to look for a special player for it.

How to Convert Audible to WAV

If you have decided to convert your Audible files, you just need to use an audiobook converter. Thanks to the TunesKitAudible Audiobook Converter, it has never been easier to convert Audible books to WAV. It comes with 100X faster converting to save you time substantially. It can also convert Audible audiobooks to Bose SoundLink and other devices easily.

Convert Audible Files to WAV with 3 Steps

1.   Import Audible Files

In order to convert your Audible audiobooks, you can drag and drop your downloaded audiobooks to the TunesKit Audible AA/AAX Converter’s main screen first. If you haven't download Audible books yet, you can refer to this passage: How to Download Audible Audiobooks Easily.

2.   Set Output Format as WAV

TunesKit software supports a couple of popular formats such as MP3, M4A, AAC, AIFF, WAV, FLAC, and so on. You can select one of the formats you want among them. Here I will choose WAV. Besides the output format, you may customize other settings such as splitting files, editing metadata, etc.

3.   Export the Audible Audiobooks

After you have done the settings, you can click the Convert button to export the Audible files to new WAV audio files. The WAV has rather large size. Please make sure you have enough space on your destination folder of the computer.

How to Play WAV Audios

Many players support WAV files. To play WAV audiobooks on your professional speaker, just open them on any compatible player to play it. Following is a list of the top 3 WAV players.

Windows Media Player. This is the official player for WAV files. It is usually available on Windows computers and Windows-based mobile devices.

VLC Player. It is the most popular cross-platform player, you can use it on Windows, Mac, Linux. With it, you can play WAV and plenty of other formats of files.

iTunes. It is a digital media store as well as a great player. It comes with Mac computers by default. For Windows computers, you need to manually download and install it.

Conclusion

After you read this article, you must know how to convert Audible AA/AAX to WAV. With the help of TunesKit Audible AA/AAX Converter, you can easily convert Audible audiobooks to other formats so that you can play them on any device easily.


For more: https://www.tuneskit.com/audiobook-tips/convert-audible-files-to-wav.html


Mar 3, 2021

Top Ways to Solve iPhone Volume Button Stuck

 When you tried to boost the volume on your iPhone, do you have the problem of the button not working and no sound strengthened? Generally, this is what we call iPhone Volume button stuck. The Volume button stuck on your iPhone could result from various reasons including software or iOS glitches, the button getting damaged, dirt and dust around the button, and more. Despite these, this issue can be easily fixed and we are gonna talk about top 8 solutions to get rid of the problem.

Method 1: Several Click the Volume Button

First and foremost, once your iPhone Volume button turns stuck, the possible situation could be it stuck inside. In this way, what you can do is to easily and continually press the button for several times until it becomes functioning.

Method 2: Clean the Volume Button

Besides, to make sure the normal performance of your iPhone Volume button for a long time, it's also necessary for you to timely remove the dirt and debris in the port by cleaning and rubbing it with a cotton dipped with few water.

Method 3: Check Charge Port and Headphone Jack

Similarly, checking the charge port and headphone jack of iPhone is significant, too. Because any wrong with them will lead to iPhone 6/7 Volume button stuck. So please clean your iPhone charge port and headphone jack apart from the Volume button.

Method 4: Force Restart iPhone

As is widely know that force rebooting an iPhone can deal with numerous iPhone problems. Likewise, you could force restart your device to resolve the Volume button stuck on iPhone.

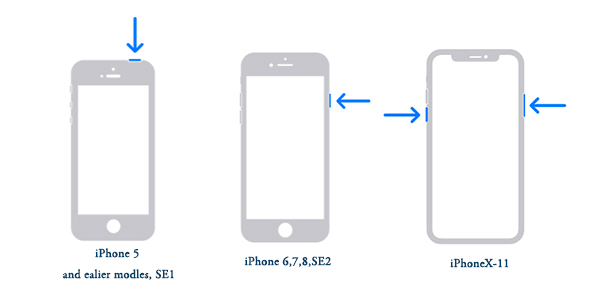
iPhone X/11, simultaneously press down the Side and the Volume buttons until the Slider appears, then drag on the slider to turn off the iPhone, finally hold the Side button to turn on it.

iPhone SE (2nd) /8 /7/6, hold down the Side button until the Slider appears and drag on the slider to power off your iPhone, finally press the Side button to power it on.

iPhone SE (1st) / 5 and former, press down the Top until the Slider appears, then pull on the slider to switch off the iPhone, finally hold the Top button to switch it on again.

Method 5: iPhone Software Update

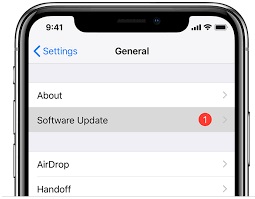
To avoid any software bugs causing your iPhone Volume button stuck, you need to update your iPhone to the latest version. Make sure your iPhone has enough battery and is connected to a stable Wi-Fi network, then go to Settings > General > Software Update, and click Download and Install option to wait for the process completed.

Method 6: Fix iPhone Volume Button Stuck with TunesKit

When it comes to the fastest and the most workable solution to fix a stuck volume button on an iPhone, then it should be various professional iPhone repair software coming to your mind. Just take TunesKit iOS System Recovery as an example. It is a powerful tool to fix different kinds of iOS issues including the iPhone Volume button stuck without any data loss under the Standard Mode. Moreover, it is able to be compatible with all iOS versions and almost all iOS devices. Finally, let's have a look at how TunesKit iOS System Repair troubleshoots the Volume button stuck on your iPhone with only a few clicks.

Step 1: Open the program and use a USB cable to connect your device to your computer. Tap on the Start button, and then set the repair mode as Standard Mode and click the Next button. After that follow the prompts from the window.


Step 2: You need to confirm your iPhone info. Correct it manually if any information is wrong. Then press the Download button to get matched firmware package downloaded and verified.


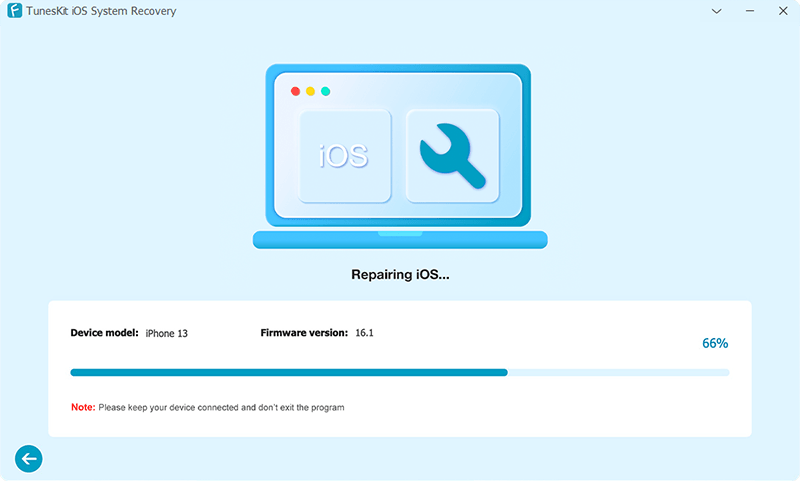
Step 3: When the downloading finishes, just press the Repair option to allow the software fix the stuck volume button on your iPhone. Keep your iPhone connected to the computer until the program completes fixing.

Method 7: Restore iPhone through iTunes

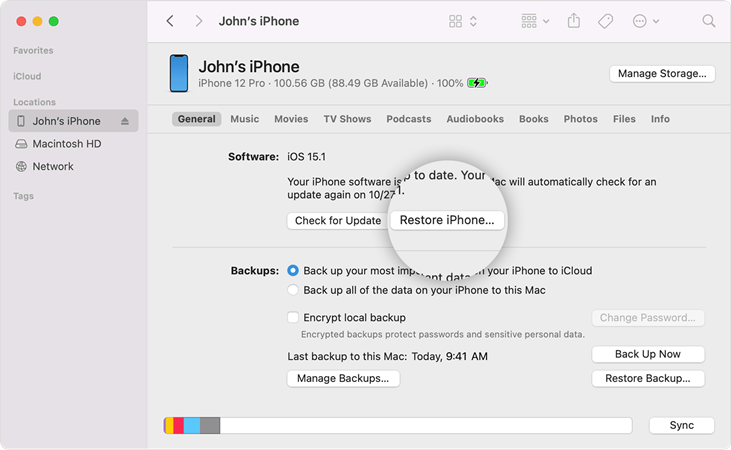
You may also favor the application of iTunes. If so, you could of course use the app to restore your iPhone to factory settings. You can understand from the implied meaning that this fix will delete all data and settings on your iPhone. Therefore, you are suggested to have a backup before proceeding in the steps here.

Step 1: Run the latest iTunes app on your computer and connect your iPhone to the computer.

Step 2: When your device is detected, click Summary tab.

Step 3: Choose Restore iPhone option.

Method 8: Contact Apple Store

In the end, if it is the case of your iPhone Volume button is broken or has other physical damage, then you might have to visit a repair store or directly head to a nearby Apple Center to ask for advice. In most situations, they may replace your broken Volume button on your iPhone with a new one.

Conclusion

Hope these 8 ways are workable for you to fix your iPhone Volume button stuck. Any other questions or suggestions, welcome to give your valuable comment below.

Mar 1, 2021

Fix Split Screen or Multitasking Not Working on iPad

 If you are looking for ways to solve your iPad split screen or multitasking feature not working, then you are in the right page. In the following contexts, we will introduce 6 best fixes for the issue.

First of all, usually, the split screen not working on iPad, in other words, iPad multitasking broken mostly is due to wrong settings, software, and iPadOS bugs. Don't worry, you can get started right now to get rid of this issue.

Method 1: Check Multitasking Settings

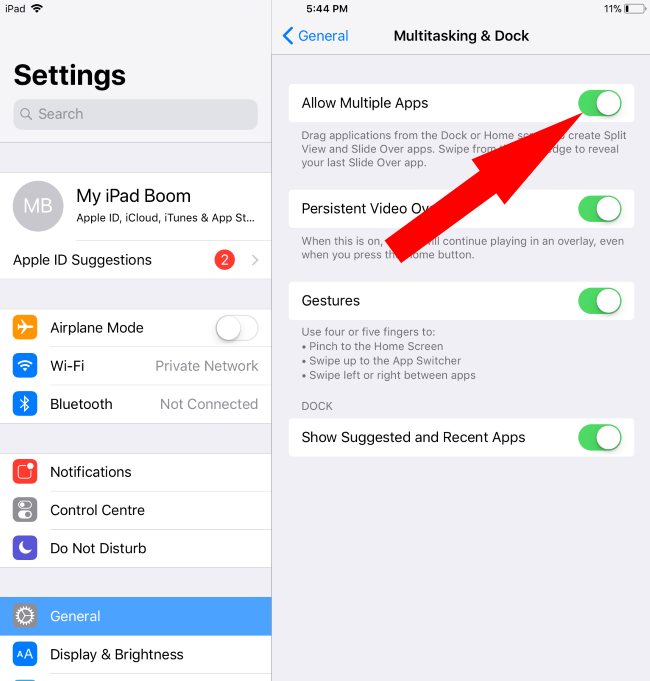
First of all, when you are unable to operate multitasking on iPad, you have to check whether you turn on the multitasking feature. If you have done that already, you can still switch it off and on to fix your iPad multitasking broken. Otherwise, please follow the instructions below.

Step 1: Open Settings on your iPad and go to General tab.

Step 2: Find Multitasking & Dock option.

Step 3: Toggle on Allow Multiple Apps.

Method 2: Turn on Auto Rotate Screen Mode

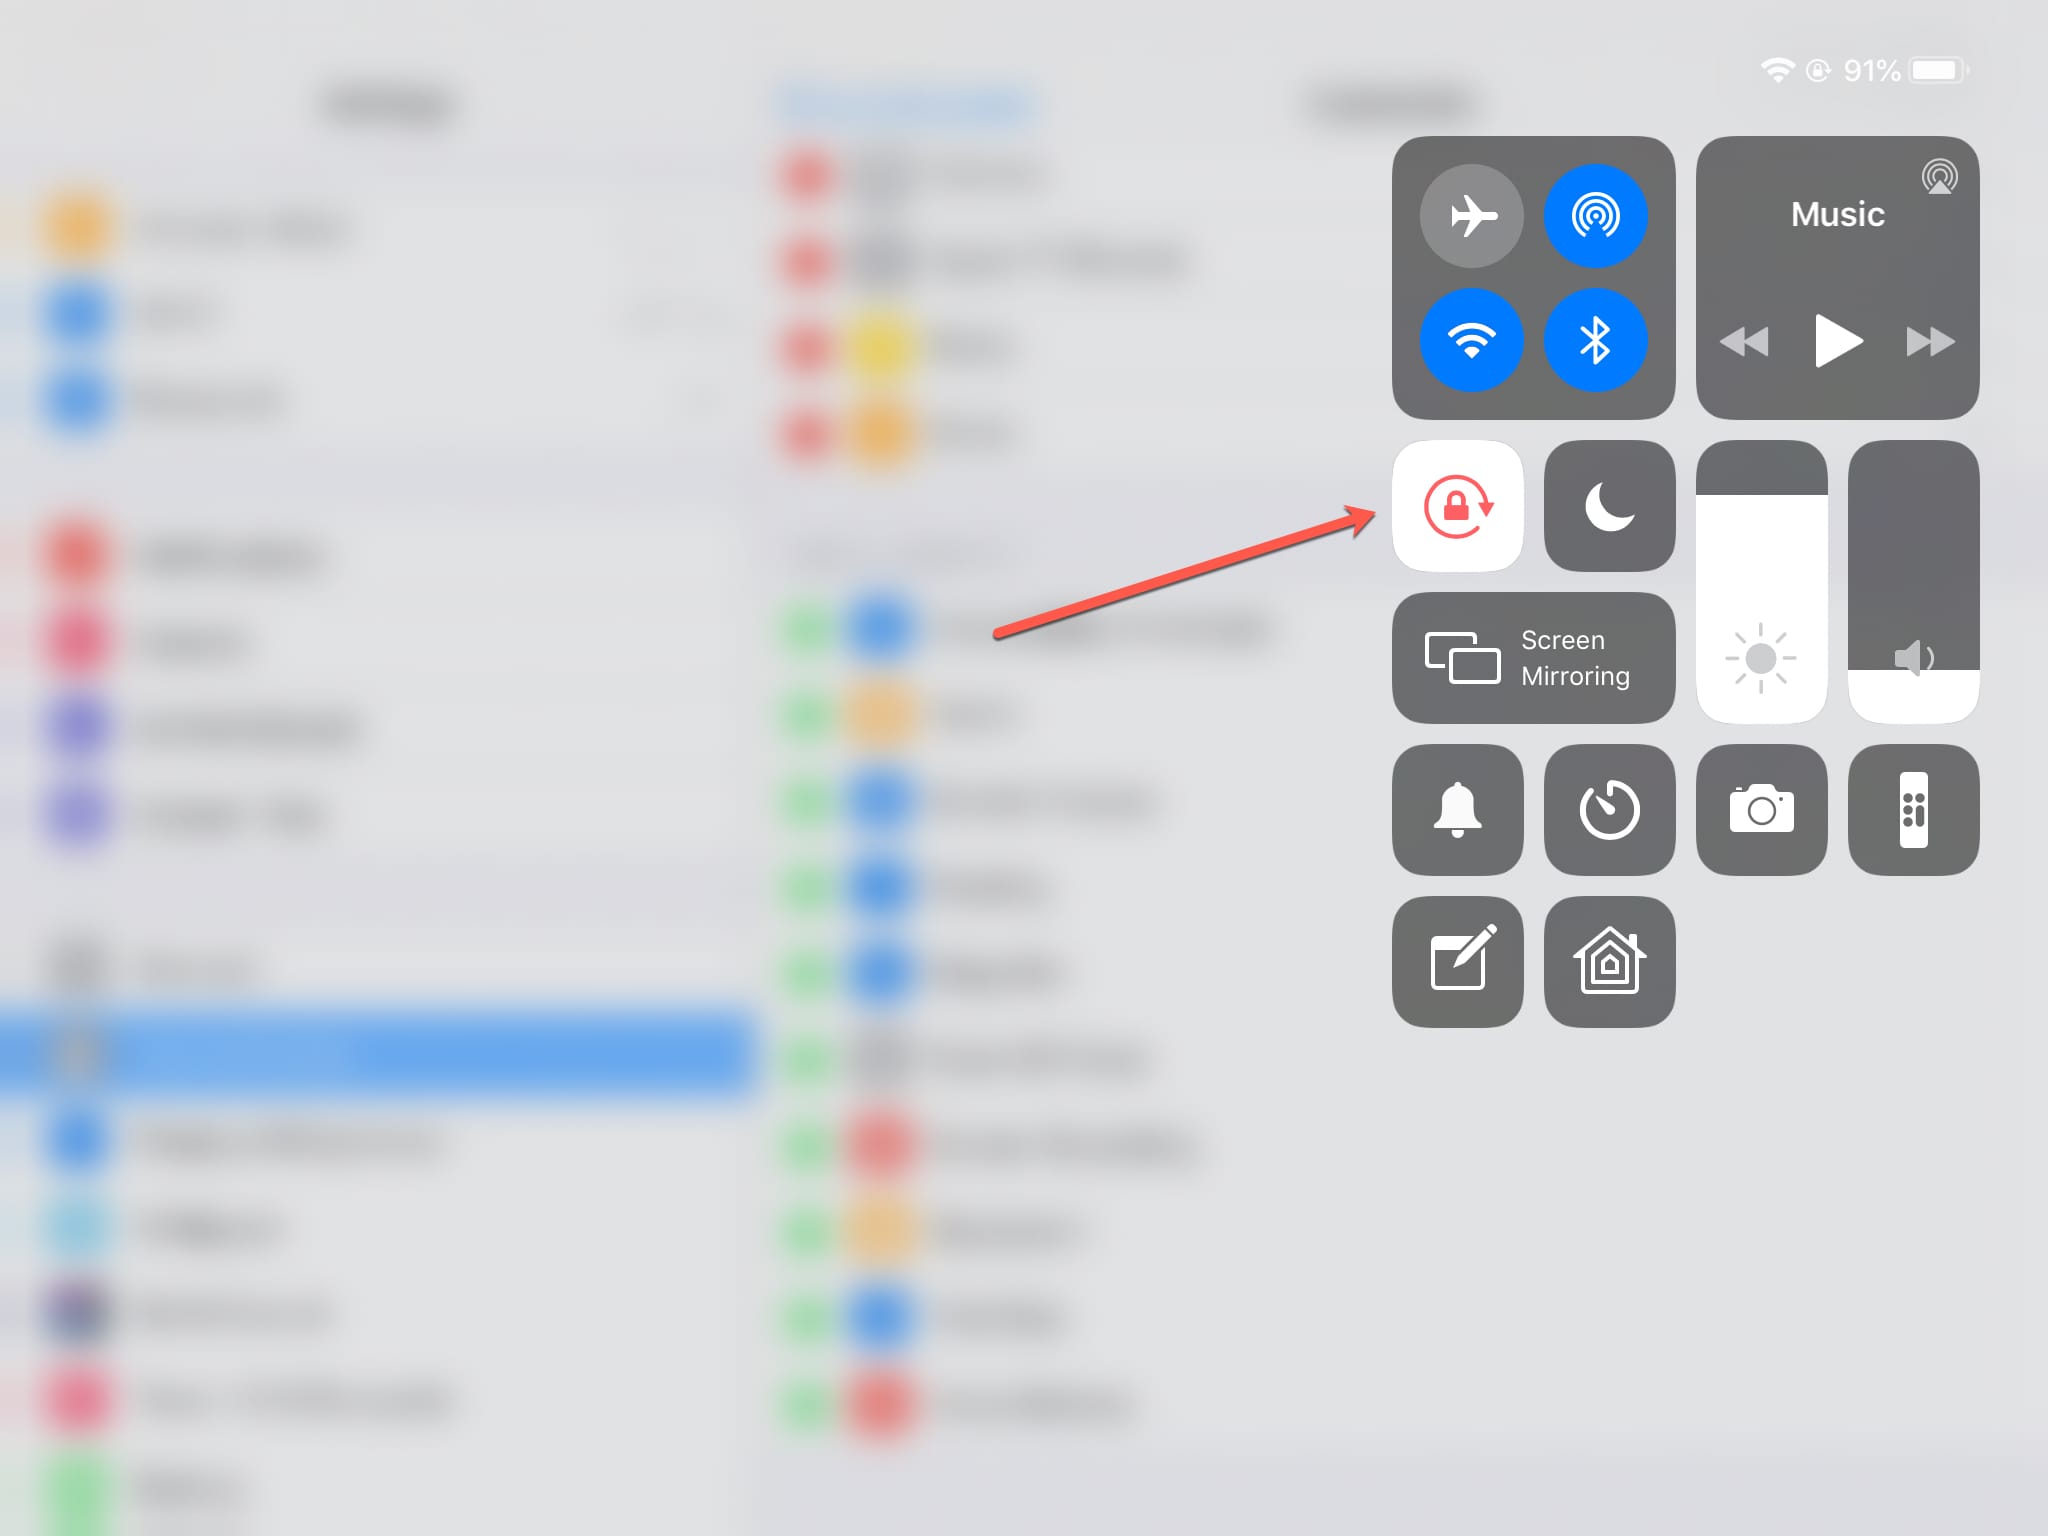
Turning on Auto Rotate Screen mode may be also possible in dealing with split screen on iPad not working. To do that, simply launch control center on your device by swiping up from the bottom of screen, tap on Rotation Lock button displayed like a padlock surrounded by a rotating arrow and situated on the right corner.

Method 3: Update iPadOS

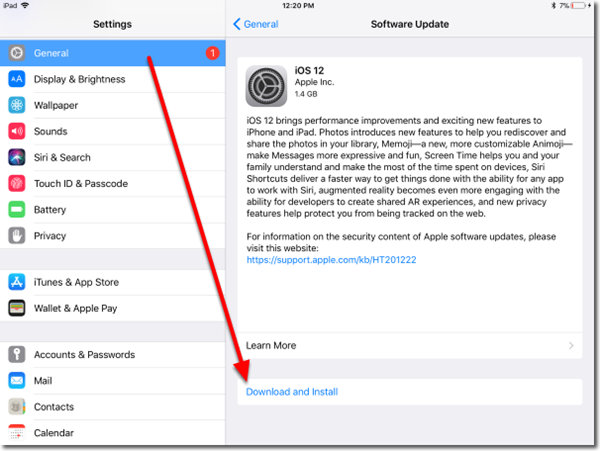
Have you updated your iPad to the latest system? If not, then you need to complete that process, as an older iPadOS version might give rise to some errors, iPad split view not working included. To avoid it, you can head to Settings > General > Software Update, and click on Download and Install if it is available.

Method 4: Force Restart iPad

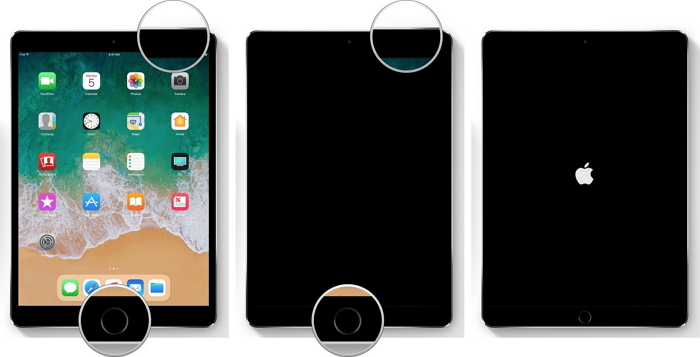
Hard rebooting iPad is worthwhile being tried to get iPad not splitting screen problem resolved. Please do the procedures according to your iPad model.

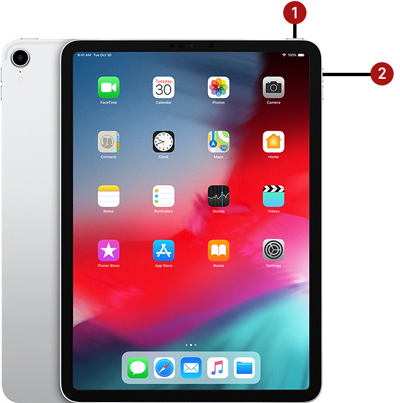
To force restart iPad with Home button, press down the Home button and Power button at the same time until the Apple logo appears on the screen.


To force reboot other iPad models, quickly and respectively hold and release Volume Up button and Volume Down button, then long press the Top button until the Apple logo pops up on the screen.

Method 5: Apply iPad Repair Software

Beside the above ways, you can directly try out this effective and quick fix – using TunesKit iOS System Recovery and other iOS repair tools to resolve split screen on iPad not working. This powerful third-party program can definitely bring the trouble to end while causing no data loss under the Standard Mode.

Key Functions of TunesKit iOS System Recovery:

1. Fix 50+ iOS and Apple TV issues without data loss;
2. Enter/exit recovery mode with only 1 click and free of charge;
3. Compatible with all iOS versions;
4. Available for both Windows and Mac computer;
5. Support downgrading iOS versions.

Step 1: At first, connect your iPad to your computer. Now you should download and run TunesKit iOS System Recovery. Click the Start button.


Select the Standard Mode to fix iPad not splitting screen without any data loss. Then tap on Next button.

Step 2: Make sure the information related to your iPad displayed is right. After that, click Download button to get matched firmware packaged downloaded and verified.

Step 3: At the last step, press down Repair button to unzip the firmware package and wait the software to fix your iPad. When it's done, your iPad can perform multitasking normally.

Method 6: Restore iPad Through iTunes

Finally, you can still choose the alternative – restoring your iPad via iTunes to solve iPad not splitting screen. But this solution is often not recommendable unless you have a backup of data on your iOS device. Because the following steps will bring your iPad to factory settings, namely, all data removed.

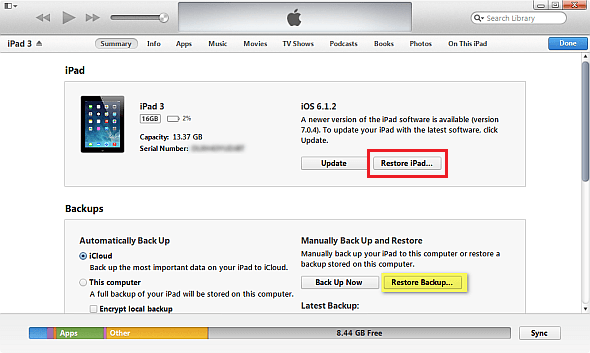
Step 1: Run latest iTunes app on your computer and connect your iPad to PC.

Step 2: Once the app detects your device, go to Summary tab.

Step 3: Click Restore iPad button.

Verdict

There are top 6 methods now you understand to fix split screen or multitasking not working on your iPad. Hope you can successfully get your problem resolved.