The error message "iPhone cannot verify server identity" keeps appearing and some people are frustrated about that. Several different parts are responsible for the problem. First of all, an expired server certificate will interrupt the connection. Besides, an attempt to switch to a new mail account also causes the notification is shown. Of course, other errors in the app and the iPhone system sometimes cause the server identity verification problem. But luckily, there are feasible ways to solve it and you can start fixing now.

Way 1: Restart the Mail app
When your iPhone mail cannot verify server identity, please force quit the app first and then restart it. To do that, double press down the Home button or swipe up the control center and remove all apps running in the background including the Mail app. Next relaunch it to see whether the message still appears.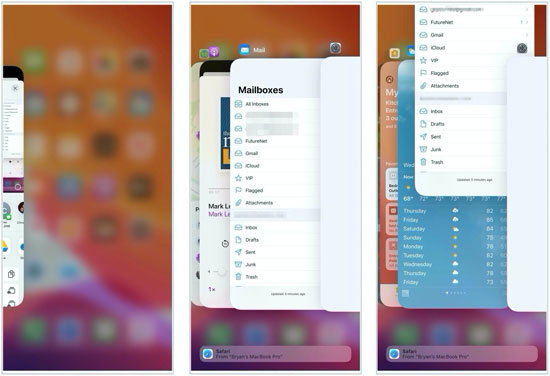
Way 2: Re-add your Mail account
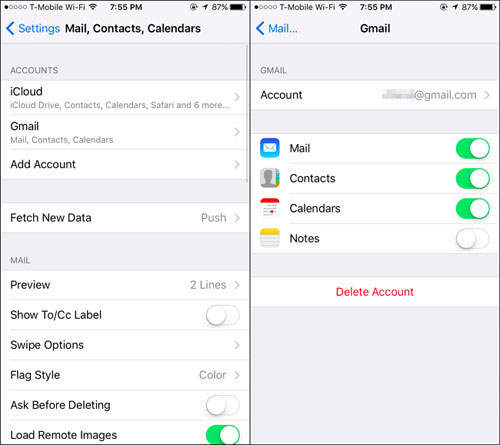
Email accounts are the culprits of iPhone cannot verify server identity at some times. To fix it, simply try to delete your account and then add it as the steps below.Step 1: Click "Settings" > "Passwords & Accounts" > "Mail" or "Mail, Contacts, Calendars".
Step 2: Tap on "Accounts" option and choose your connected account to click "Delete Account" button.
Step 3: After the deletion, go to the "Accounts" menu to select "Add Account" option to sign in your mail account.
Way 3: Update iOS
Apple company also recommend updating iPhone's system to the latest so as to resolve cannot verify server identity iPhone. If you haven't done that, just go to Settings > General > Software Update, download and install the latest iOS system.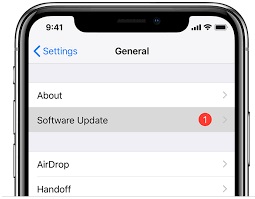
Way 4: Force reboot iPhone
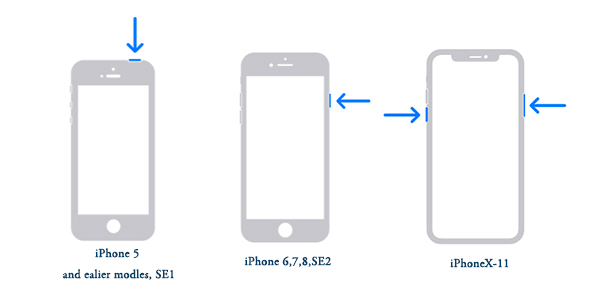
But usually, iPhone software update doesn't solve the problem. In this way, you could try force restarting your iPhone to remove some software glitches that may pose dangers to the mail server connection.To force reboot iPhone X/11, press down the Side and the Volume buttons until the Slider appears, then pull on the slider to power off the iPhone, finally hold the Side button to open your device.
To force reboot iPhone SE (2nd) /8 /7/6, press down the Side button until the Slider appears and drag on the slider to close your iPhone, finally hold the Side button.
To force reboot iPhone SE (1st) / 5 and former, press down the Top button until the Slider appears, then drag on the slider to turn off the iPhone, finally hold the Top button.
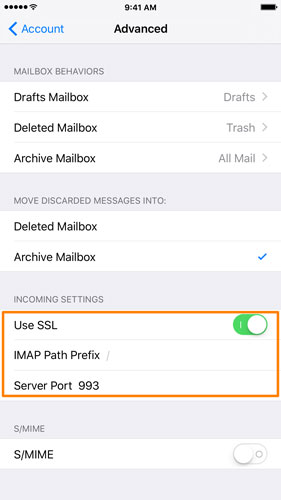
Way 5: Switch SSL off
If you want to add another mail account yet the message just notifies you that the iPhone cannot verify server identity, then you could switch off the SSL button to achieve that without verification.Step 1: Navigate to Settings > Passwords & Accounts.
Step 2: Select your mail account and tap on the Advanced option.
Step 3: Disable Use SSL button.
Way 6: Reset network settings
Under poor network connection, your iPhone mail may cannot verify server identity verification. In such a case, what you have to do is to remove all of your network settings by heading to Settings > General > Reset > Reset Network Settings.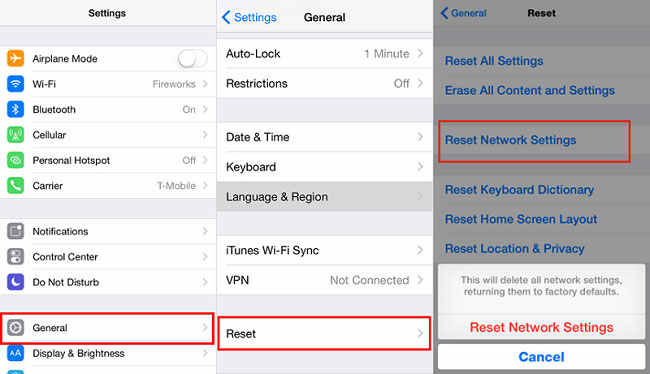
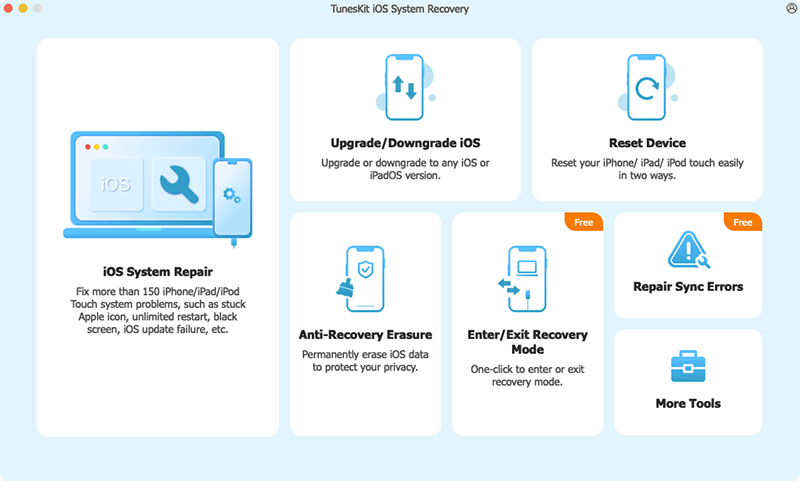
Way 7: Restore iPhone system [Hot]
If unfortunately, the above ways fail to fix the issue, then you are highly suggested to use the warmly welcomed solution – using a professional iOS system repair tool such as TunesKit iOS System Recovery. This mighty third-party software, without losing any data, is able to fix various kinds of iOS issues including your iPhone cannot verify server identity, and more. Want to know how it settles the trouble? Please follow the simple steps presented here.Step 1: Download the application on the TunesKit official website. Then double click to open this program on the computer. Next, connect your iPhone to a computer until it is being detected. After that, click the "Start" button.
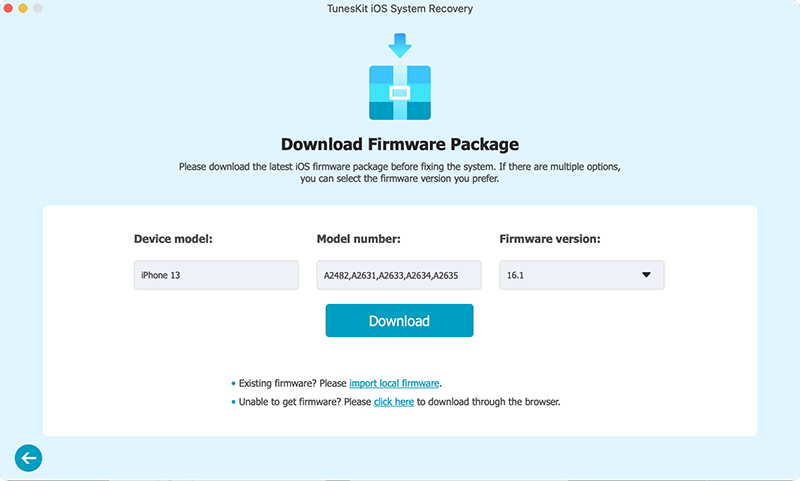
Step 2: Choose the Standard Mode. Next, check whether your device model, version and other information are correct. Then, tap "Download" button and this software will download the firmware package matched with your iPhone. Then wait it quickly verifying the firmware.
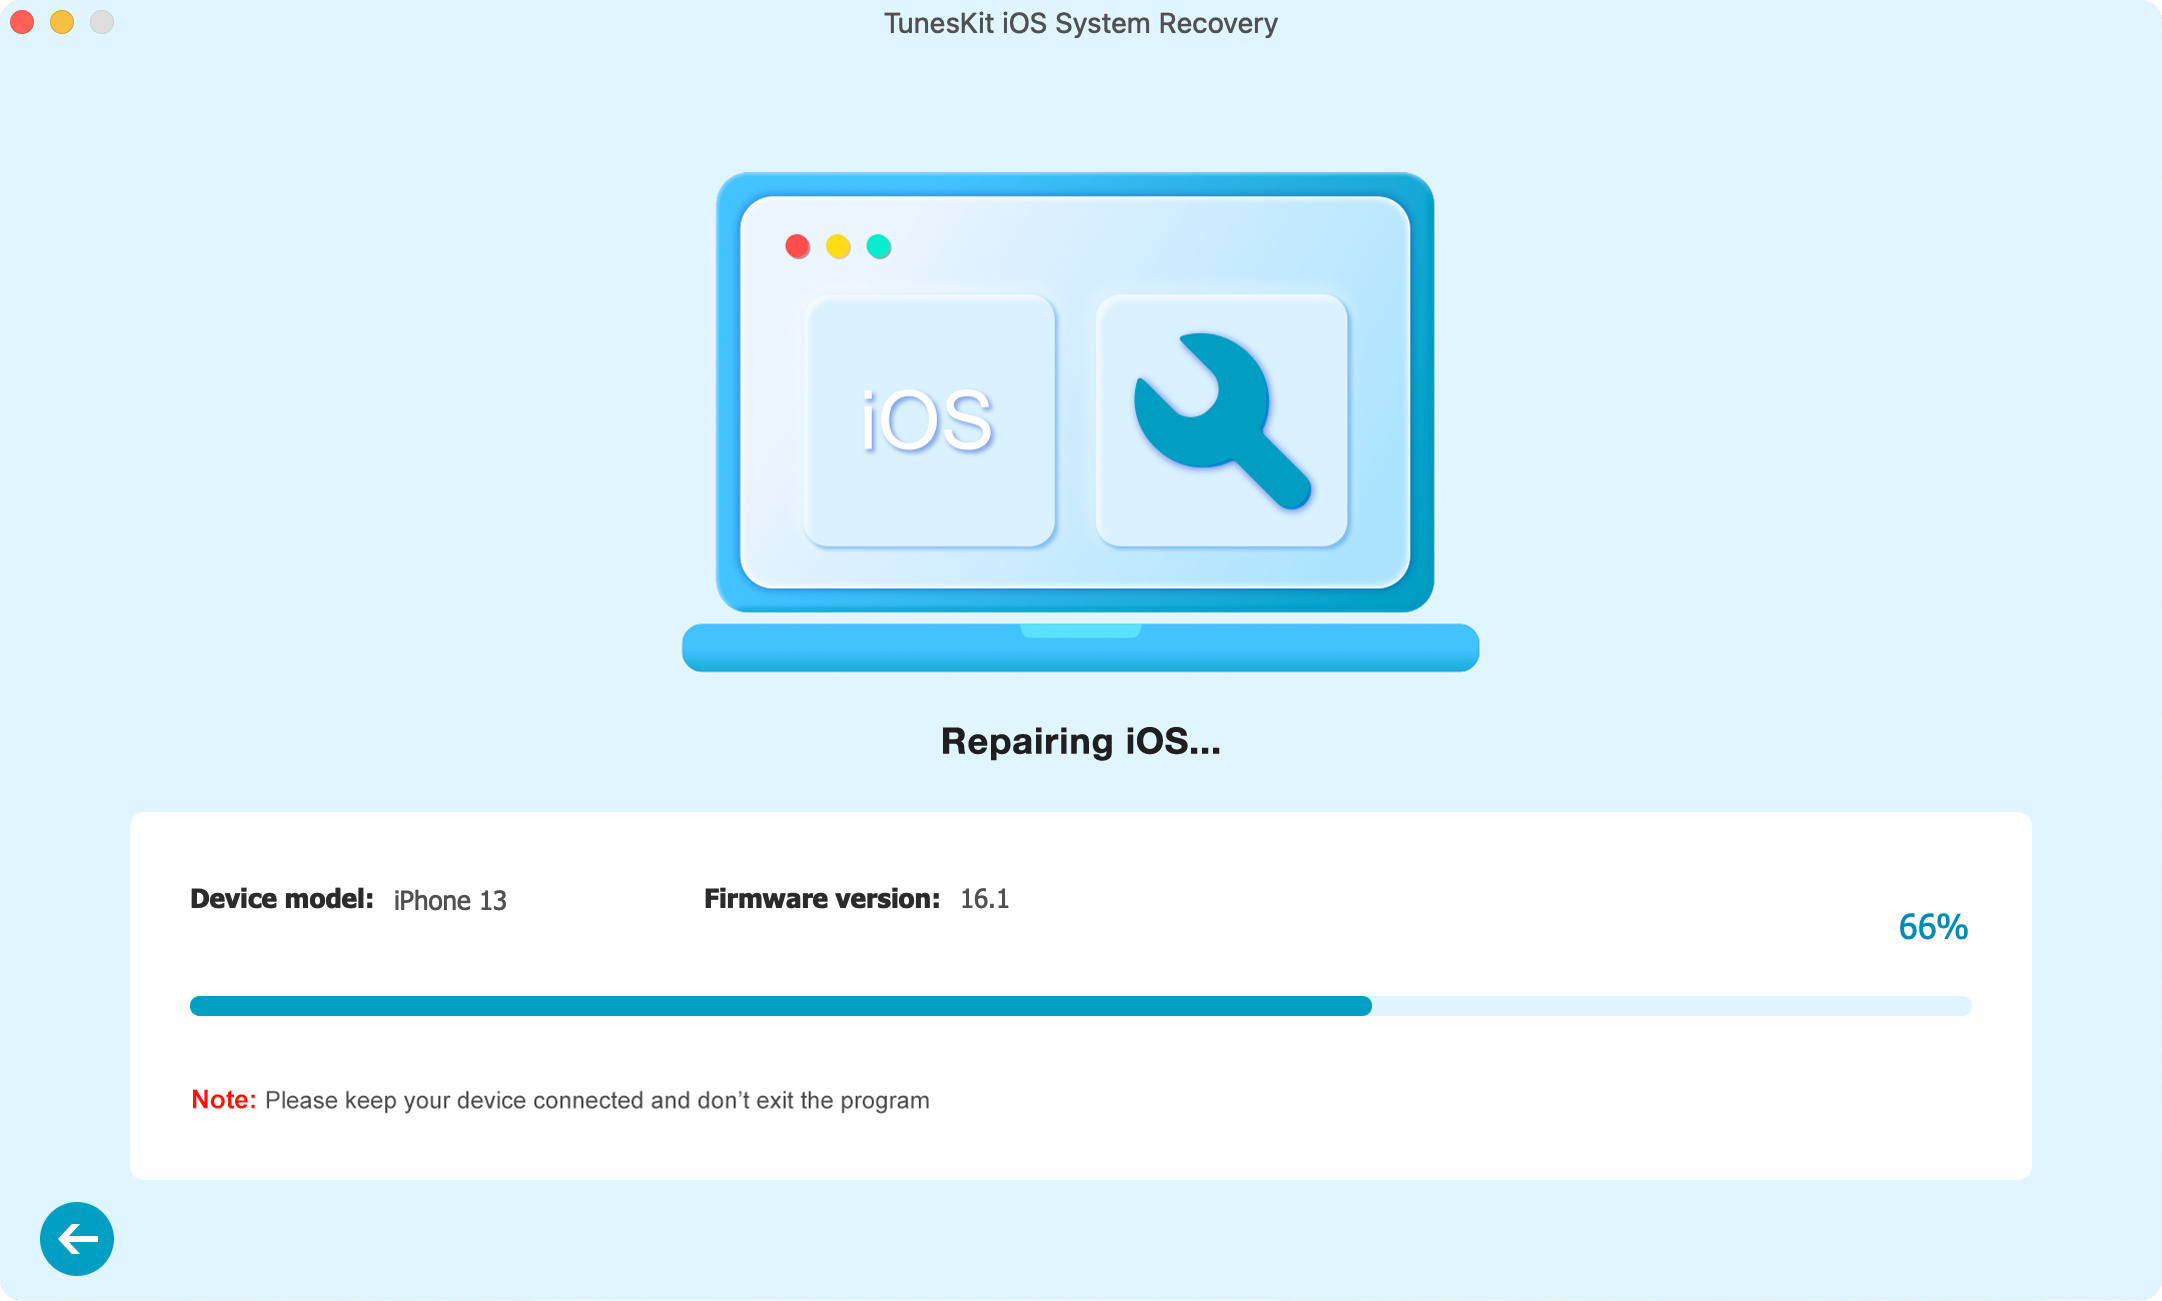
Step 3: After the firmware package has been downloaded successfully, hit on the "Repair" button on the right corner to fix the iOS system. Finally, your iPhone cannot verify server identity will be resolved.
Final words
These are almost all workable solutions to solve your iPhone cannot verify server identity and we sincerely hope that your problem could successfully be resolved. Any questions? Please give your comment below.
No comments:
Post a Comment