Have you ever seen the error 4013 or 4014 when updating or restoring your iPhone, iPad, or iPod touch? Well, many users have encountered this trouble. And I'm also one of them. Now let me tell you how I finally fix this iPhone error after trying some methods.

To deal with the restored iPhone error 4013/4014, I did some research and tests and provide 9 solutions for you. Since this iPhone restore error may also occur in iPad and iPod, the solutions in this article also work for error 4013/4014 on them.
First of all, let's see a video about how to fix iPhone/iTunes error 4013 and 4014.
Solution 1. Fix Connection
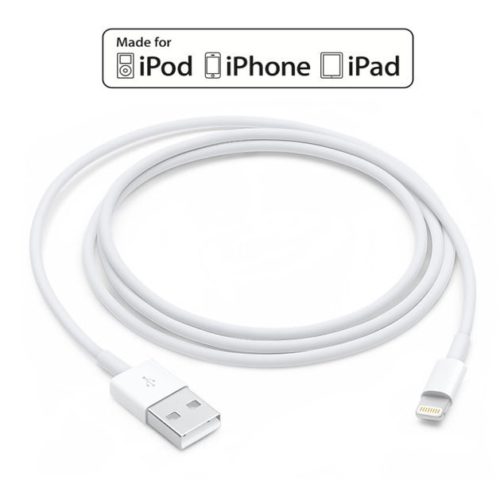
Only Made for iPhone/iPod/iPad cables and adaptors can ensure the perfect connection. If you are using the computer to update or restore your iPhone when error 4013 or 4014 happened, then the cable or adaptor you are using is possibly the culprit.
To check whether you are using the Made for iPhone/iPod/iPad cable and adaptor, follow the steps below using the current cables and adaptors:
Step 1. Connect other iDevices with your computer and see if the iTunes error notification pops up. If it occurs again, then these two accessories may not be designed for Apple devices.
Step 2. Connect other iDevices with other computers. If the error warning still shows up, then it is possible that the accessories are not a Made for Apple one.
Step 3. Switch to a Made for iDevices USB cable and adaptor and see if the notification appears again.
If the error notification shows up in any one of the 3 tests above, you may consider switching to a set of Made for iPhone/ iPod/ iPad cable and adaptors.
It is important to make sure the port is not covered with dust or other matters because an uncleaned port can obstruct connection. Also, make sure the USB cable is connected directly to the phone port. Try removing the third-party battery or case if necessary.
Solution 2. Hard Restart the iPhone
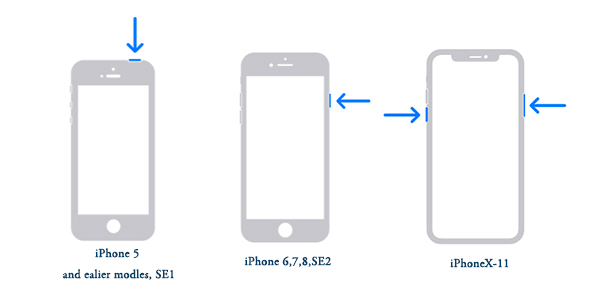
It would be surprised how many issues a simple restart can eliminate. iTunes errors related to software issues, such as software crashes, can be resolved using this method. Usually, those who encounter error 4014 are iPhone 6 or iPhone 6s users, and they can resolve this problem by this hard reboot way.
However, to achieve a complete restart, you need a hard restart so that the glitch will actually disappear. The way of hard reboot varies among different models of iPhone, and you can follow the quick instructions below to hard restart your device.
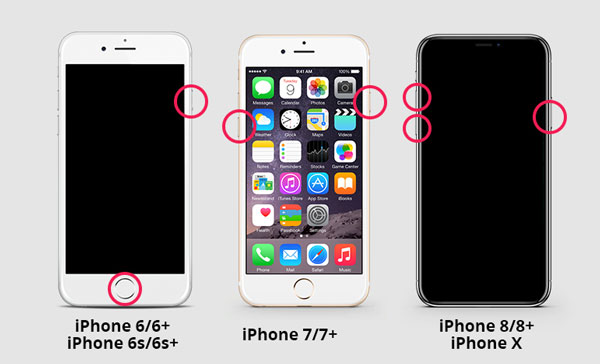
For iPhone 8 and later:
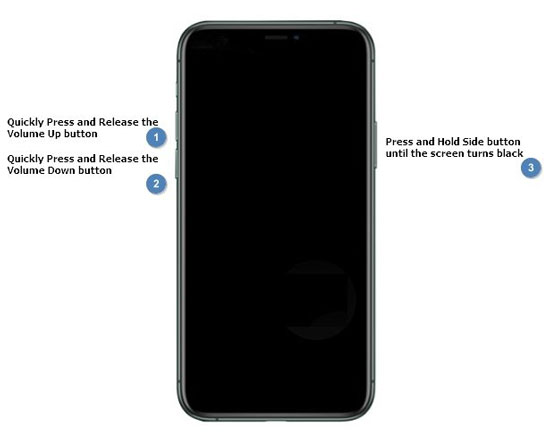
· You can press and quickly release the Volume Up button. Then press and quickly release the Volume Down button. Finally, press and hold the Side button until the Apple logo appears.
For iPhone 7 and 7 Plus:
· Press and hold both the Side button and Volume Down button until the Apple logo appears.
For iPhone 6s and earlier:
· Press and hold both the Side button and Home button until the Apple logo appears.
Solution 3. Check Wi-Fi Network
If Wi-Fi isn't running well or is poor, the replacement system can be interrupted and you'll obtain a mistakes message. Therefore, to make sure you've got a proper Wi-Fi connection, try to reset the network setting.
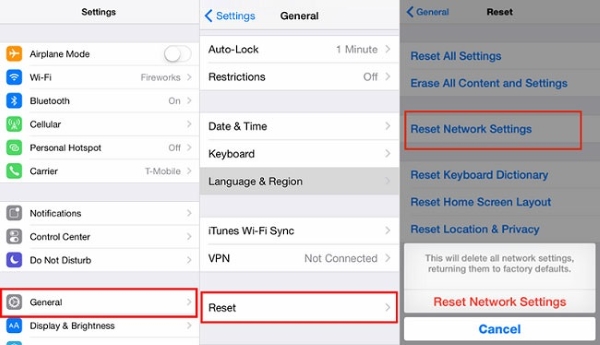
Reset your device's network settings can start the connectivity of the iPhone with Wi-Fi all over again. This is a treatment for iTunes error 4013/4014, considering the fact that a terrible connection also can moreover disconnect the device. This will really impart you with that annoying error message. In this case, follow the below steps:
Step 1. Unlock your iPhone first, and from the main screen, click on "Settings" → "General" → "Reset" → hit "Reset Network Settings" afterward.
Step 2. If prompted, enter the passcode and again tap "Reset Network Settings" to confirm.
When resetting is completed, the subsequent thing to do is to restart the Wi-Fi router. You simply require unplugging the power source. After a few minutes, connect it once again and attempt updating to the new iOS.
Solution 4. Updating iTunes to the Latest Version
In many cases, iPhone restore error 4014/4013 occurs also due to the older versions of iTunes. Updating iTunes on both your phone and computer to the latest version will eliminate this cause. To update iTunes on your computer:
To update iTunes on your computer:
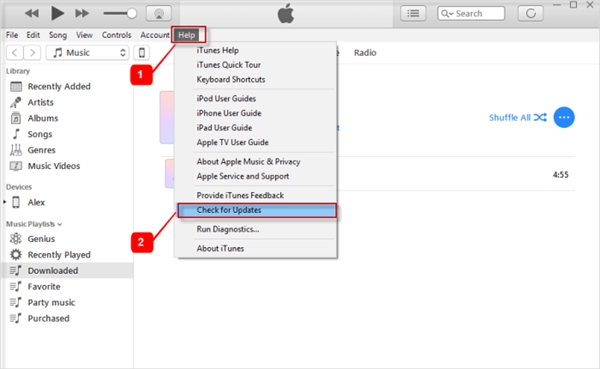
Step 1. Open iTunes and find the "Help" menu, where you can see the "Check for Updates" button.
Step 2. Click on it, and iTunes will automatically check for the latest version. If there is a newer version, simply update it.
To update iTunes on Mac computer:
Step 1. Open the App Store on your Mac.
Step 2. At the top of the window, find Updates and click it.
Step 3. Check there has any available macOS or iTunes updates, if yes, click Install.
Now with the latest iTunes, updating or restoring your iPhone would succeed.
Solution 5. Clean Up Your iPhone
Free space is required for the operating system to function properly. The system allocates space on the device for this purpose, but each update installed on the device consumes more and more space. The error may appear due to a lack of storage on your iPhone to accommodate the update.
In this case, you need to delete or transfer as many unwanted files as possible. For example, you can move unwanted photos, videos, music, and other documents. This complete guide helps you retrieve more space.
Solution 6. Factory Reset on Your iPhone
This method will put you at iPhone data loss risk, so remember to back up your valuable data to iCloud or iTunes first. Follow the below step:
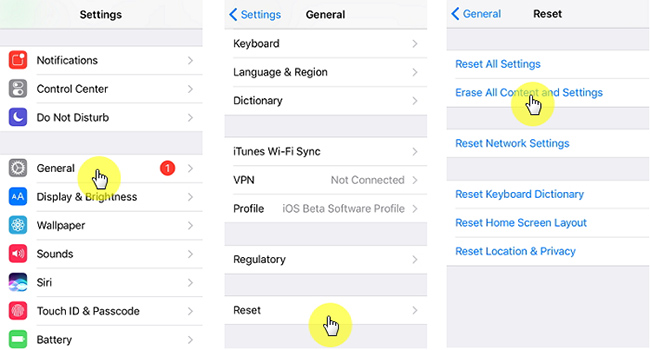
Step 1. Inside Settings → General → Reset → Tap on Erase All Content and Settings.
Step 2. Now, enter your passcode and click on Erase iPhone.
Solution 7. Entering DFU Mode
Try putting your iPhone or iPad into DFU mode if none of the above methods worked. However, restoring to a new state will erase all data on the device. Such as photos, videos, music, app settings, etc. Similar to applying the previous method, remember to back up your iPhone before doing this.
You can enter DFU mode by connecting your iPhone to your PC and following the steps listed below (applicable to iPhone 8, iPhone 8 Plus, and iPhone X):
Step 1. Press the Volume Up button, followed by the Volume Down button.
Step 2. Then press and keep holding the Side button until the iPhone screen goes black.
Step 3. Simultaneously hold down both the Side button and Volume Down button.
Step 4. Continue holding the Volume Down button but release the Side button.
Step 5. If the device is in DFU mode, it will not display anything on the screen. The device will be detected in recovery mode if iTunes is open on your system.
Step 6. Now restore your iPhone with iTunes. There should be no more error 4013 or 4014.
Note: Restart your iPhone/iPad if you need to exit DFU Mode anytime.
Solution 8. Fix iPhone Error 4013/4014 with TunesKit iOS System Recovery [100% Effective]
Should the previous solutions fail, then the cause could be that your iTunes is corrupted or glitches. This is a grim situation because to fix iTunes on your phone you need to restore your iPhone with iTunes, which means your personal data will be erased.
Fortunately, there is another option — TunesKit iOS System Recovery, an iOS system recovery tool. Though it costs a small amount of money, the software will definitely make your iTunes back to normal.
TunesKit iOS System Recovery is probably one of the best iOS system recovery software. It guarantees to solve 50+ iOS issues, including iPhone error 4013/4014, iPhone stuck on recovery mode or stuck on Apple logo, etc. Most importantly, your data will remain intact after the recovery. And the problem you initially restore your phone to resolve might get fixed in the process.
The rest main advantages of this software as well as its free trial downlinks are listed below.
TunesKit iOS System Recovery Key Features:
- Resolve 150+ iOS issues and iTunes glitches
- User-friendly interface and easy to operate
- 3 quick steps to finish the whole operation
- No data loss in the Standard Mode
- Lowest price among similar products
Tutorial of using TunesKit iOS System Recovery:
Try to download the software and experience it yourself. This tutorial will tell you how to use TunesKit iOS System Recovery exactly.
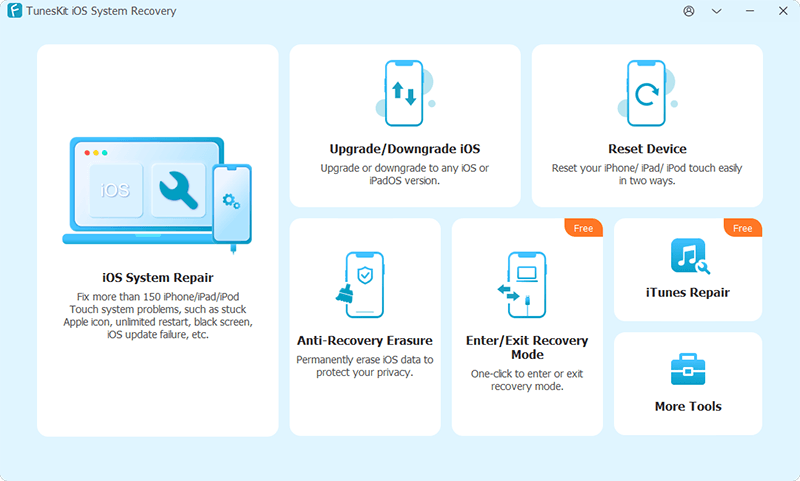
Step 1: Open TunesKit iOS System Recovery and connect your iPhone to the computer (make sure the connection is fine in advance). Press the Enter Recovery button to let your phone enter the recovery mode, then just click the Start button to begin.
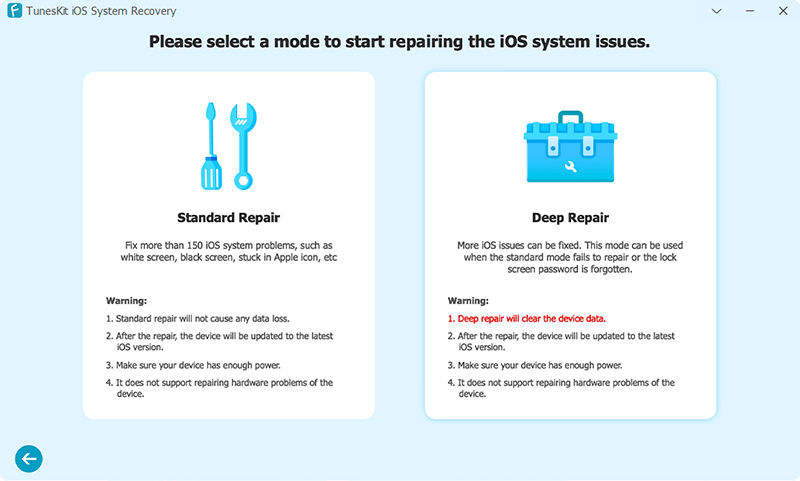
Step 2 Click the Standard Mode to fix iPhone error 4014/4013 without data loss. Be aware not to choose the Advanced Mode because it will erase all your personal data.
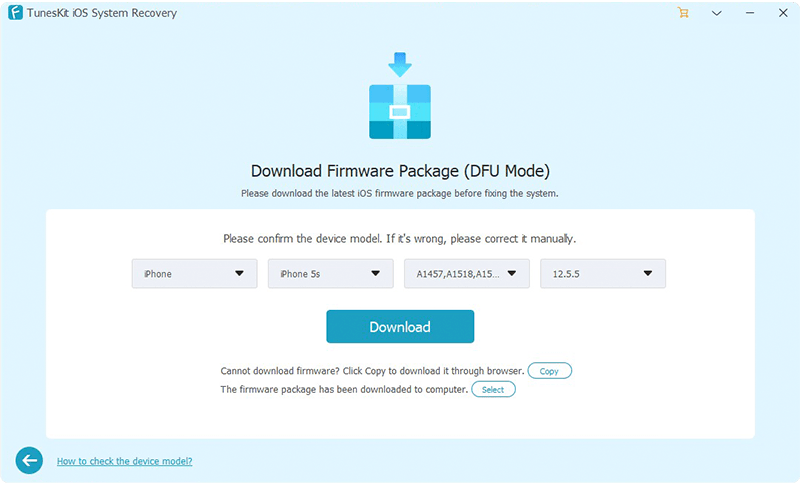
Step 3: In the downloaded Firmware Package interface, check all the info of your device and Download firmware suitable to your device.
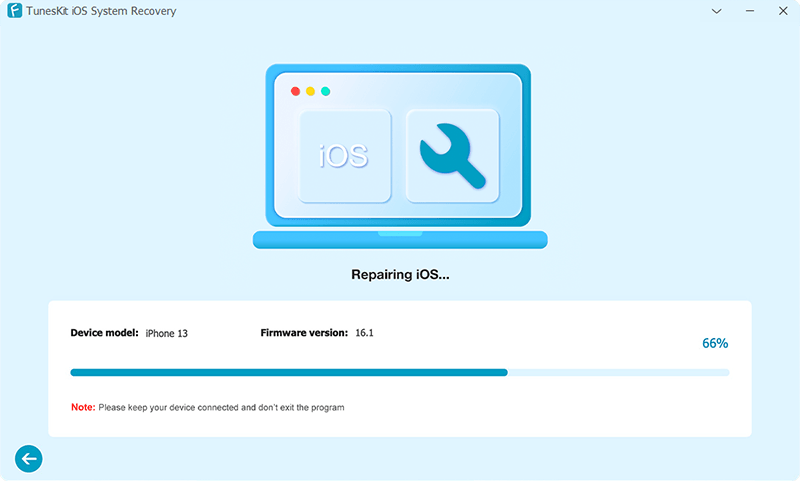
Step 4 Click the Repair button to start fixing iPhone error 4013/4014. Be careful not to disconnect the device from your computer or it might brick.
Solution 9. Resort to Apple Official Support
We have seen some similar guides on the Internet telling people to factory reset their iPhones to solve iPhone error 4013/4014. But I strongly oppose users doing so because factory reset will erase all precious personal data.
If the previous solutions do not succeed, then asking for Apple's official customer service for support would be the best solution. The professional technician of Apple will provide you with ultimate and safe solutions. The only disadvantage of using this method is that it may cost a lot if your device is out of warranty.