Showing posts with label best free iphone repair software. Show all posts

Oct 13, 2020

How to Solve iPhone Silent Switch Not Working

Do you know how to effectively fix the iPhone silent switch not working? The silent switch also can be called as the ring switch, is used to put the iPhone into silent / mute or ring mode with one step. If it goes wrong, then people may land into some troubles. And indeed in the recent times, it is reported online that some individuals have been unable to make their iPhone ring or become silent through this strong functionality. To help them solve the confusion and you who are seeking suggestions, this article is going to list 8 methods to fix iPhone silent switch not working issue.

Way 1: Restart your iPhone

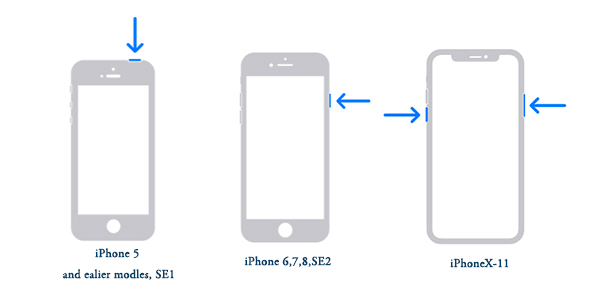
Usually, when the ring switch on iPhone not responding, the first solution comes to your mind is to restart your iOS device, and it can surely remove some software errors that may cause this matter. Owing to reason that the problem can happen on different models of iPhone such as iPhone 8 and iPhone XR, you can follow the below instructions.

For iPhone X/11, simultaneously press the Side and the Volume buttons until the Slider is shown, then pull the slider to power off the iPhone, finally hold the Side button to power your device on.

For iPhone SE (2nd) /8 /7/6, hold the Side button until the Slider pops up and drag the slider to switch off the iPhone, finally press the Side button to switch on the device.

For iPhone SE (1st) / 5 and former, press the Top until the Slider appears, then slide the slider to turn off the iPhone, finally turn on your device again by holding the Top button.
Way 2: Turn down the volume

If you are eager to make your iPhone enter the mute mode at present, then you could employ the volume down button to silent your ringing iPhone. You just need to long hold the volume down button, which locates the left side of your iPhone, until the volume level reach the zero.

Way 3: Add silent ringtone

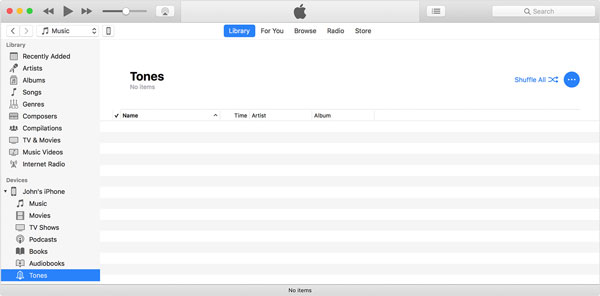
Another alternative to put your iPhone into silent mode is adding a silent ringtone as default. This method is easy with the help of iTunes library. Related steps are as presented below.

Step 1: Download a silent ringtone on your computer and launch the latest iTunes.

Step 2: Under the iTunes Library column, click on the "Tones" option and copy the downloaded silent ringtone on it.

Step 3: Connect your iPhone with the computer and hit the "Device" icon to sync the data.

Step 4: On iPhone, go to "Settings" > "Sound and Haptics", then click the "Ringtone" button to set the silent tone.
Way 4: Open airplane mode

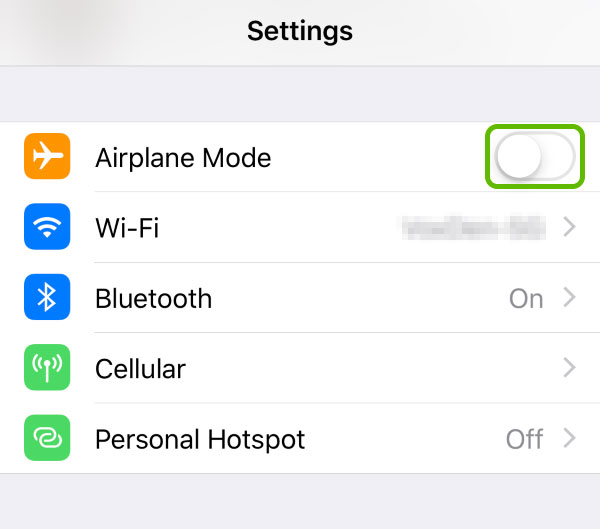
Also, you can open the Airplane mode to mute your iPhone with only Wi-Fi network working. You can turn it on either on the iPhone's control center or heading to the Settings of iPhone, find out the Airplane Mode and enable the switch.
Way 5: Enable Text Tone to None

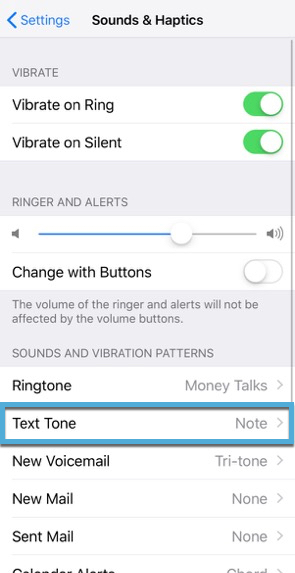
If you are merely willing to make some specific notification disappear like messages and emails, then you could set the Text Tone to none. It is a feature that silent notifications you receive on your iPhone. To do that, run the "Settings" of iPhone and tap on the "Sound and Haptics" button, then find the "Text Tone" and enable it to “None”.
Way 6: Turn on Assistive Touch

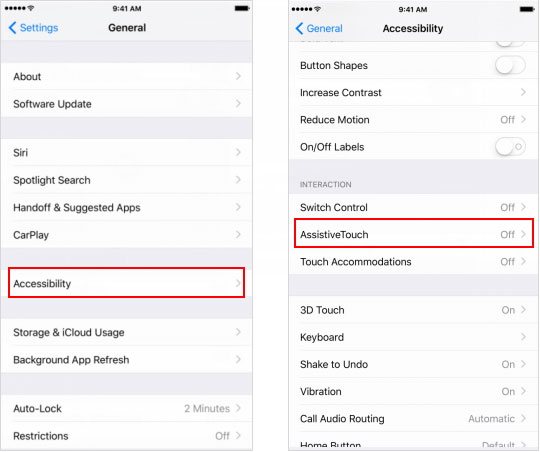
In case the situation is that the ring or silent switch is broken, you can use the Assistive Touch, grey in color and floating on iPhone’s screen, to manage the device. Do as follows to solve iPhone silent button not working.

Step 1: Run "Settings" of iPhone, hit the "General" button and then the "Accessibility" option.

Step 2: Click on the "Assistive Touch" and turn on it.

Step 3: On the home screen, use the Assistive Touch to open the menu and press the "Device" to silent iPhone during ringing.
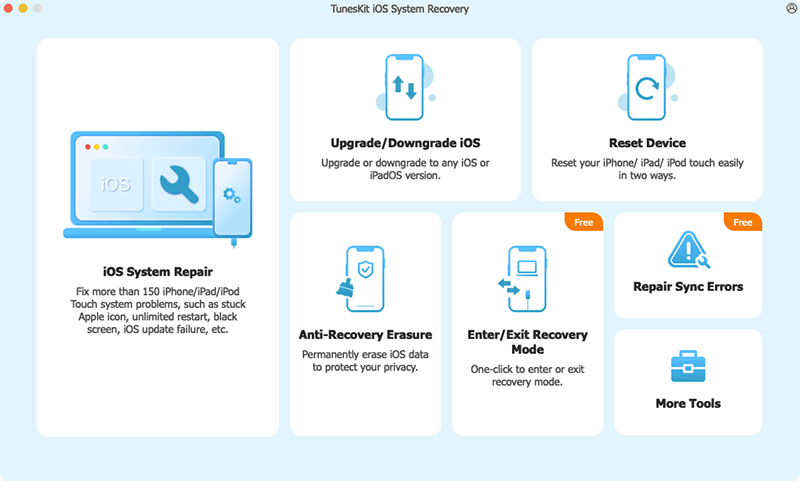
Way 7: Use TunesKit iOS System Repair program

The above ways to fix iPhone silent switch not working are temporary and can't resolve this issue completely. In this case, you are suggested to use professional iOS system recovery applications, for example, TunesKit iOS System Repair. This program can work out the problem once and for all, and with its professionalism and effectiveness, it is also able to fix other iOS issues such as stuck problems and errors. Apart from this, it supports iPhone/iPad/iPod/iPod touch/Apple TV, etc. other iOS devices. Moreover, the most stunning feature of this program is that it will not result in ant data loss while resolving the not-working silent switch on iPhone under the Standard mode. Last but not least, it is fully compatible with the latest iOS 14, 13, 12 and former versions.

Now try the following 3 easy steps of TunesKit iOS System Recovery to settle the iPhone silent / ring button and make it working again.

Step 1: Download TunesKit iOS System Recovery for Windows and open this software on the computer. Then, connect your iPhone with PC until it is being detected. After that, press on the "Start" button.

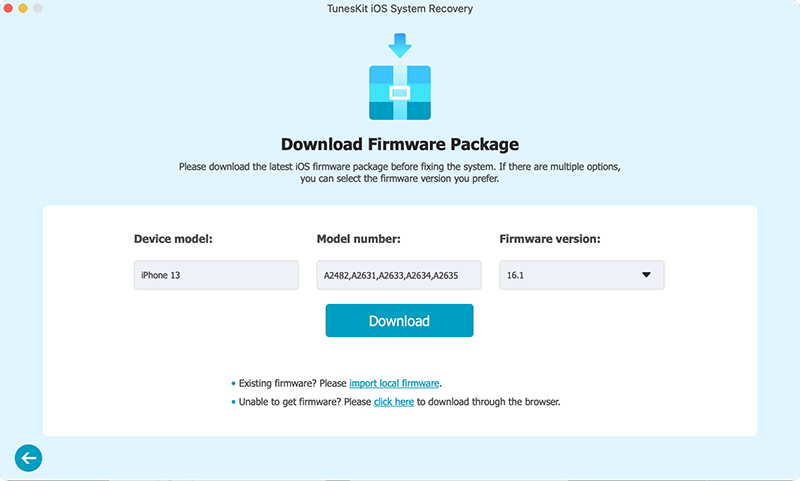
Step 2: At this step, check whether your device model, version and other information are correct. If there is nothing wrong, click on the "Download" button and this tool will start to download and verify the firmware package according with your iPhone.

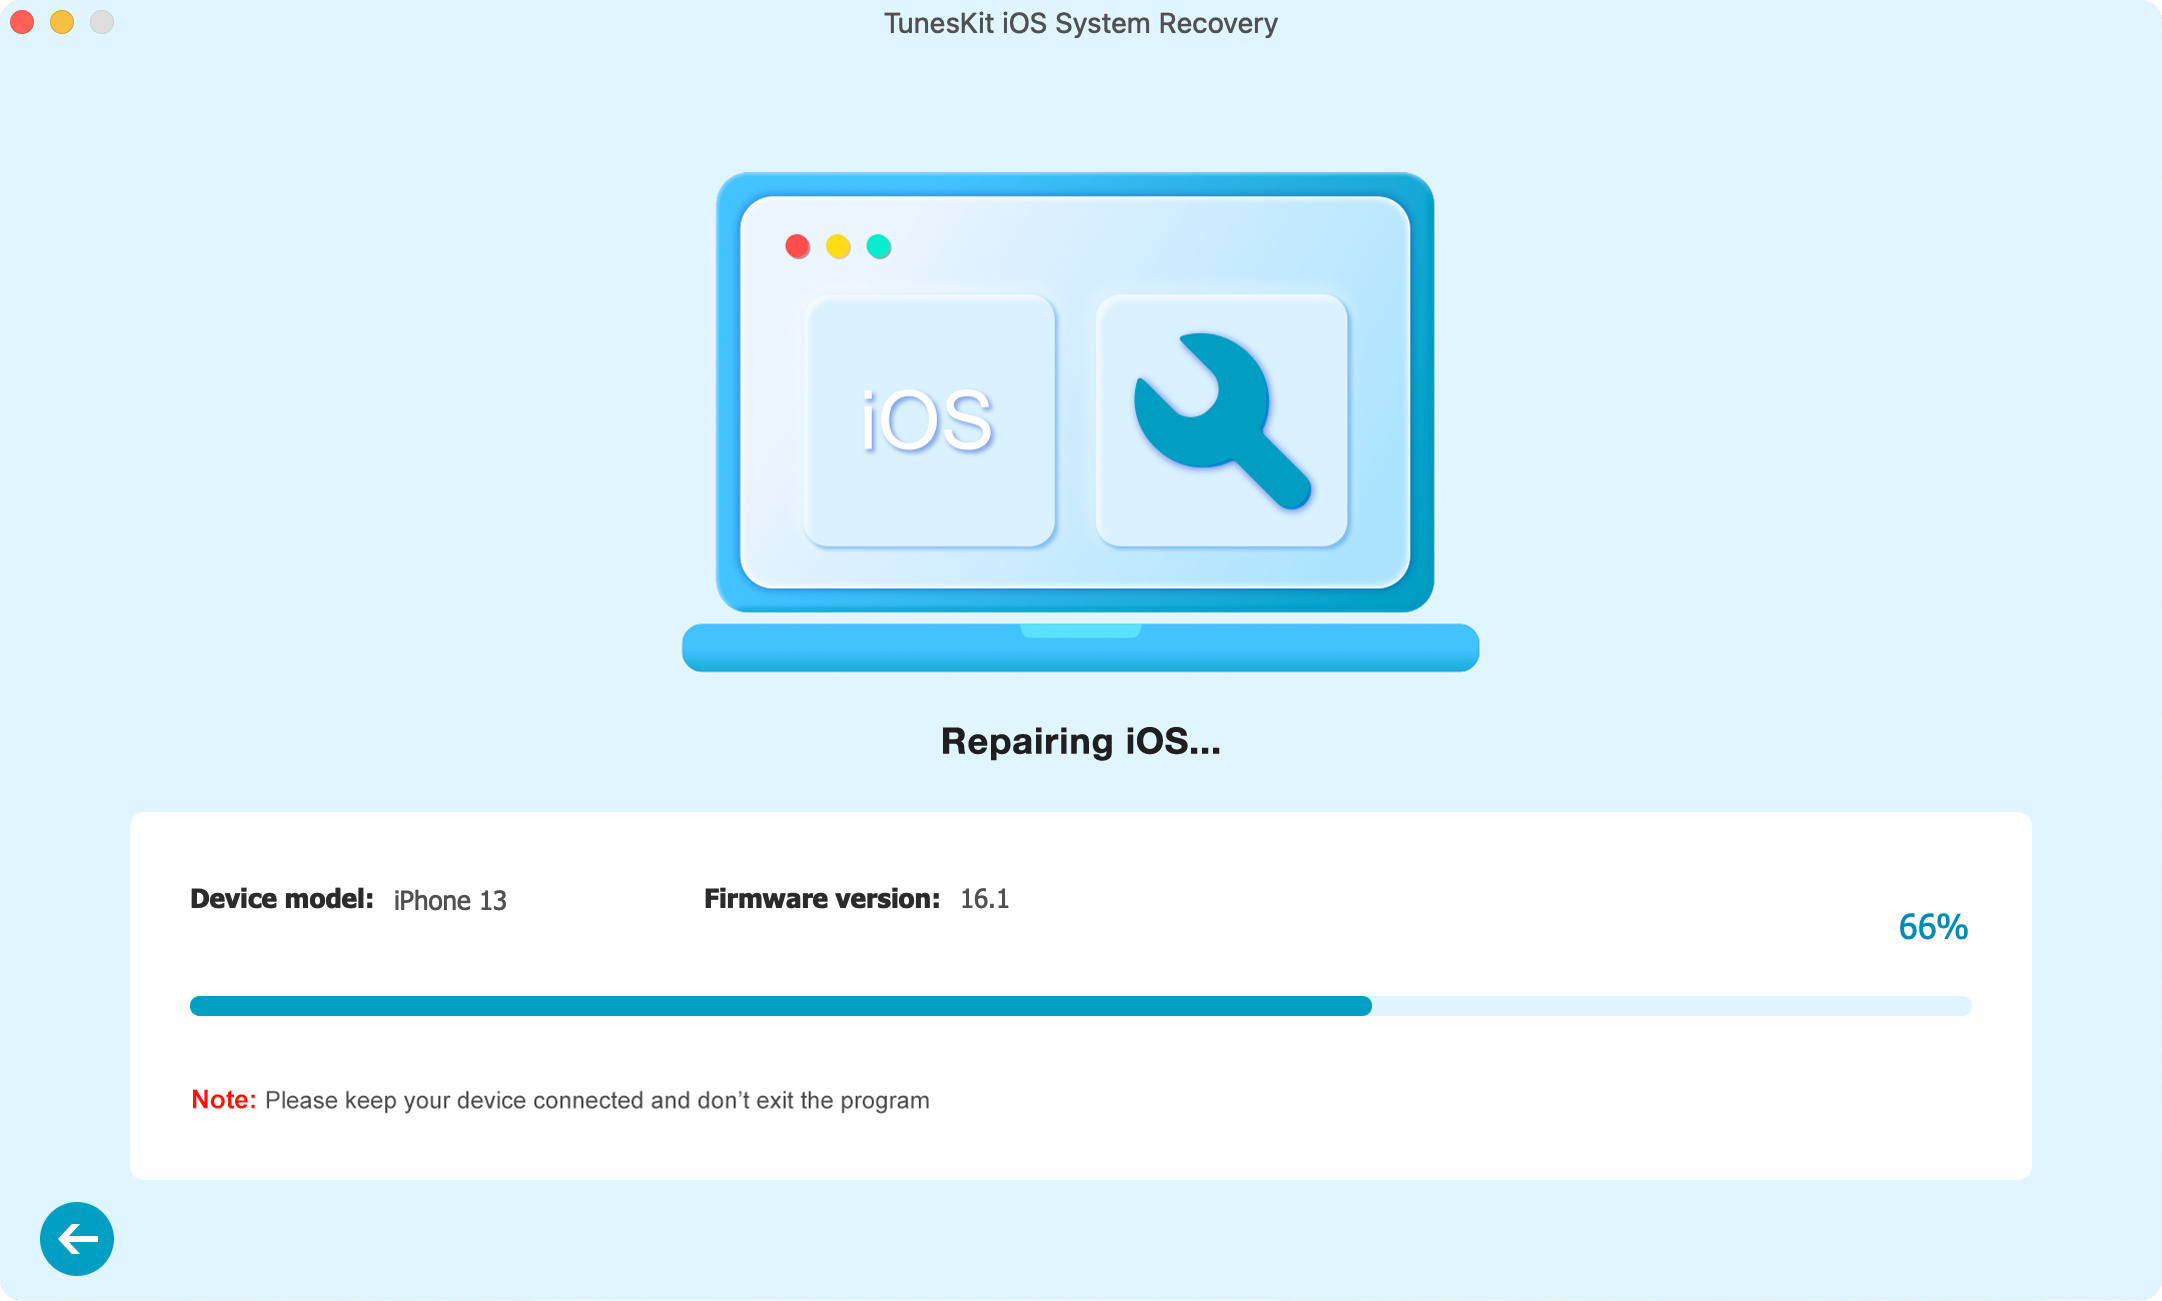
Step 3: After the message that reads the firmware package has been downloaded successfully is presented on the screen, press the "Repair" button on the right corner to fix the iOS system.
Conclusion

If you don't favor all the solutions mentioned above, then the final try is going to the Apple store for professional help. But if you don't have a warranty, it may cost you many bucks. In this way, it's better for you to employ the cheaper iOS system repair software.

Aug 17, 2020

6 Proven Methods: Fix iPad Screen Flickring

The Apple company launches the iPad as its the "smartest" tablet computer in the world. Thus it has become wildly popular among many people, as they enjoy its beautiful design, powerful performance, and convenience. However, there are also glitches such as iPad screen flickering that occurred on this electronic device. Did you meet with this issue before? If you did, take it easy, in the following, we will guide you on how to solve this problem step by step.

Tip 1: Restart your iPad

Rebooting is one of the most common fixes for a variety of iPad problems as well as any other computers. Restarting helps one override the software glitches that may be inhibiting normal software functioning which may be the core of your iPad screen flickering problem.

For iPad with a home button: simply press and hold the Home button and Top button simultaneously until an Apple logo appears then release both buttons.

Other models: Press and quickly release the Volume Up button, repeat the same for the Volume Down button and then press and hold the top button until an Apple logo appears then release the button.

Tip 2: Check if it is in a particular app

If your iPad mini screen flickering problem is not fixed by restarting, then you should proceed to check if the iPad flickers when running a particular application. The flickering could be as a result of a 'misbehaving' application. If you find such an application, force quitting the application is highly recommended. So, how do you force quit?

For iPads with Home button, you only need to press the Home button to open the app switcher then swipe away the particular application.

For iPads with no Home button, slide your finger from the bottom to open the app switcher then swipe away to force quit the application.

Try re-launching the application and if the flickering persists you can proceed to uninstall the application and install it later on.

Tip 3: Check auto-brightness feature

Usually, iPads have an auto-brightness feature that facilitates screen light adjustment according to light in your environment. If enabled the screen could appear to flicker depending on the change of the surrounding light. However, this may not be issued. To be sure, you need to disable the feature. To disable follow the following steps;

Step 1: Click on "settings" on the interface.

Step 2: Scroll down to tap the "Accessibility" button. 

Step 3: Select 'Display Accommodations' from the options.

Step 4: You will find the auto-brightness feature, move the slider to disable. After disabling the screen light will remain constant.

Tip 4: Reduce motion and transparency

In any case that the iPad Pro screen flickering problem is not solved by disabling the auto-brightness feature, you should proceed to disable the motion and transparency feature. It goes a long way in improving the performance of the iPad. To disable follow the following steps.

Step 1: From the main screen click on 'Settings'.

Step 2: Select 'General' and then 'Accessibility'.

Step 3: Select 'Increase Contrast' and then move the slider forward to enable 'Reduce Transparency'.

Step 4: Go back to the 'Accessibility' and move the slider in front to enable 'Reduce Motion'. This way, the iPad screen flickering on and off may stop.

Tip 5: Use iOS system recovery tools with no data loss

If all the above-stated solutions do not work to resolve your iPad screen flickering won't turn on, then the TunesKit iOS system recovery tool is your best chance to resolve the issue once and for all. TunesKit iOS Repair is designed to help you resolve both common and serious iOS errors without losing any data from your iPad. The screen flickering issue at this point maybe as a result of iOS failures. The software provides you with two repair modes namely Standard Mode and Advanced Mode. It is also compatible with all iOS and iDevices including iPads, iPhones among others.

All you need is to download TunesKit iOS System Recovery and then follow the following steps to fix the problem.

Step 1: Connect Device and Select Repair Mode
Launch the application on Mac and then proceed to connect your iPad to the computer. Once it is detected, click on the 'start' tab to proceed to the next window. Select 'Standard Mode' as your repair mode and click 'next'. You will be requested to put your iPad on DFU or recovery mode. Follow the instruction and click 'Next'.
Step 2: Download the Latest Firmware Package
Here, the program will proceed to download the latest firmware package to recover the iOS back to normal. It is crucial that you confirm the device info to make sure it is correct. If not, you can manually correct it. Proceed to hit 'Download' to download.
Step 3: Recover and Fix iOS System
Once the download is complete, click on the 'Repair' button on your screen to initiate the repair process. Make sure your iPad is connected during this time. The repair will only take a few minutes. If the Standard Mode does not work you can proceed to use the Advanced Mode using the same procedure.

Tip 6: iPad screen repair

If at this juncture, your iPad is still flickering then there must be a hardware problem. It is possible that the gadget was dropped on a hard surface or fallen into the water. iPad screen repair is quite a complicated process and hence it is highly recommendable that you seek a professional assistant. Equally, you can visit the nearest Apple service shop for assistance. They will definitely help you out.

Conclusion

The above methods listed are of great significance to fix iPad screen flickering. When you or your friends come across such a problem, you can use these fixes to resolve this issue. But the best way, as far as I am concerned, is still to employ professional iOS system repair programs like TunesKit iOS System Recovery.


Apr 24, 2020

[Review] 4 Best iOS System Repair Tools

Our iPhones may get stuck in the white Apple logo, keep restarting or stop charging, etc. from time to time. At this time, a quick solution is to reset the device but you may lose your data. Now you're suggested to try a professional iOS system repair tool which will help solve the issue without causing any data loss. Here I'd like to pick 4 top-notch ones for your reference.

1. TunesKit iOS System Recovery

tuneskit ios system recovery
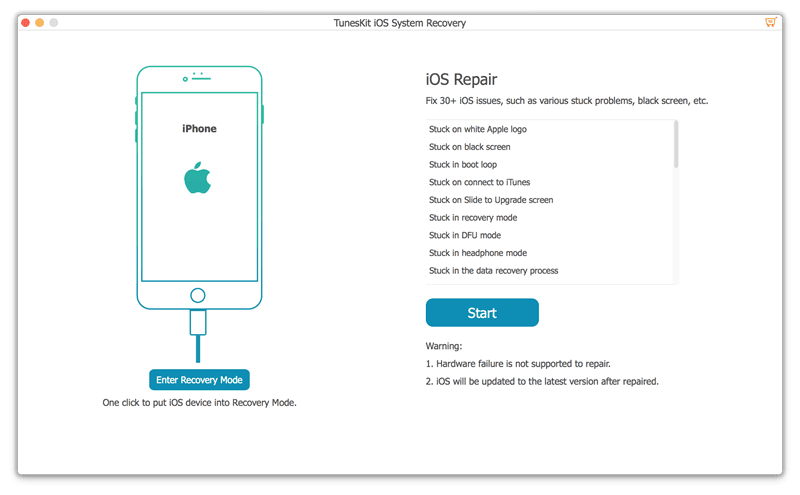
TunesKit iOS System Recovery for Mac/Windows ranks the top of the best iPhone repair software list. This tool is well designed to reach into the iOS/iPadOS/tvOS systems and fix various issues caused by it, which includes iOS software update failure, iPhone stuck in recovery mode, camera not working on iOS 13, iPad black screen, etc.
It offers two repair modes - Standard Mode and Advanced Mode. The former allows you to fix all kinds of common iPhone problems without erasing any data on the device, while the latter can help you repair some severe iOS system problems like the iPhone is disabled or locked, etc.

2. Dr.fone - Repair

drfone-repair
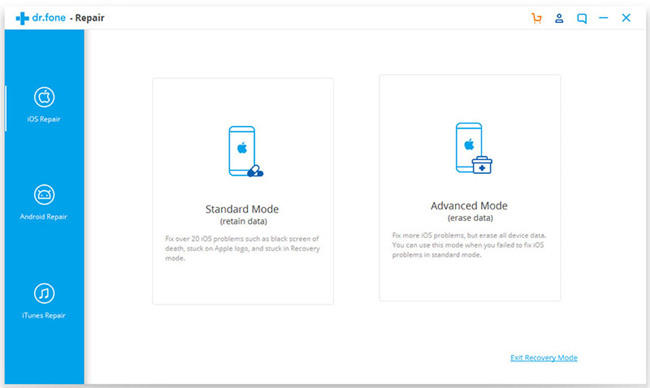
Wondershare has introduced a powerful iOS toolkit to help mobile users better enjoy their device and Dr.fone - Repair (iOS System Recovery) is one of them. It enables users to repair types of iOS problems without any technical skills when you meet the iPhone white screen of death, Siri not working on iPhone, iPad won't turn on, iPhone recovery mode not working, etc. Similarly, this smart program works well with all iPhone, iPad, iPod models.

3. Joyoshare UltFix

joyoshare ultfix
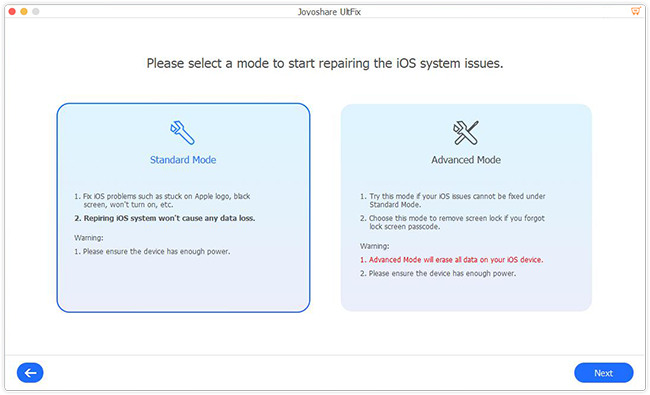
Now let's come to the next useful iPhone repair software whose name is Joyoshare UltFix. This is a safe and trustworthy iOS system recovery tool that has the ability to fix over 30 different common or serious iOS issues such as iPhone stuck on a black screen with spinning wheel, GIFs not working on iPhone, iPhone gets bricked, etc. More importantly, Joyoshare UltFix is able to repair the problem without causing any data loss.

4. Tenorshare ReiBoot

tenorshare reiboot
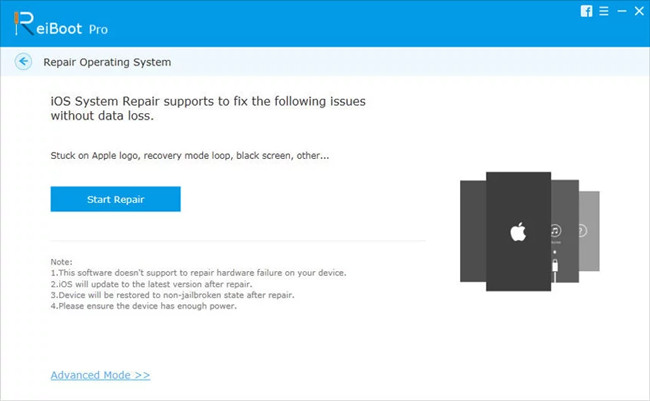
The last one for the best free iPhone repair software is Tenorshare ReiBoot. Actually, it only gives you a free option to enter or exit the recovery mode. When you start to repair your iOS issues such as iPhone stuck on Apple logo, recovery mode loop, screen is locked and won't turn on, you need to pay for it. Anyway, this iOS repair program can help you repair your iOS to normal without losing the data.
If you want to learn more about all these tools, you can refer to the source page here:
https://www.tuneskit.com/ios-repair/top-iphone-repair-software.html