TunesKit Studio is a professional multimedia software developer to help both Windows and Mac users enjoy digital life better or use your iOS devices easier.
Contact: support@tuneskit.com
"I have an iPhone 12 and I bought it 2 years ago. It works perfectly but yesterday when I woke up, I can't use my iPhone suddenly. It showed a message saying This iPhone was Lost and Erased when I tried to unlock it. What can I do now? How can I fix this problem?"
When your iPhone is lost or stolen, you can use the Find My iPhone feature to enable the Activation Lock on your iPhone to prevent illegal access. However, what if your iPhone shows This iPhone was Lost and Erased but you didn't put it in lost mode, or when you bought a second-hand iPhone from others, the iPhone can't unlock but tell you that the iPhone is in Lost mode? Today in this post, I will show you what to do if you see This iPhone was Lost and Erased.
The Reasons Behind This iPhone was Lost and Erased
Before learning how to bypass This iPhone was Lost and Erased on your iPhone, you can check why you will receive this message on your phone.
1. Hacker hacks your iPhone: If your iPhone is bought from Apple Store or authorized resellers, and the iCloud account on your iPhone is created by yourself, your iCloud account may be attacked by hackers. Someone hacks your iCloud account and removed your iPhone remotely.
2. It is a stolen iPhone: If you bought your iPhone from an online user, you might receive a stolen iPhone. You should contact the seller and send the phone back to the seller.
Solution 1. Fix This iPhone was Lost and Erased by TunesKit Activation Unlocker
When you see the iPhone was Lost and Erased message on your screen, the easiest solution you can use is to use TunesKit Activation Unlocker. TunesKit Activation Unlocker is an almighty iCloud unlocking tool that helps users to remove iCloud lock from iPhone, iPad, and iPod touch. By taking assistance from TunesKit Activation Unlocker, you can easily get your iPhone out of This iPhone was Lost and Erased. Besides, TunesKit Activation Unlocker supports turning off Find My iPhone feature without entering passcode and unlocking iCloud locked iOS device.
Now, let's see how to fix This iPhone was Lost and Erased by using TunesKit Activation Unlocker.
Step 1. Connect iPhone to Computer
Download and install TunesKit Activation Unlocker on your computer. Then, connect your iPhone to the computer and click on the Start button. Please read the risk tip and click on the Agree button if you agree.
Step 2. Jailbreak Your iPhone
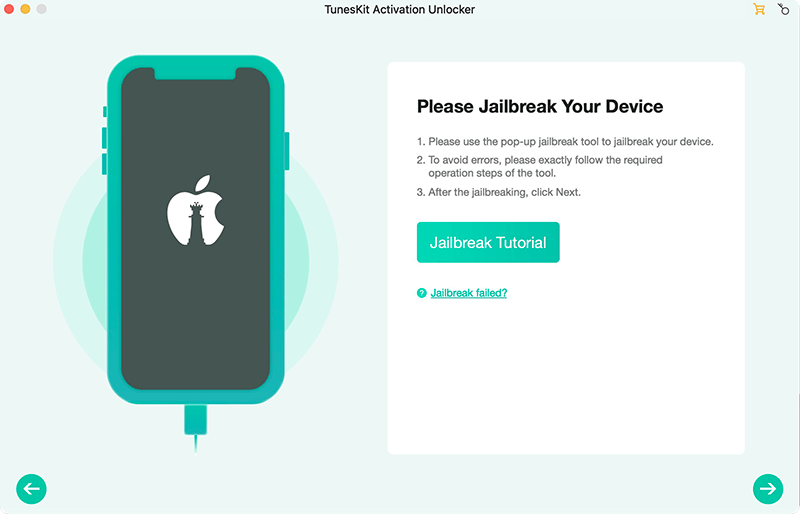
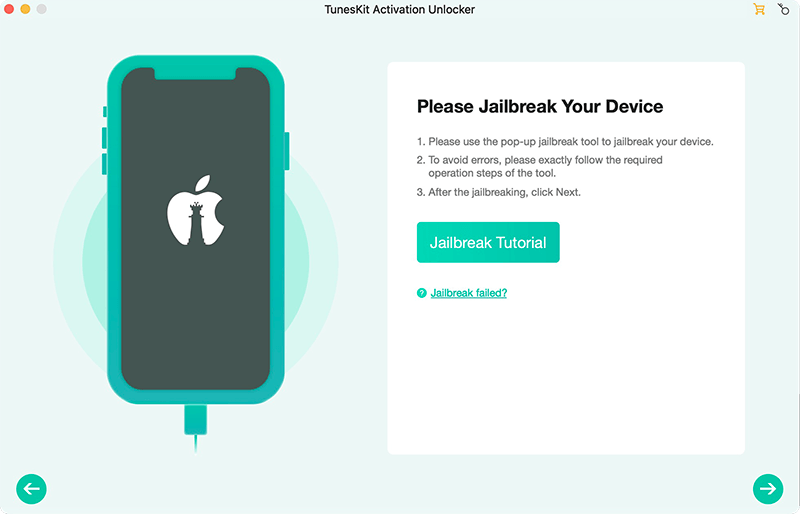
Here, you will need to jailbreak your iOS device. TunesKit Activation Unlocker will download a jailbreak tool on your computer. Please follow the below instructions to jailbreak your iPhone.
Step 3. Fix This iPhone was Lost and Erased
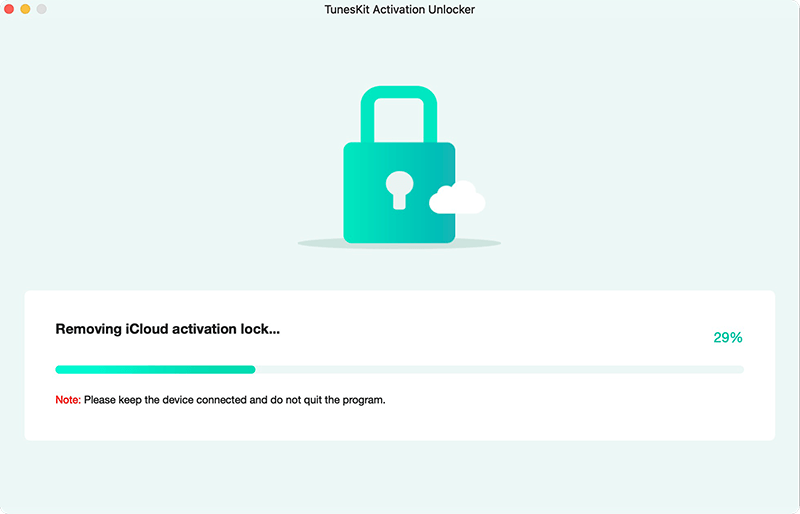
Check the device information and click on the Start to Remove button to remove the Activation Lock on your iPhone. After removal, you can access your iPhone again without facing the iPhone lost screen.
Solution 2. Fix This iPhone was Lost and Erased via iCloud if You Know Passcode
If you know the iCloud account and the correct passcode, you can use iCloud to turn off the Find My iPhone feature and Lost Mode on your iPhone. You can follow the steps below to make it.
Step 1. Open a browser on your iPhone, and then navigate to the icloud.com website.
Step 2. Log into your Apple ID account and then go to select the Find My iPhone option.
Step 3. Hit on the All Devices option and select the iPhone that you want to fix.
Step 4. Hit on Lost Mode and select the Stop Lost Mode option.
Solution 3. Use Find Password to Fix This iPhone was Lost and Erased
If you can't remember the correct Apple ID passcode to unlock your iPhone in lost mode, you can still use the email or security questions to change the passcode. When you set up a new passcode, you can navigate to solution 2 and fix your iPhone when you see This iPhone was Lost and Erased. Now, let's see how to make it.
Step 1. Open a browser and go to iforgot.apple.com.
Step 2. Enter your Apple ID and click on the Continue button.
Step 3. Enter your phone number to confirm that you are the owner of the Apple ID.
Step 4. Click on Continue and follow the onscreen instructions to set up your iPhone.
Step 5. After reset-up your iCloud passcode, go to iCloud and turn off the Lost Mode on your iPhone.
Conclusion
When your iPhone is set in Lost Mode, you should first check if your iCloud passcode was hacked and changed by others. If you don't know the correct Apple ID passcode to fix This iPhone was Lost and Erased, please try using TunesKit Activation Unlocker, which is a powerful iCloud unlocking program that can help you solve your problems with several simple steps.
Entering the wrong passcode multiple times will cause an iPhone unavailable screen, which means that the security lockout is activated. In this case, the conventional course of action is to wait for the restriction time to expire before typing the correct passcode to unlock your phone. Here comes the question, are there any other ways to bypass iPhone unavailable screen? The answer is positive. You could read this article to learn how to bypass iPhone unavailable screen in 4 ways.
Part 1: How to Bypass iPhone Unavailable
Method 1: How to Bypass iPhone Unavailable Lock Screen without Computer
Any iOS 15.2-compatible device will come with Erase iPhone feature, allowing people to reset their device that is in an unavailable lock screen. However, resetting means it will erase all the content and data on your iPhone, and you'd better finish backing up what you need before tapping it.
This feature does not require connecting your iPhone to the computer or any third-party software. All you need is simply click the Erase iPhone button in the bottom right corner of your phone screen and then enter your Apple ID password to start reseting and bypassing your iPhone unavailable lock screen.
Note: This feature can only be used if your locked device is connected to the internet beforehand.
Step 1: Keep typing the wrong passcode until the Erase iPhone option is displayed in the lower right corner, then click on it.
Step 2: Click Erase iPhone again to confirm, and then enter your Apple ID password to start the resetting.
Step 3: When the progress bar finishes, your iPhone will restart, and the unavailable lock screen is gone.
Method 2: How to Bypass iPhone Unavailable Lock Screen via TunesKit iPhone Unlocker
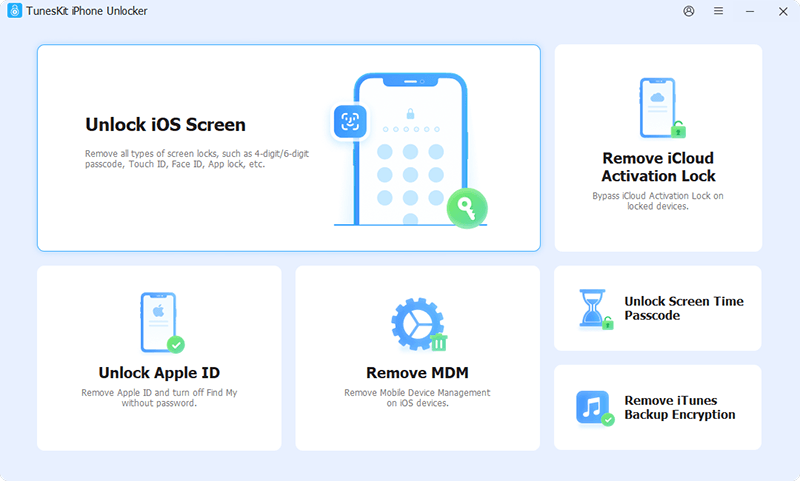
What if you forget your Apple ID password or your unavailable iPhone is not connected to the internet? In such a situation, TunesKit iPhone Unlocker comes in handy. As its name suggests, this tool can help you bypass and unlock the security lockout on your iPhone without entering any password or verification. This unlocker is available on both Windows and Mac, enabling you to unlock your disabled iPhone regardless of the iOS version. In addition, it could remove the Apple ID, screen lock, Screen Time, and MDM without entering a password as well.
Note: Remember to back up your phone's data before using it.
Why Choose TunesKit iPhone Unlocker?
Bypass iPhone unavailable screen with ease
Unlock almost all iOS versions of iPhone, iPad, and iPod Touch
Available on Windows and Mac
Remove screen lock, Apple ID, Screen Time, and MDM with simple clicks
You may refer to the steps below on how to bypass iPhone unavailable lock screen via TunesKit iPhone Unlocker
Step 1: On your computer, download the most recent version of the TunesKit iPhone Unlocker, then connect your unavailable iPhone to it. Select Unlock iOS Screen and click on Start.
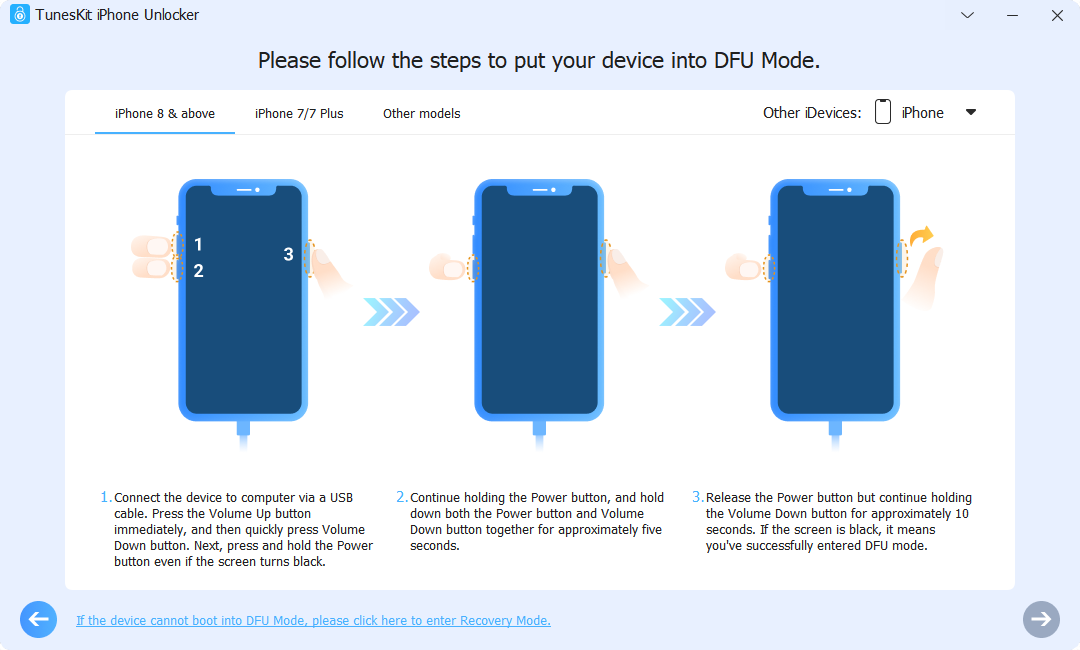
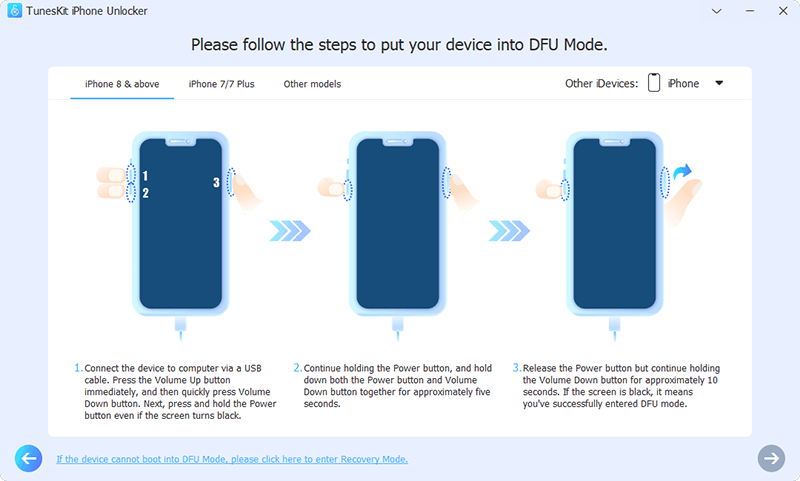
Step 2: Follow the on-screen instructions to put your phone into DFU mode.
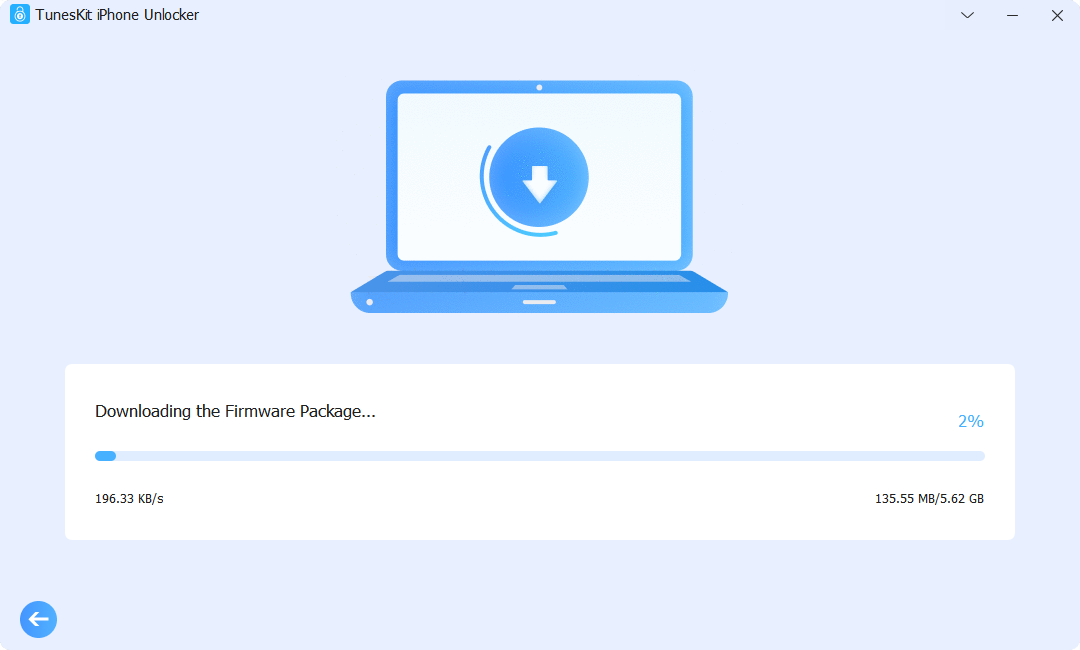
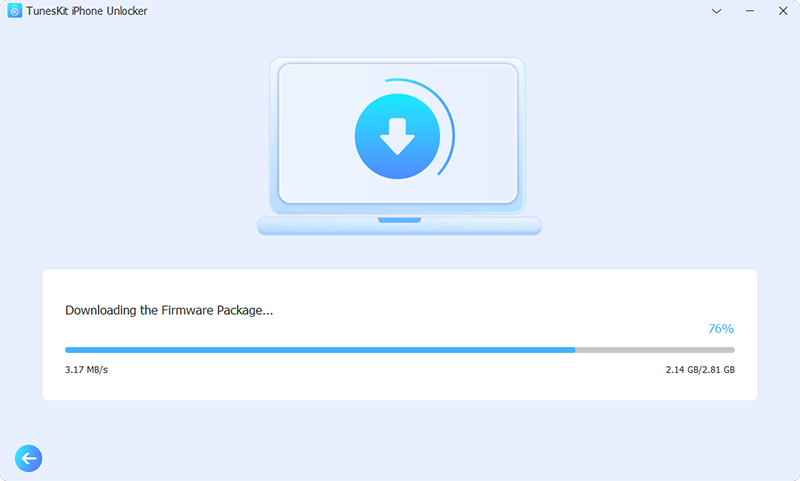
Step 3: Next, confirm and check your phone information and the firmware package version. You can manually change the information if it is incorrect. Then tap Download to start downloading the firmware package.
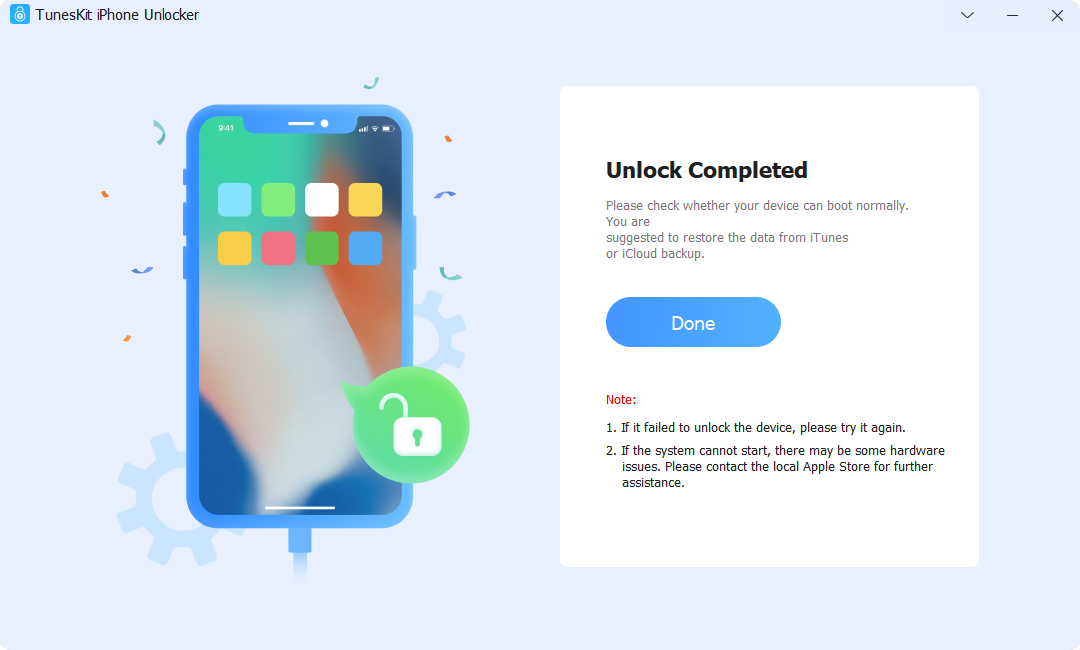
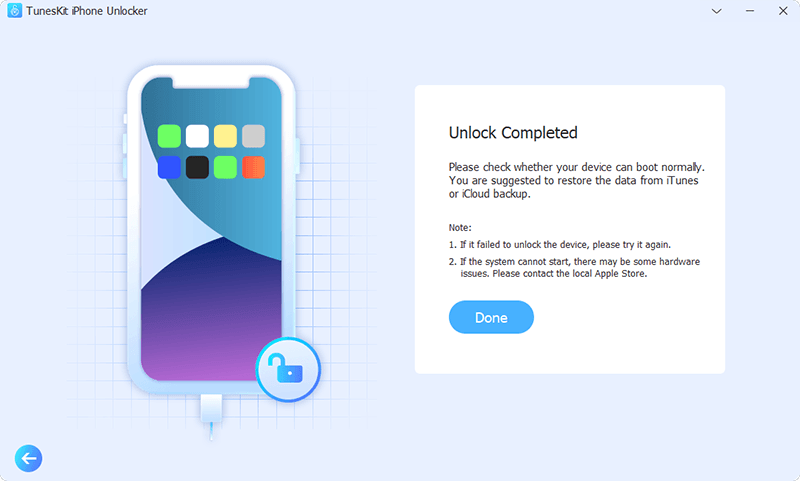
Step 4: After that, you may click on the Unlock button to start the process to bypass your iPhone unavailable screen.
Method 3: How to Bypass iPhone Unavailable Screen on iTunes/Finder
The default file manager, iTunes/Finder, also has the ability to help you bypass your iPhone security lockout. When your iPhone is on an unavailable screen, you should put it into DFU mode so that iTunes/Finder can detect your device as it is connected to your computer. Again, this option will also erase anything off your iPhone, and you'd better back up the content you want beforehand. As the process is similar, we will show you how to bypass iPhone unavailable lock screen via Finder.
Step 1: Put your unavailabl iPhone into DFU mode, and then connect to your Mac via a lightning-to-USB cable.
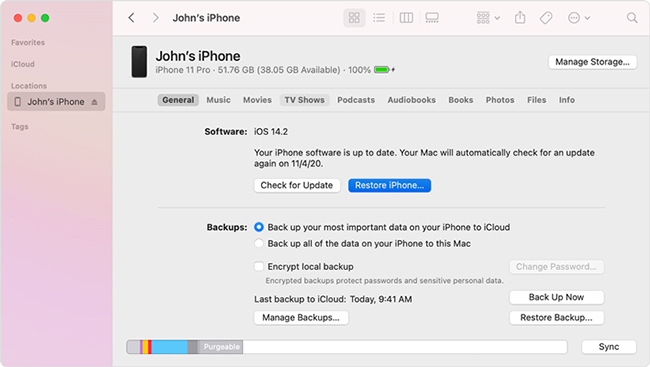
Step 2: Launch the latest Finder on your Mac, then it will pop up a window for you to restore or update. Simply tap the Restore button.
Step 3: Now it will start restoring your iPhone. The Apple logo will appear on your phone when the progress finished, signing of successful bypass of iPhone unavailable screen.
Method 4: How to Bypass iPhone Unavailable Screen on iCloud
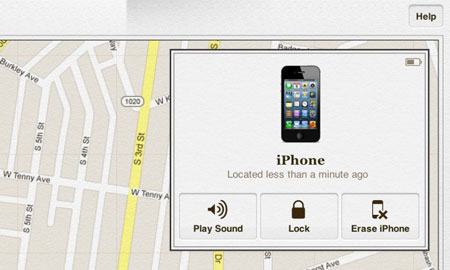
The last practical solution you can try is to use iCloud, which assumes that your unavailable iPhone has Find My iPhone enabled. You can sign in to the same Apple ID account on the iCloud website or on another iOS device, then select the target iPhone and erase it remotely to bypass the unavailable screen. This also means that it will completely delete all data and content from that device. Please check the steps below.
Step 1: Access icloud.com on your PC and sign in with your Apple ID.
Step 2: Click on the Find My option, tap All Devices on the top bar, and select your target iPhone.
Step 3: Tap Erase iPhone option to start bypassing iPhone unavailable screen.
Final Thought
As you can see, in addition to waiting for the security lockout time up, there are still four effective ways for you to learn how to bypass iPhone unavailable screen with ease. In the event that you are unwilling to enter any password or authentication, you're suggested to TunesKit iPhone Unlocker, which can assist you in bypassing and unlocking the security lockout with simple steps. Just give it a try!
Shenzhen, China, November 21, 2022 – The professional software developer TunesKit Studio has recently launched a super sale for Black Friday. Here visitors can enjoy an up to 65% off discount for a 3-in-1 super bundle, buy 1 and get 1 free, get an extra 20% off on discounted software, and a $5 storewide coupon.
Starting from November 15, TunesKit Black Friday & Cyber Monday sale is in progress. Here is the landing page for this campaign:
Is your iPhone stuck on the white Apple logo? Have you ever forgot your iPhone passcode or deleted the important data by accident? Don’t worry! TunesKit Studio offers many efficient iOS utilities that can Apple users use their iOS devices better.
TunesKit iPhone Unlocker helps users remove the screen locks, Apple ID, Screen Time, and MDM easily.
TunesKit iPhone Data Recovery works well in recovering the lost or deleted iOS data, such as messages, contacts, memos, videos, photos, etc.
In this campaign, the three programs are in bundle at 65% off! In other words, customers can get them at $99.95 only, saving $189.9. Once purchase, they can enjoy the license for lifetime, free upgrade, and free after-sale tech support.
In the second part, TunesKit offers a gift to all. No matter what they buy, TunesKit iOS System Recovery or TunesKit iPhone Unlocker, they’ll get TunesKit iPhone Data Recovery for free. And all licenses can be used for up to 5 iOS devices.
Besides, customers can enjoy an extra 20% off on discounted products, including iOS System Recovery, iPhone Unlocker, iPhone Data Recovery, AceMovi Video Editor, Screen Recorder, Audio Capture.
Finally, the company also offers a $5 sitewide coupon code. Visitors can apply it to buy any product on TunesKit’s online store. Yet, it will only be valid during the campaign.
“To shows our sincere gratitude to all customers, we have offered the greatest discounts during the Black Friday Campaign, and this would be the lowest price of the year,” said Andres Green, marketing manager of TunesKit. ”
Media Contact
Andres Green
Marketing Manager
Email: support@tuneskit.com
About TunesKit
TunesKit Studio is an outstanding software developer that aims at offering the best iOS utilities and multimedia programs. Its popular programs include iOS System Recovery, iPhone Unlocker, iPhone Data Recovery, AceMovi, etc. They’re all available on Windows and Mac platforms for customers all around the world. As a professional iOS tools developer, all the users can get free and prompt online support from TunesKit Studio. At present, millions of users are fixing their iOS devices with TunesKit's and leaving a good rating.
I have a low-end PC, and when I used Premiere Pro on my computer, it crashed every two minutes. It was fine when I do some normal cuts, but when I add some special effects and animations, it was a big pain. Can someone suggest some good video editing software that is good for low-end PCs and also have the ability to keyframe, animate text, or add other special effects? — Jane Green from Reddit
In fact, there are many video editing programs on the current market that are claimed to be used for low-end devices to edit videos. It might be difficult for us to try them one by one. That’s why I’d like to write this post for you after selecting and testing. The editing software in this article will consist of both free and paid tools. You should carefully read the pros and cons of each software, and make the best choice based on your preferences.
Top 1. TunesKit AceMovi
Top 2. Lightworks
Top 3. VSDC
Top 4. HitFilm Express
Top 5. Shotcut
#1. TunesKit AceMovi (Windows, macOS)
The first low-end equipment video editing program recommended here is TunesKit AceMovi Video Editor. It is a one-stop video editor that provides multiple effects and transitions. It comes with a screen recorder that can record images as well as the sound coming out of your computer.
As a well-established video editor, AceMovi is mounted with features like keyframing, split-screen, filters, animations, texts, music library, fade in and fade out. You can easily learn how to use it by yourself in just a few steps. If you want to seek video editing software for a low-end PC, it is also a good choice.
System Requirements:
Operating System: Windows XP, Vista, 7, 8, or higher; Mac OS X 10.8, 10.9, or higher.
CPU: 1G Hz or above.
RAM:512MB(Windows); 256M (MacOS).
Hard Disk Space: 5GB for Installation.
Pros:
Abundant filters, transitions, background music, sound effects, etc.
One-stop video editor
User-friendly interface
Various output formats, devices, social platform options
best video editor for low-end PC
Cons:
The free trial version will add a watermark to the exported video file.
#2. Lightworks (Windows, macOS, Linux)
Lightworks is a free video editor for low-end PC that supports 4K editing and you can preview the video while editing. Whether you are a novice or a specialist with rich experience, you can quickly get started with this product, and it can run perfectly on any PC.
System Requirements:
Operating System: Windows Vista and higher; MacOS 10.9 or higher.
CPU: 2GHz or above.
RAM: 3 GB.
Hard Disk Space: 200MB for installation.
Pros:
Support multiple languages
Color LUTs
Boris FX plugins
Cons:
Less online content
Less available features for the free version
#3. VSDC (Windows)
VSDC is the fourth video editing software we recommend. This software is a free video editor for low-end PC and has a straightforward and intuitive interface. It allows you to make your recording using the webcam and create slideshows. If you still don’t know how to edit video, you can definitely learn how to use this software quickly, because it doesn’t require you to have any professional knowledge.
System Requirements:
Operating System: Windows 2000, 2003, XP, Vista,7,8 or higher;
CPU: 800 MHz;
RAM: 128 MB;
Hard Disk Space: 20 MB for Installation.
Pros:
Small in size
Easy to use
Cons:
Less pro editing features
Free version without tech support
Only support Windows
#4. HitFilm Express (Windows, macOS)
HitFilm Express is a video clip and video conversion software with all the basic functions. It comes with a simple free video editing tutorial. You can trim and split the video with the program, and you can also use more advanced functions like adding transitions, effects, and inserting audio. But you must register before you download the software.
System Requirements:
Operating System: MacOS 10.13 or higher; Windows 8 or higher.
CPU: 4th Generation Intel® Core™ Processors or AMD equivalent.
RAM: 4GB.
Hard Disk Space: 2 GB for installation.
Pros:
Support 3D video
Abundant online content
Cons:
Outdated interface
Less available features for the free version
#5. Shotcut (Windows, Mac, Linux)
Shotcut is a fantastic and one of the best video editing software for YouTube beginners. It is a reliable video editor, and you can perform advanced video editing. And you can also make precise edits using this application. If you don’t mind not being able to preview filters, it is also a good free video editor software for low-end PC.
System Requirements:
Operating System: Windows 7 or higher; MacOS 10.12 or higher.
CPU: 2Ghz.
RAM: 4GB.
Hard Disk Space: 1 GB for installation.
Pros:
Support 4K
Free and open source
Cons:
Lack of AVCHD support
Delayed video preview
Final Words
So, here are 5 useful video editing tools that work well on low-end computers. You can read the review carefully and pick the right one to have a try. Most of the programs provide a free trial version, with the most useful features you may need. Just have a shot before making a purchase!
This article was first published on TunesKit website:
My son has accidentally dropped my iPhone XS, and now the screen is broken! I can't unlock my iPhone with the broken screen as the screen is totally not working. Can someone help, please!! - Michael White from Apple Discussion
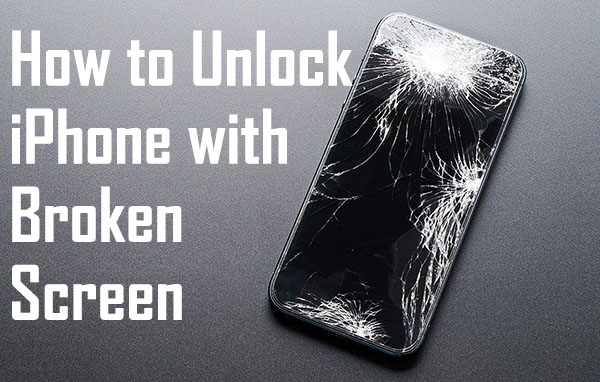
This is really disastrous if your iPhone screen has broken and can't unlock. But don't worry. Everything will have a solution. Today we'll teach you 4 methods to unlock iPhone with a broken screen.
Method 1. Use TunesKit iPhone Unlocker to Unlock iPhone [100% Working]
Method 2. Unlock iPhone via iCloud [Need Apple ID Credentials]
Method 3. Unlock iPhone via iTunes [Need to Be Trusted Before]
Method 4. Access iPhone via Siri [Low Success Rate]
Method 1. Use TunesKit iPhone Unlocker to unlock iPhone with broken screen [100% Working]
We have an efficient way for you to unlock your iPhone within several clicks - TunesKit iPhone Unlocker. It is a dedicated iPhone unlocking tool that helps users to unlock their iPhones effortlessly. In cases like iPhone with a broken screen and an iPhone screen is unresponsive, TunesKit iPhone Unlocker can always solve it perfectly for you. Besides, TunesKit iPhone Unlocker can factory reset your iPhone without entering a passcode or unlocking your iPhone.
Key features of TunesKit iPhone Unlocker:
Available on the latest iOS version including 15
Unlock iPhone with broken screen within several minutes
Enable to factory reset iDevices without passwords
Unlock iPhone/iPad/iPod touch at ease
Remove Face ID and fingerprint recognition at ease
Now, let's see how to unlock iPhone with broken screen using this effective tool.
Step 1: Connect iPhone to the computer
First of all, please connect your iPhone to a computer via a lightning cable. Then, launch TunesKit iPhone Unlocker on your computer. TunesKit iPhone Unlocker will detect your iPhone automatically.
Step 2: Put iPhone into DFU Mode
Then, follow the guide to put your iPhone into DFU mode. If you are failed to get your iPhone into DFU mode, you can put it into Recovery mode.
Step 3: Download Firmware Package
Next up, TunesKit iPhone Unlocker will download the firmware package for you. Before downloading, please check if the device information is corresponding to your device. If not, please correct it manually.
Step 4: Unlock Your iPhone
TunesKit iPhone Unlocker will start to unlock your iPhone as soon as the firmware package is downloaded. It is worth noting that this process will erase all your iPhone data. If you want to reserve your iPhone data, please backup your iPhone before unlocking it.
Method 2. Unlock iPhone with broken screen via iCloud [Need Apple ID Credentials]
In iCloud, there is a feature called Find My iPhone. This feature allows users to manage their iOS devices remotely. In the premise of Find My iPhone is enabled, and iPhone is linking to iCloud, you can take this method a try. It is important to note that this method will erase all your iPhone content. If there is something important on your iPhone, please back it up before using this method.
Here is a step-by-step guide for how to unlock iPhone with broken screen via iCloud.
Step 1: Navigate to the iCloud website and log in to your iCloud account.
Step 2: In the main interface of iCloud, there is an option that says Find iPhone, click it to the next step.
Step 3: Hit on the All Devices option and select the disabled iPhone in the dropdown menu.
Step 4: Click on the Erase iPhone icon and Remove from Account. And this process unlocks your iPhone.
Method 3. Unlock iPhone with broken screen via iTunes [Need to Be Trusted Before]
With the service of iTunes, unlocking an iPhone would be easy. iTunes is an official tool that allows users to backup, restore, and update their iOS devices. If you are wondering can iTunes unlock iPhone with broken screen, the answer is undoubted YES. Just like the above methods, using iTunes to unlock an iPhone will delete all your user content, and you can use the built-in feature to back up your iPhone in iTunes.
Note: If the damaged screen does not allow you to trust the computer, this method will be ineffective.
Step 1: Connect your iPhone to a computer, then launch iTunes. If iTunes fails to detect your iPhone, you can try to update it to the latest version.
Step 2: When iTunes detects your iPhone, click Trust on your iPhone. Then, hit on the small iPhone icon on iTunes.
Step 3: There will be a Summary tab on the next interface. Select it and hit on the option that says Restore iPhone. Tap on it to unlock your iPhone. In Finder, you just need to click the General tab to restore your iPhone.
Method 4. Access iPhone with broken screen via Siri [Low Success Rate]
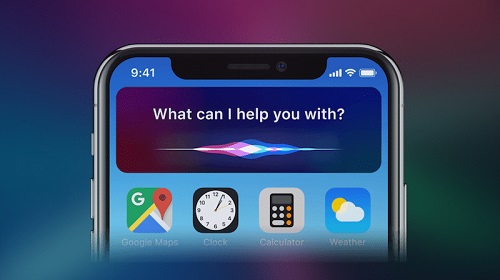
Siri, a voice controller that allows users to access most features on iPhone, can be a powerful tool for users with broken screens. It is not a way that has a 100% success rate, but still worth trying as it won't cause any data loss. Users can use Siri to turn on the VoiceOver feature to control their iPhones without touching the screen, thereby unlocking the iPhone.
Let's see how to unlock iPhone with broken screen.
Step 1: Keep holding the Home button to activate Siri. If you are using an iPhone without Home button, just hold the Side button to make it.
Step 2: Speak "Turn on VoiceOver" when Siri is activated. Then, navigate to the iPhone locking screen and call out the dial.
Step 3: Swipe to highlight the corresponding numbers that can unlock your iPhone, and Enter them one by one. You can double-hit on the screen to enter.
Step 4: Submit the password to unlock your iPhone.
Summary
Those are the four possible solutions we gathered for you after doing a lot of research. And we also analyzed the disadvantages of each method. You can try them one by one. Hope you can regain the iPhone now. Good luck!
Forgot iPhone passcode or the code is changed by kids accidentally always happen. After several wrong attempts, your iPhone might be disabled and cannot access. Don’t panic! Today, I’m going to show you three effective methods to help you get out of this trouble.
How to Unlock iPhone Without Passcode 2022: 3 Ways
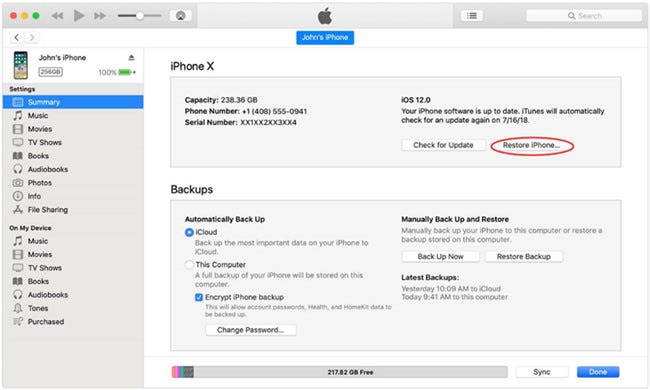
Method 1: Unlock iPhone via iTunes
iTunes is a powerful iOS tool that can do a lot for Apple Users, including unlocking an iPhone without entering the passcode. However, this method will be feasible only if you have synced your iPhone via iTunes before. If your iPhone does not meet the condition, please move forward. Here is a detailed guide for using iTunes to unlock iPhone.
Unlock iPhone via iTunes
Step 1: Connect your iPhone to a computer. Then launch iTunes and iTunes will detect your iPhone until a little iPhone icon appears on the toolbar.
Step 2: Hit on the iPhone icon. Then, click on the Summary tab.
Step 3: Click on the Restore iPhone to restore your iPhone. When iTunes finishes restoring, the lock on your iPhone will be wiped.
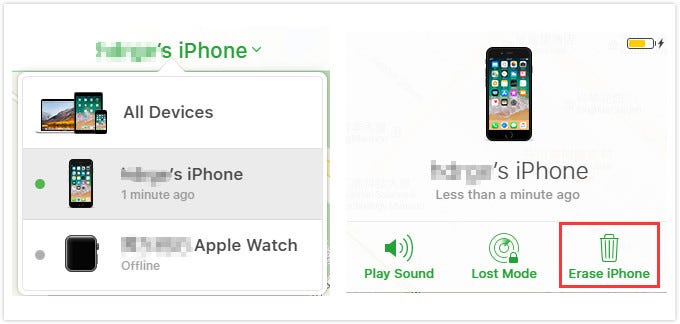
Method 2: Unlock iPhone via iCloud
Another way to unlock iPhone without passcode is to use Find My iPhone feature. By using this method, you need to make sure that you have remembered your Apple ID and its passcode. If yes, let’s see how to.
Unlock iPhone via iCloud
Step 1: Launch a browser on a computer or Mac, then visit the iCloud website. Enter your Apple ID and passcode to log in to your iCloud account.
Step 2: Then, navigate to the Find My iPhone option and select the All Device tab.
Step 3: Find the iPhone you are going to unlock and select it. Then, choose the option that says Erase iPhone. And the lock will be wiped on your iPhone.
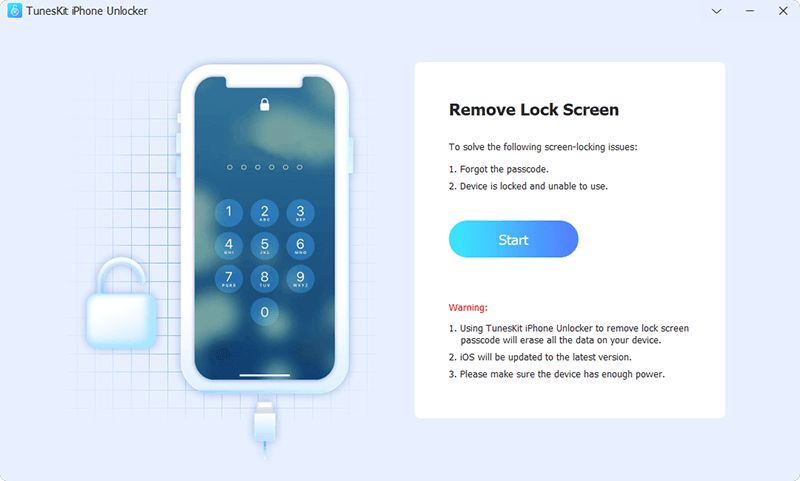
Method 3: Unlock iPhone via TunesKit
The last resort to unlock iPhone without passcode is to use a professional third-party iOS unlocking tool such as TunesKit iPhone Unlocker.
TunesKit iPhone Unlocker is a useful unlocking tool that helps users to unlock iPhone, iPad, and iPod touch without passcodes. When you encounter cases like entering wrong passwords too many, Face ID not working, can’t enter password because of broken screen, etc., TunesKit iPhone Unlocker can always help you out within several clicks. It is now fully compatible with most iPhone, iPad, iPod touch models.
Now, let’s see how to use TunesKit iPhone Unlocker to do that with ease.
Step 1: Connect iPhone to the computer To begin with, please connect your iPhone to a computer. And TunesKit iPhone Unlocker will detect your iPhone as soon as the connection is completed.
TunesKit iPhone Unlocker Main Interface
Step 2: Put iPhone into DFU Mode Please follow the guide to put your iPhone into DFU mode or Recovery mode in this step. When you make it successfully, click the Next button.
Put iPhone into DFU Mode
Step 3: Download Firmware Package In this step, you will see a series of device information. Ensure that all the given information is corresponding to your iPhone. Correct it manually when there is something wrong. Then click the Download button to start downloading its firmware package.
Download Firmware Package
Step 4: Unlock iPhone without password Hit on the Unlock button when TunesKit iPhone Unlocker finishes the downloading. And you can access your iPhone when the unlocking process is done.
Unlock iPhone via TunesKit
Final Words
So, these are 3 effective methods you can try when you need to unlock iPhone without passcode. No matter which method you adopt in the end, you must be aware that your data on the device will be wiped completely. That is unavoidable. Fortunately, you can still use iTunes or iCloud to get your data back as long as you have backed up it before. Good luck!
Hong Kong, Feb. 22, 2022 - Recently, the professional software provider TunesKit Studio has announced a new iOS utility named iPhone Unlocker. The program aims to help iPhone/iPad/iPod users unlock their iOS devices when forgetting the passcode, the devices are disabled, the screen is broken and can't enter the password, etc. Refusing redundant features, to unlock your iPhone/iPad/iPod screen passcodes is the only thing that TunesKit iPhone Unlocker will do for you.
Available on Windows and Mac, TunesKit iPhone Unlocker gives users a cross-platform guarantee. With expected features, this iPhone unlocking program will bring disabled iPhone/iPad/iPod back to normal within several steps. Also, it allows users to factory reset their iOS devices without entering the password. The purpose of the TunesKit iPhone Unlocker is to protect users' iOS devices from becoming a brick because of forgetting the password.
With no expert skills requirement, this program will lead you to the destination step by step. As a powerful unlocker, TunesKit iPhone Unlocker performs perfectly in most situations, including unlock screen broken iPhone, wrong password entering, second-hand locked devices, etc. However, like most other iOS unlock programs, using it to remove the lock will erase all the personal data on your iPhone, iPad, or iPod.
"Proud to introduce this anticipated product of TunesKit Studio to users all around the world. TunesKit iPhone Unlocker is now a potent member of TunesKit iOS utilities." Said William Garcia, the chief product officer of TunesKit Studio. "TunesKit devotes itself to multimedia and iOS supports. We are so glad that we can give service for the convenience of every aspect. The arrival of the TunesKit iPhone Unlocker fills our blank in iOS unlocking. Looking forward to the next surprise of TunesKit."
Video Demo: Unlock iPhone with TunesKit iPhone Unlocker
Price and Availability
TunesKit iPhone Unlocker has three different pricing plans to meet different needs. For a single computer, a license for a month at 19.95$ or a year at 29.95$ is recommended. For family users, there is a lifetime license at 49.95$ for up to 5 computers and an unlimited license at 299.95$ for unlimited computers. Though you can download TunesKit iPhone Unlocker for free, it is not free to unlock your iPhone, iPad, or iPod touch.
TunesKit iPhone Unlocker is now fully compatible with the latest iOS version. This program is also available on the latest macOS 12.2.1 and Windows 11. You can download TunesKit iPhone Unlocker for free here.
TunesKit Studio is a professional multimedia software and iOS utility developer. Including video editor, video cutter, screen recorder, media converter, iOS system recovery, iPhone data recovery, etc. All the products of TunesKit will bring users new experiences in the digital world. All products have superior quality. With users from more than 150 countries all around the world, TunesKit still wins widespread high praise.
Have you ever seen the error 4013 or 4014 when updating or restoring your iPhone, iPad, or iPod touch? Well, many users have encountered this trouble. And I'm also one of them. Now let me tell you how I finally fix this iPhone error after trying some methods.
To deal with the restored iPhone error 4013/4014, I did some research and tests and provide 9 solutions for you. Since this iPhone restore error may also occur in iPad and iPod, the solutions in this article also work for error 4013/4014 on them.
First of all, let's see a video about how to fix iPhone/iTunes error 4013 and 4014.
Solution 1. Fix Connection
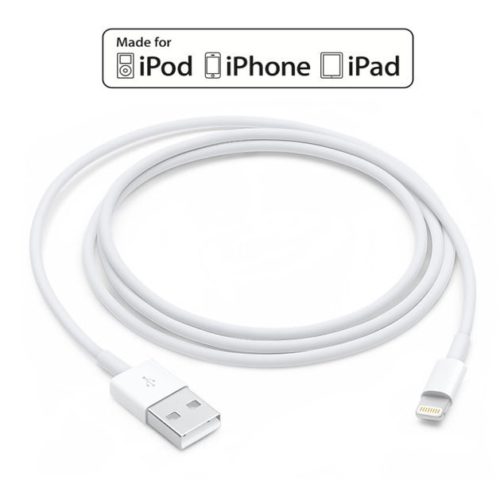
Only Made for iPhone/iPod/iPad cables and adaptors can ensure the perfect connection. If you are using the computer to update or restore your iPhone when error 4013 or 4014 happened, then the cable or adaptor you are using is possibly the culprit.
To check whether you are using the Made for iPhone/iPod/iPad cable and adaptor, follow the steps below using the current cables and adaptors:
Step 1. Connect other iDevices with your computer and see if the iTunes error notification pops up. If it occurs again, then these two accessories may not be designed for Apple devices. Step 2. Connect other iDevices with other computers. If the error warning still shows up, then it is possible that the accessories are not a Made for Apple one. Step 3. Switch to a Made for iDevices USB cable and adaptor and see if the notification appears again.
If the error notification shows up in any one of the 3 tests above, you may consider switching to a set of Made for iPhone/ iPod/ iPad cable and adaptors.
It is important to make sure the port is not covered with dust or other matters because an uncleaned port can obstruct connection. Also, make sure the USB cable is connected directly to the phone port. Try removing the third-party battery or case if necessary.
Solution 2. Hard Restart the iPhone
It would be surprised how many issues a simple restart can eliminate. iTunes errors related to software issues, such as software crashes, can be resolved using this method. Usually, those who encounter error 4014 are iPhone 6 or iPhone 6s users, and they can resolve this problem by this hard reboot way.
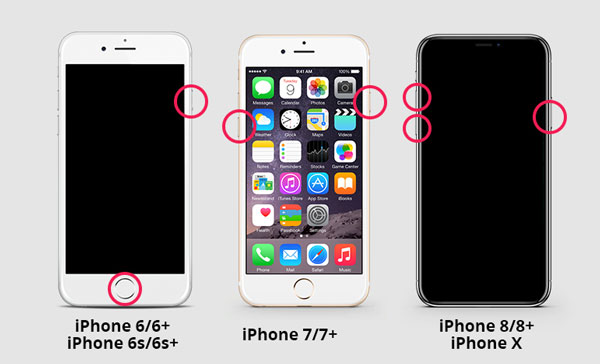
However, to achieve a complete restart, you need a hard restart so that the glitch will actually disappear. The way of hard reboot varies among different models of iPhone, and you can follow the quick instructions below to hard restart your device.
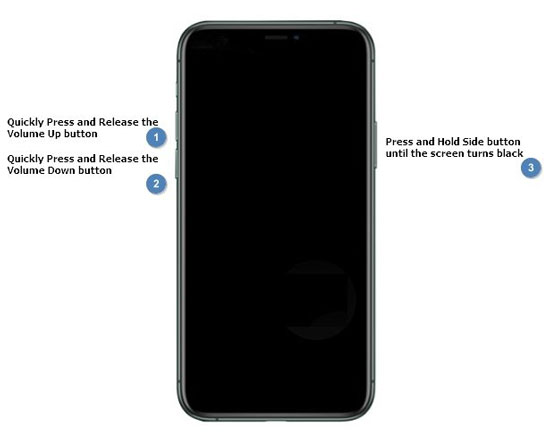
For iPhone 8 and later: · You can press and quickly release the Volume Up button. Then press and quickly release the Volume Down button. Finally, press and hold the Side button until the Apple logo appears.
For iPhone 7 and 7 Plus: · Press and hold both the Side button and Volume Down button until the Apple logo appears.
For iPhone 6s and earlier: · Press and hold both the Side button and Home button until the Apple logo appears.
Solution 3. Check Wi-Fi Network
If Wi-Fi isn't running well or is poor, the replacement system can be interrupted and you'll obtain a mistakes message. Therefore, to make sure you've got a proper Wi-Fi connection, try to reset the network setting.
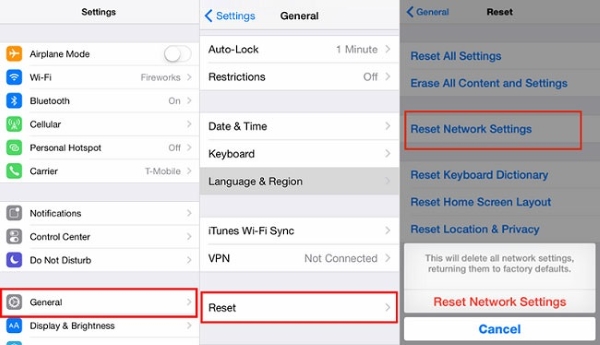
Reset your device's network settings can start the connectivity of the iPhone with Wi-Fi all over again. This is a treatment for iTunes error 4013/4014, considering the fact that a terrible connection also can moreover disconnect the device. This will really impart you with that annoying error message. In this case, follow the below steps:
Step 1. Unlock your iPhone first, and from the main screen, click on "Settings" → "General" → "Reset" → hit "Reset Network Settings" afterward. Step 2. If prompted, enter the passcode and again tap "Reset Network Settings" to confirm.
When resetting is completed, the subsequent thing to do is to restart the Wi-Fi router. You simply require unplugging the power source. After a few minutes, connect it once again and attempt updating to the new iOS.
Solution 4. Updating iTunes to the Latest Version
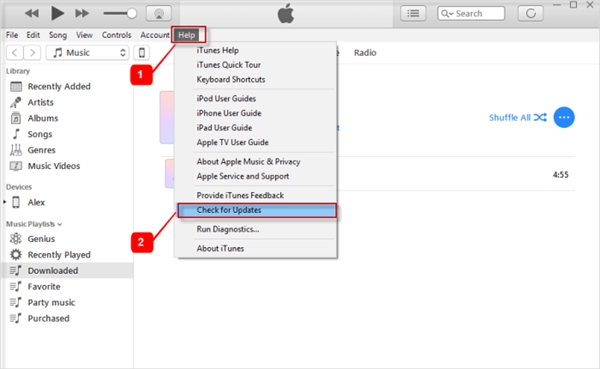
In many cases, iPhone restore error 4014/4013 occurs also due to the older versions of iTunes. Updating iTunes on both your phone and computer to the latest version will eliminate this cause. To update iTunes on your computer:
To update iTunes on your computer:
Step 1. Open iTunes and find the "Help" menu, where you can see the "Check for Updates" button. Step 2. Click on it, and iTunes will automatically check for the latest version. If there is a newer version, simply update it.
To update iTunes on Mac computer:
Step 1. Open the App Store on your Mac. Step 2. At the top of the window, find Updates and click it. Step 3. Check there has any available macOS or iTunes updates, if yes, click Install.
Now with the latest iTunes, updating or restoring your iPhone would succeed.
Solution 5. Clean Up Your iPhone
Free space is required for the operating system to function properly. The system allocates space on the device for this purpose, but each update installed on the device consumes more and more space. The error may appear due to a lack of storage on your iPhone to accommodate the update.
In this case, you need to delete or transfer as many unwanted files as possible. For example, you can move unwanted photos, videos, music, and other documents. This complete guide helps you retrieve more space.
Solution 6. Factory Reset on Your iPhone
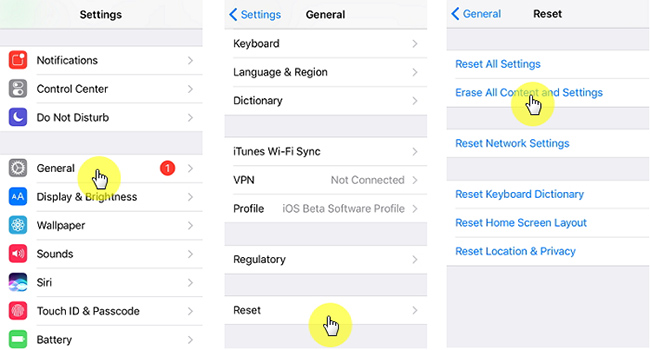
This method will put you at iPhone data loss risk, so remember to back up your valuable data to iCloud or iTunes first. Follow the below step:
Step 1. Inside Settings → General → Reset → Tap on Erase All Content and Settings. Step 2. Now, enter your passcode and click on Erase iPhone.
Solution 7. Entering DFU Mode
Try putting your iPhone or iPad into DFU mode if none of the above methods worked. However, restoring to a new state will erase all data on the device. Such as photos, videos, music, app settings, etc. Similar to applying the previous method, remember to back up your iPhone before doing this.
You can enter DFU mode by connecting your iPhone to your PC and following the steps listed below (applicable to iPhone 8, iPhone 8 Plus, and iPhone X):
Step 1. Press the Volume Up button, followed by the Volume Down button. Step 2. Then press and keep holding the Side button until the iPhone screen goes black. Step 3. Simultaneously hold down both the Side button and Volume Down button. Step 4. Continue holding the Volume Down button but release the Side button. Step 5. If the device is in DFU mode, it will not display anything on the screen. The device will be detected in recovery mode if iTunes is open on your system. Step 6. Now restore your iPhone with iTunes. There should be no more error 4013 or 4014.
Note: Restart your iPhone/iPad if you need to exit DFU Mode anytime.
Solution 8. Fix iPhone Error 4013/4014 with TunesKit iOS System Recovery [100% Effective]
Should the previous solutions fail, then the cause could be that your iTunes is corrupted or glitches. This is a grim situation because to fix iTunes on your phone you need to restore your iPhone with iTunes, which means your personal data will be erased.
Fortunately, there is another option — TunesKit iOS System Recovery, an iOS system recovery tool. Though it costs a small amount of money, the software will definitely make your iTunes back to normal.
TunesKit iOS System Recovery is probably one of the best iOS system recovery software. It guarantees to solve 50+ iOS issues, including iPhone error 4013/4014, iPhone stuck on recovery mode or stuck on Apple logo, etc. Most importantly, your data will remain intact after the recovery. And the problem you initially restore your phone to resolve might get fixed in the process.
The rest main advantages of this software as well as its free trial downlinks are listed below.
Try to download the software and experience it yourself. This tutorial will tell you how to use TunesKit iOS System Recovery exactly.
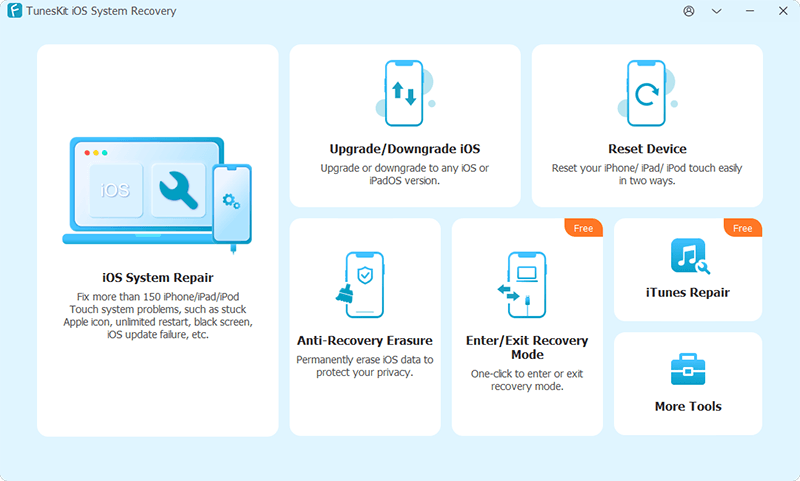
Step 1: Open TunesKit iOS System Recovery and connect your iPhone to the computer (make sure the connection is fine in advance). Press the Enter Recovery button to let your phone enter the recovery mode, then just click the Start button to begin.
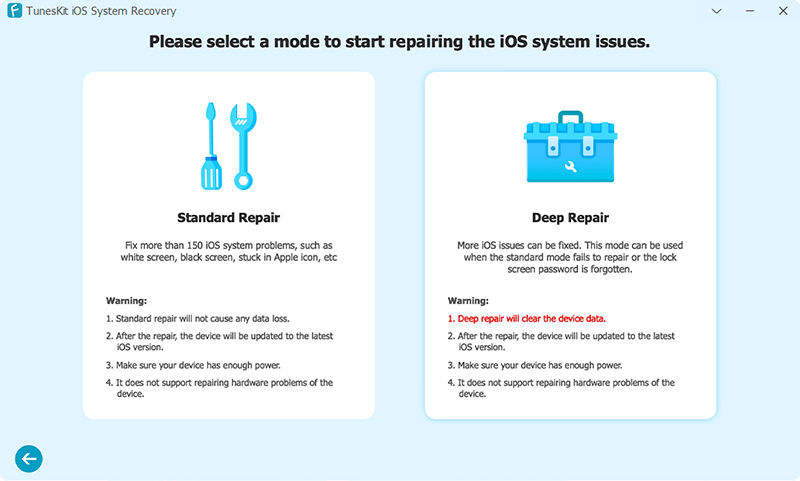
Step 2 Click the Standard Mode to fix iPhone error 4014/4013 without data loss. Be aware not to choose the Advanced Mode because it will erase all your personal data.
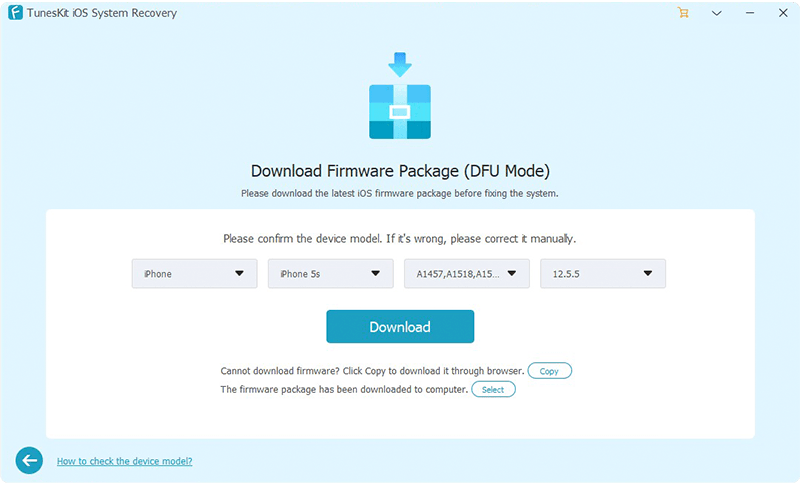
Step 3: In the downloaded Firmware Package interface, check all the info of your device and Download firmware suitable to your device.
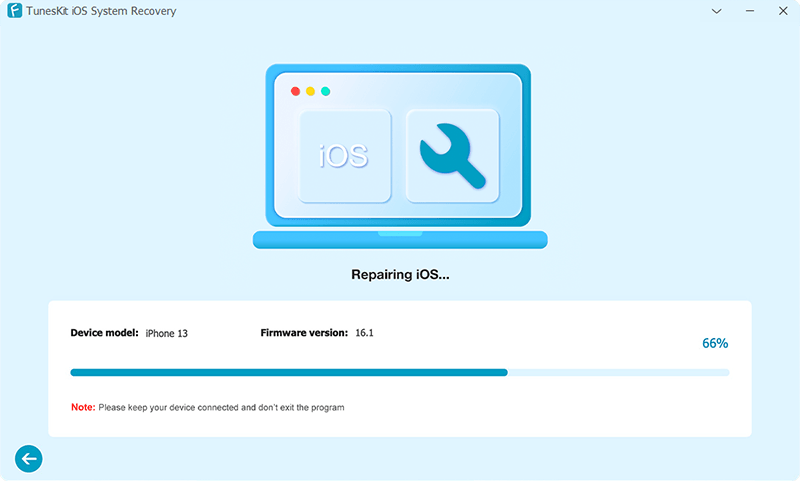
Step 4 Click the Repair button to start fixing iPhone error 4013/4014. Be careful not to disconnect the device from your computer or it might brick.
Solution 9. Resort to Apple Official Support
We have seen some similar guides on the Internet telling people to factory reset their iPhones to solve iPhone error 4013/4014. But I strongly oppose users doing so because factory reset will erase all precious personal data.
If the previous solutions do not succeed, then asking for Apple's official customer service for support would be the best solution. The professional technician of Apple will provide you with ultimate and safe solutions. The only disadvantage of using this method is that it may cost a lot if your device is out of warranty.
Conclusion
So, here are all the solutions I'd like to recommend you to have a try. You can get them from the first one until your problem is solved. In the end, if nothing works among these, the last resort is to ask Apple Support for help. It may be time-consuming but also worth a try.
The article is originally published on TunesKit.com.