Part 1: Basic knowledge about bricked iPhone/iPad
Firstly, when the title catches your eyes, you may be wondering that what bricked iPhone/iPad is. Electronically, the "brick" means a device not functioning or not working. While when it comes to the bricked iPhone/iPad, it refers to that the device not turning on, not responding, not making calls, stuck in a loop and so on.Part 2: Bricked iPhone/iPad data recovery tool you need
If one of above similar situation happens on your iPhone or iPad and you are eager to get the lost or deleted data back, then this is what you are seeking. To recover data from bricked iPhone/iPad, professional iOS data recovery tools such as TunesKit iOS Data Recovery is necessary. This data recovery software provides three recovery modes to retrieve your lost or deleted data no matter whether you have backup or not. And its other key functions are as presented below.Key features of TunesKit iPhone Data Recovery
1. Recover data from different iOS device like iPhone,iPad and iPod.
2. Retrieve data under various scenarios including mistaken deletion and software update failure.
3. Restore diverse types of data like videos, photos, etc.
4. Fully compatible with all iOS versions including the latest iOS 14.
5. Rescue encrypted files.
6. Support Previewing and selecting required data before recovery.
Part 3: Ways to retrieve data from bricked iPhone/iPad
Now it's time for us to start to recover data from bricked iPhone or iPad with three different means.1. Recover without backup
Step 1: Launch TunesKit iPhone Data Recovery and connect your iPhone or iPad with the computer through a USB cable. Then choose the recovery mode as "Recover from iOS" from the program's main interface.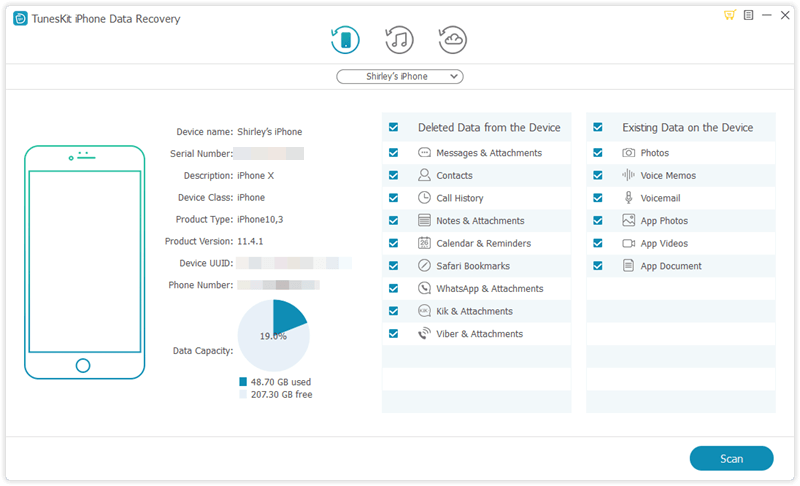
Step 2: After the device and different files are shown on the screen, choose the categories on the right column that need to be scanned. Then click the "Scan" button and the program will begin scanning.
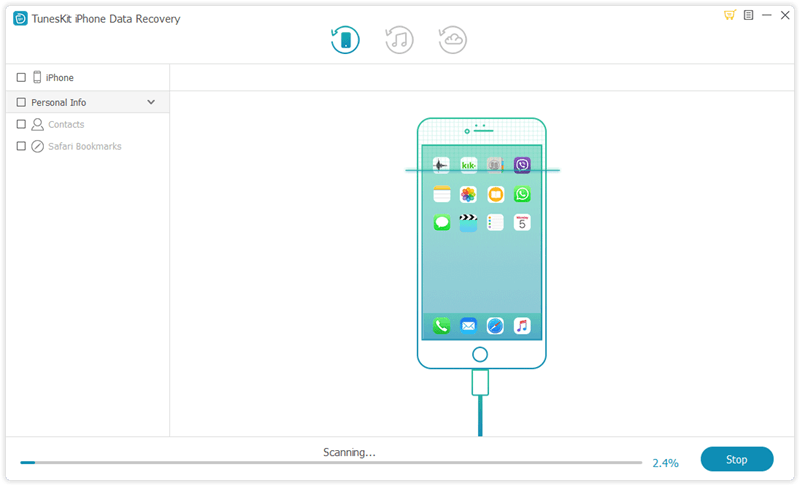
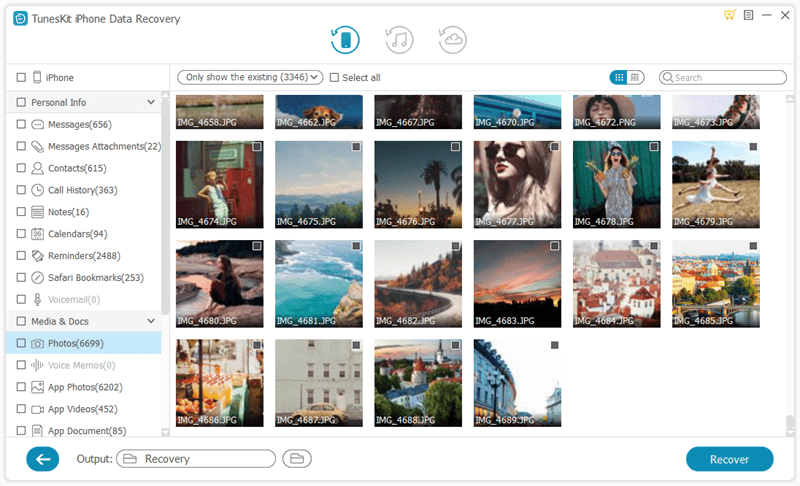
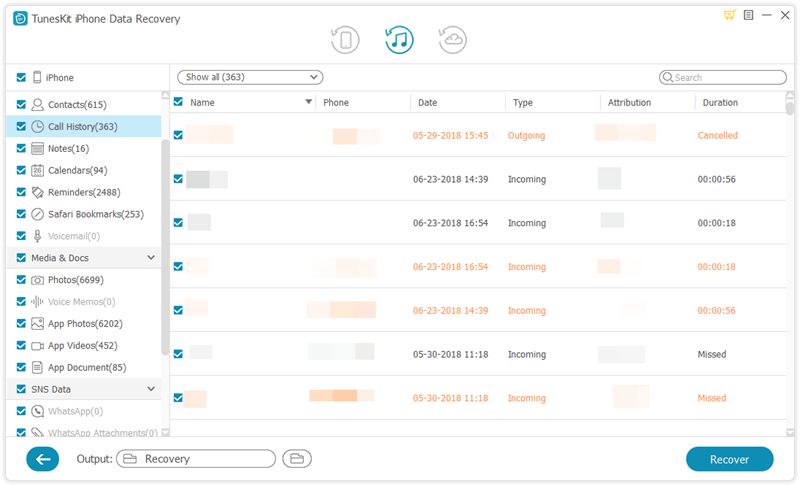
Step 3: Then all data scanned will appear on the left. Before you click the "Recover" button, you can preview the iPhone data you want to retrieve from different columns. After that the application will start to bring your data back.
2. Restore from iTunes backup
Step 1: Open TunesKit iOS Data Recovery on the computer and connect your iPhone/iPad with the PC. Then select the recovery mode named as "Recover from iTunes backup" on the main screen of the app.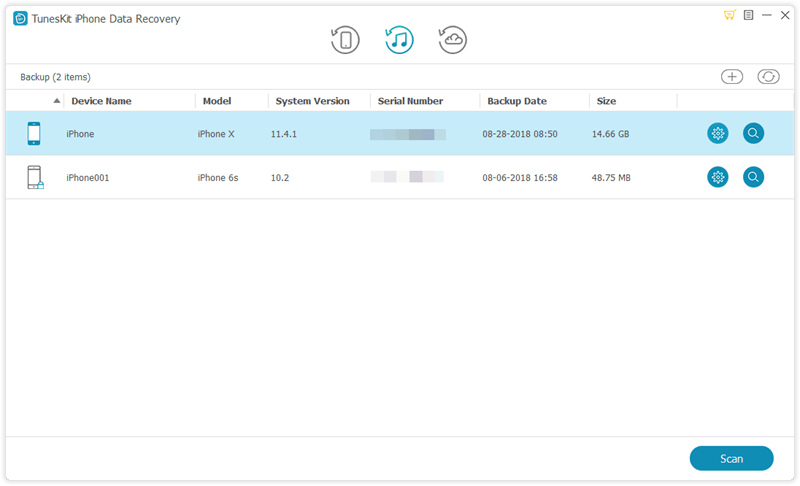
Step 2: Press on the "Scan" button to examine your iPhone or iPad data and choose the data on the left column.
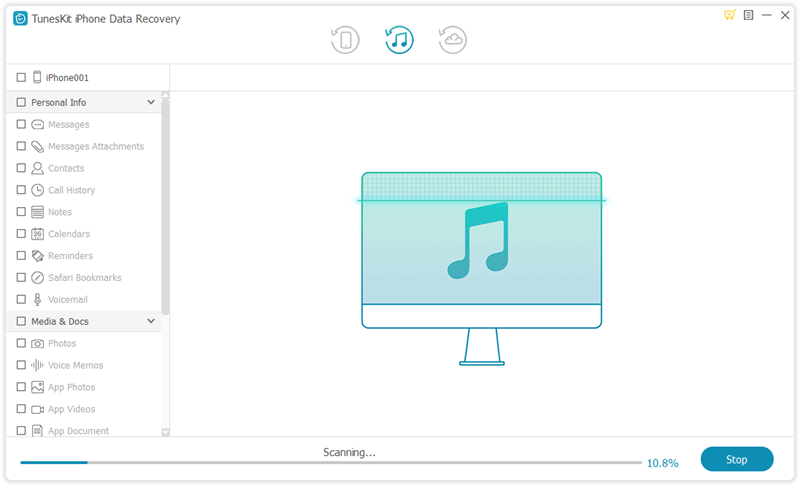
Step 3: Find out the deleted or lost data on your iTunes you are willing to recover and lastly hit the "Recover" button to restore them to the computer.
3. Retrieve via iCloud backup
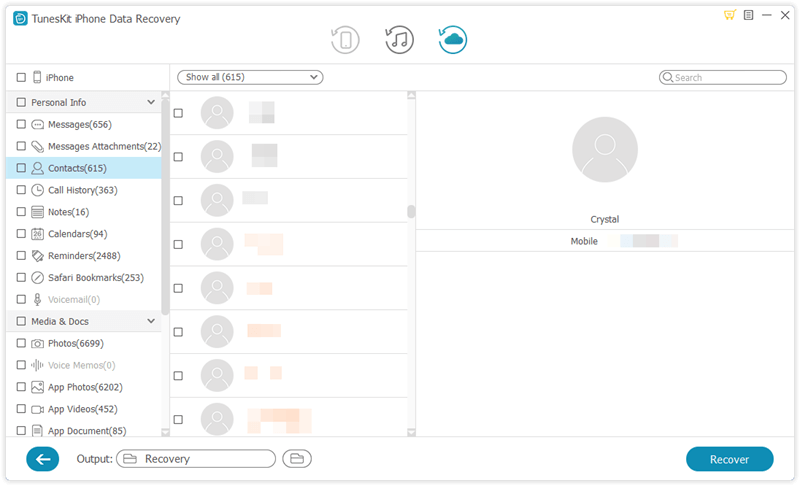
Step 1: Launch TunesKit iPhone Data Recovery on the computer and make your iPhone connected with the PC. Then choose the third icon called as "Recover from iCloud Backup" from the main interface.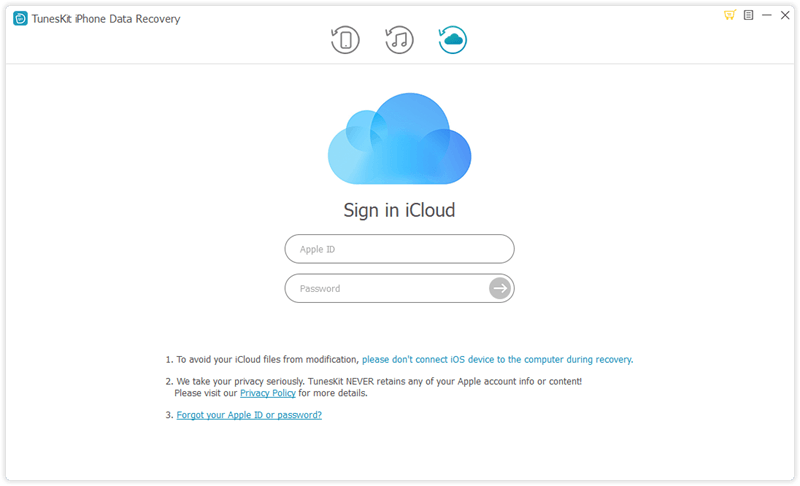
Step 2: Log in your iCloud by entering your Apple ID and password. Next select your own device among many different iPhones or iPads.
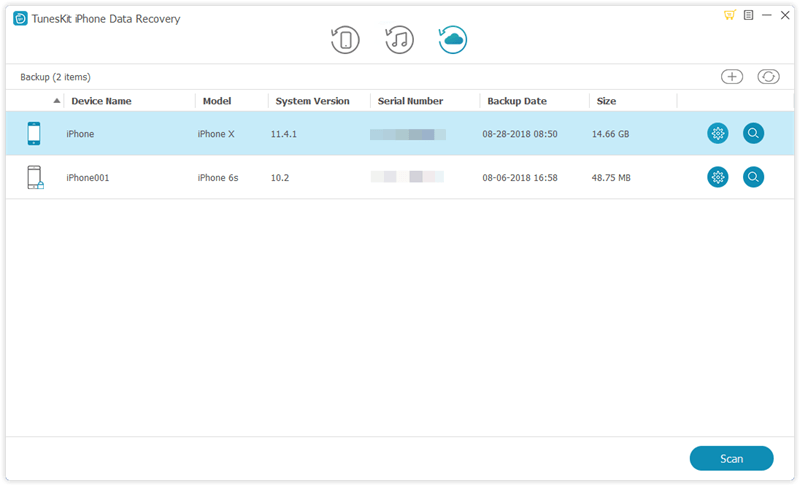
Step 3: Choose the data under the left columns and click on the "Recover" button to retrieve your lost data from bricked iPhone/iPad to the computer.

No comments:
Post a Comment