Showing posts with label TunesKit iOS System Repair. Show all posts

Dec 3, 2020

How to Fix Apple Music Freezing/Crashing on iPhone/iPad

Your Apple music app on the iPhone/iPad becomes freezing/crashing?  Are you scratching your head and have no idea about what to do when it stops suddenly and gets unresponsive? Well, this article is posted here to help you to fix the Apple music freezing/crashing on iOS 14/13.

Method 1: Force quit all background apps

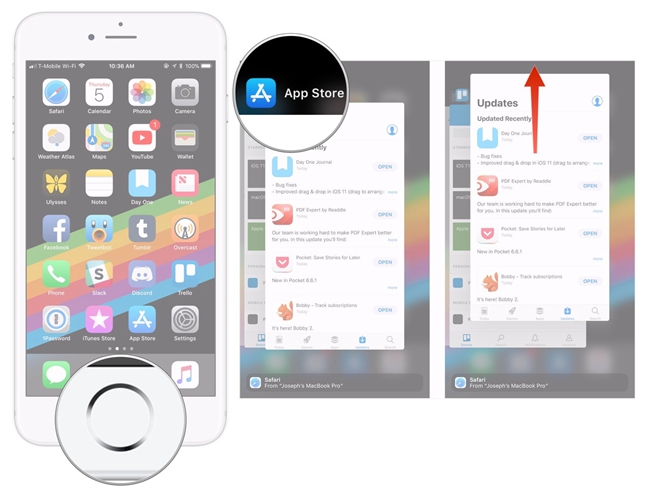
Once the Apple music turns frozen on your iPhone/iPad, what first comes to your mind is to quit all apps running in the background. Because there might be a faulty program that cause the problem. To force quit all apps background, you could double press down the Home button or launch the control center, then swipe them up off the top screen. After a while, re-open the Apple music app to see if the issue still exists.
Method 2: Use Apple music de-freeze software

Next, if you would like a faster and more effective way to solve Apple music app crashing or freezing on iOS 14/13, then you are highly recommended to use professional iOS system repair tools to fix the iOS, thus de-freezing the app on your iPhone/iPad. Here you could use the widely popular software named TunesKit iOS System Recovery. This mighty program can definitely settle the unresponsive Apple music while keeping all data on your device.

Key Features of TunesKit iOS System Recovery:

1. Resolve 50+ kinds of iOS problems like app crashing and so on.
2. Support almost all iOS devices and iOS versions.
3. With Standard and Advanced Modes to fix common and complicated issues.
4. One-click to enter or exit recovery mode.
5. Support downgrading iOS versions.
6. Easy steps and user-friendly screen.


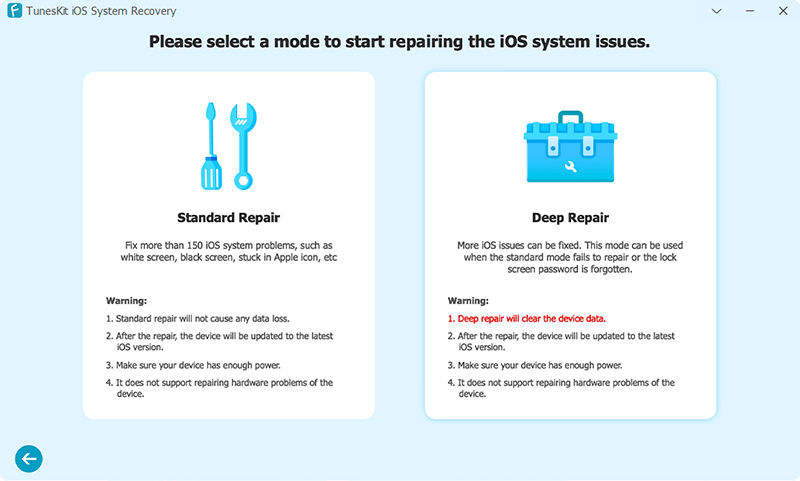
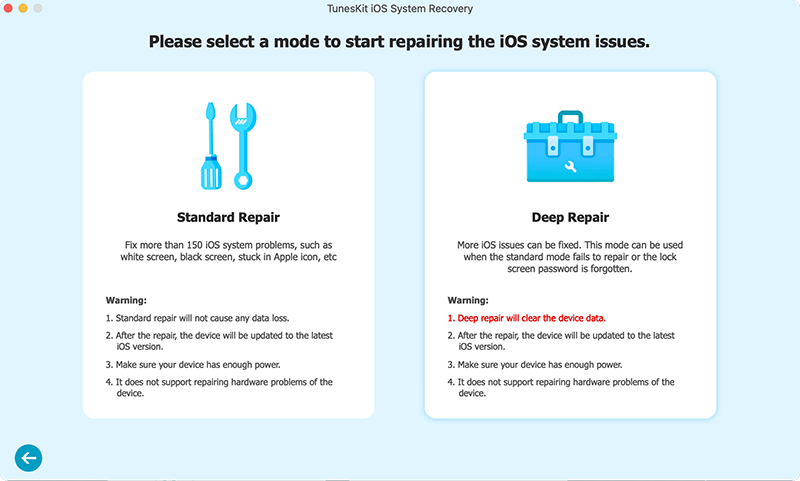
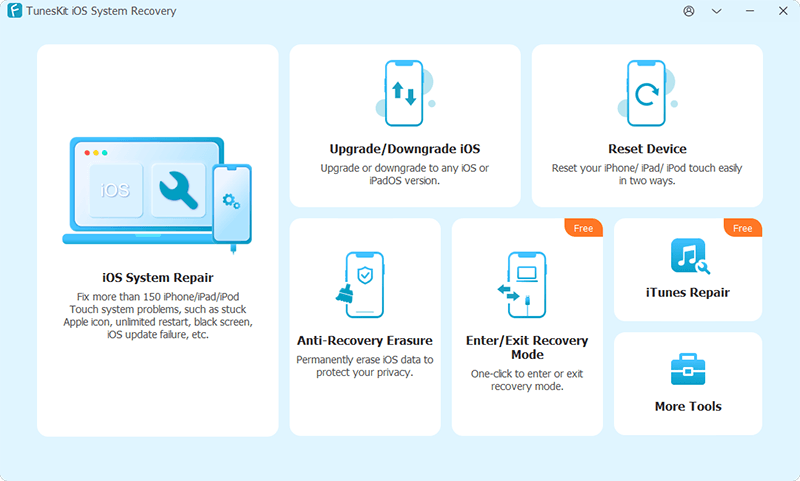
Step 1: Install TunesKit iOS System Recovery and open it. Then connect your iPhone to a PC. Click on the "Start" button to start fixing the unresponsive Apple music app and choose the "Standard mode".

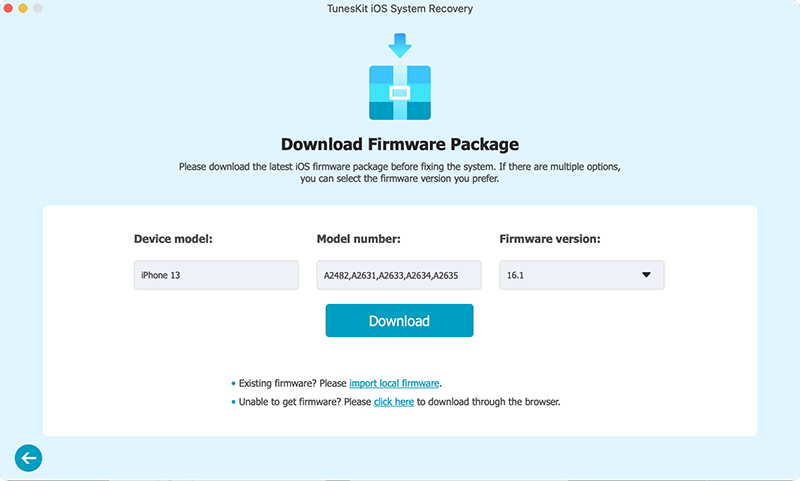
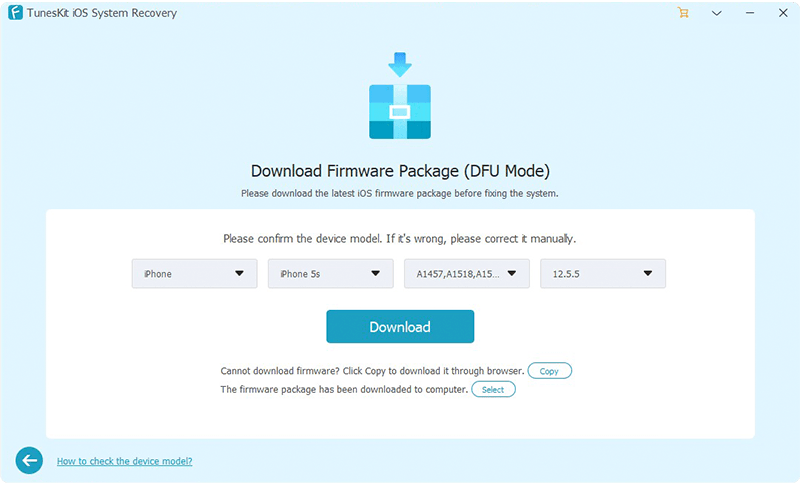
Step 2: Check the information of your device. Then tap on the "Download" button to download and verify the firmware package matched with your device.

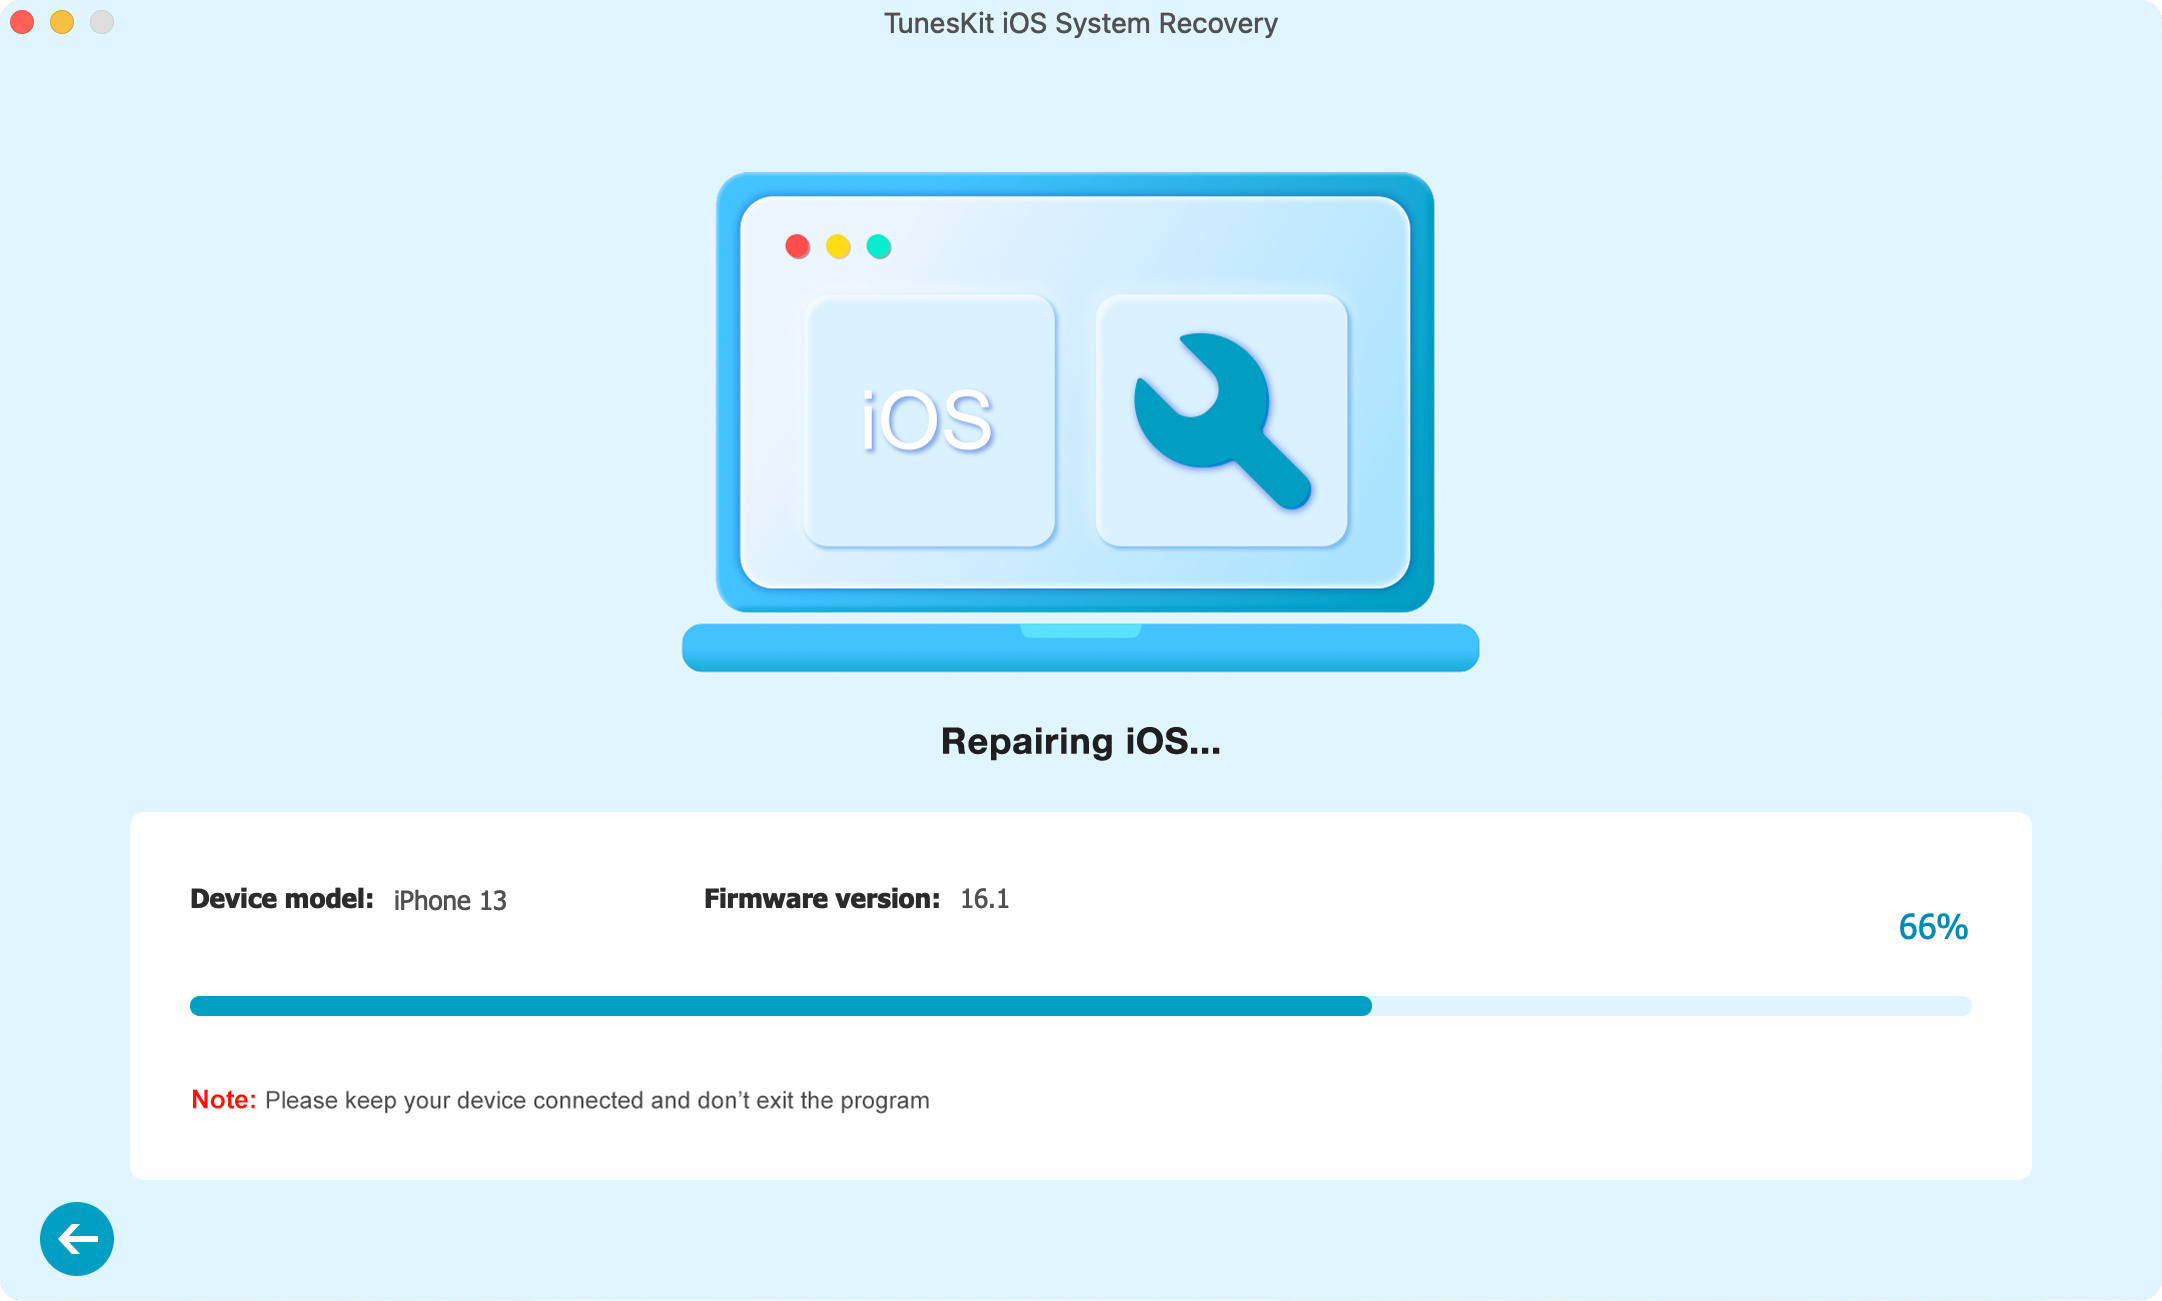
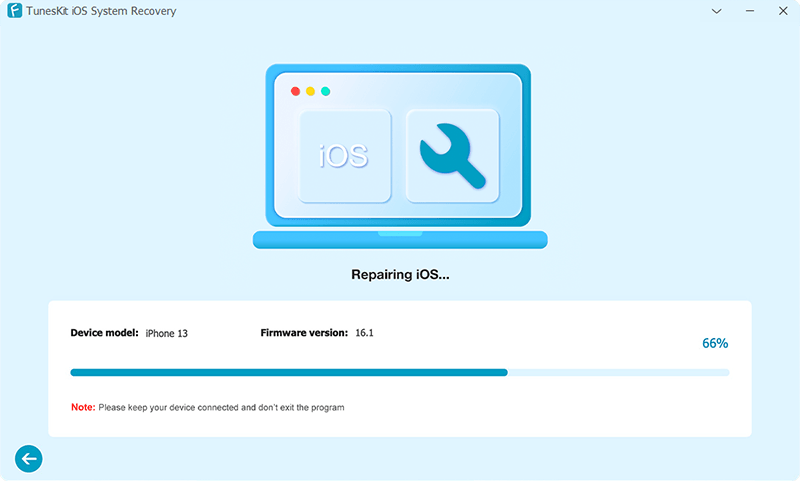
Step 3: After the firmware package is successfully download and verified, press down the "Repair" button to fix the iOS system. Finally, when the process finishes, close the software and plug out youe deice. At this time, the Apple music freezing or crashing on iPhone/iPad is resolved..
Method 3: Restart your iPhone/iPad

Of course, there are also other fixes that are worth trying. Firstly, restart your iPhone or iPad, which is publicly recognized as the common tip to work out most problems.

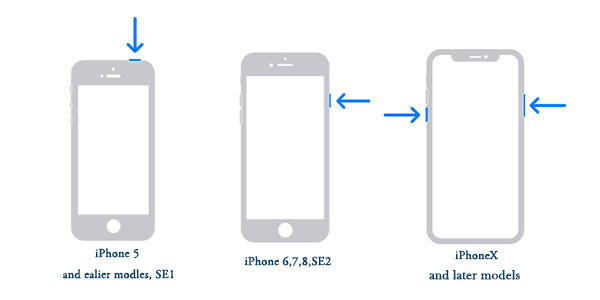
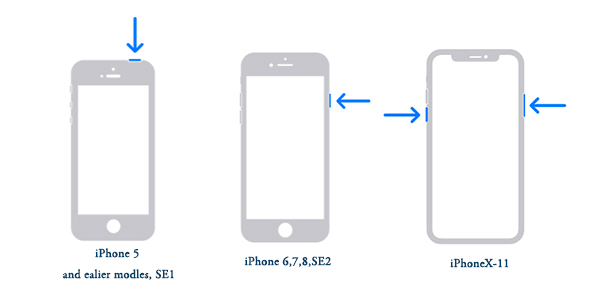
To restart iPhone X/11, simultaneously hold the Side and the Volume buttons until the Slider is shown, then pull on the slider to turn off the iPhone, finally press the Side button to turn on your device.

To reboot iPhone SE (2nd) /8 /7/6, hold the Side button until the Slider is dispalyed and pull on the slider to switch off the iPhone, finally press down the Side button to switch on the device.

To restart iPhone SE (1st) / 5 and former, hold the Top until the Slider is presented, then pull on the slider to power off the iPhone, finally press the top button to power on your device.

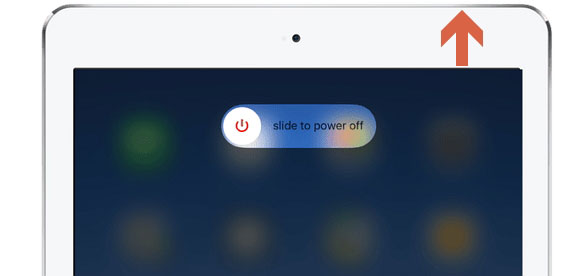
To restart iPad with Home button, press down the Home and Power buttons at the same time until the Apple logo appears on the interface.

To reboot other iPad versions, each quickly press and let go of volume up and down buttons, then hold the top button until the Apple logo appears on the screen.
Method 4: Reinstall the app

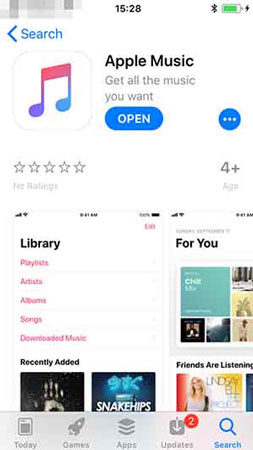
Usually, when an app goes wrong, directly deleting and installing again is possible in dealing with the issue. Similarly, uninstall the Apple music app and download it later to resolve the its crashing problem.

Procedures: Long press the Apple music app icon on the Home interface till the "X" signal pops up, then click the cross and head to the App store to install it again.
Method 5: Re-sign in the app

After re-installing the Apple music app, you must have to re-log in the account. If not, try to exit it and re-sign it to get out of this trouble. Here's how to do it.

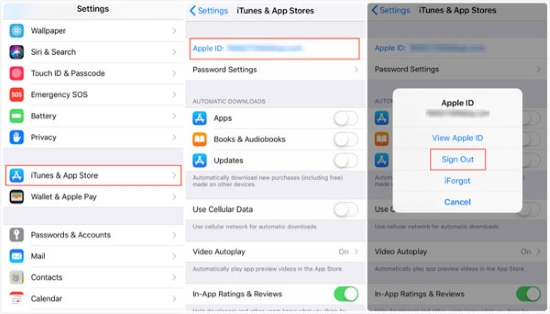
Step 1: Open Settings of iPhone/iPad and tap the iTunes & App store option.

Step 2: Click Apple ID to sign it out, then sign in again by entering your account and passcode.
Verdict

The apple music app on iPhone/iPad turning freezing or crashing after an iOS update could result from several situations. To name a few, an improper installation of iOS update, an incompatible app version and some software bugs. Whatever, what is significant is that you are able to resolve the matter with the help of the above 5 useful methods.

Nov 29, 2020

How to Fix iMessage Waiting for Activation on iPhone/iPad

The iMessage waiting for activation error or the service not activating sometimes happens on iPhone/iPad. Maybe you are encountering this problem right now and looking for according solutions to solve it. Well, if so, then you are on the right page as this article covers the full methods to fix iMessage waiting for activation issue on iPhone/iPad.

Part 1: Why does iMessage won't activate on iPhone/iPad?

iMessage won't activate on iPhone/iPad is a common glitch that occurred at present. Before getting to the fixes, it is significant for you to know the possible reasons behind this issue, and they are listed below.

1. Poor Wi-Fi signal strength or unstable network connectivity.

2. Older iOS version on iPhone/iPad.

3. Wrong Date &Time settings and other system settings.

4. Software bug and iOS system errors.

Part 2: How to fix iMessage waiting for activation on iPhone/iPad?

Solution 1: Check network connection

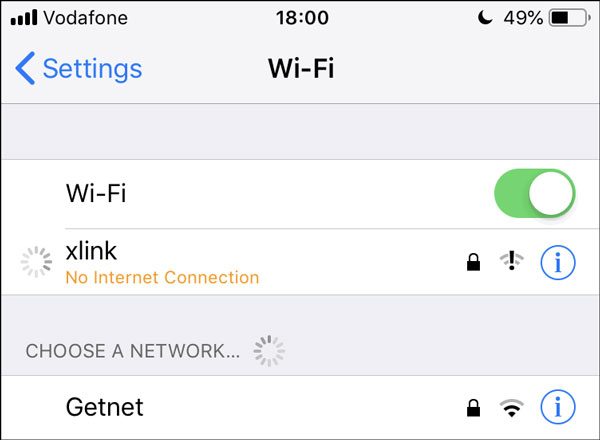
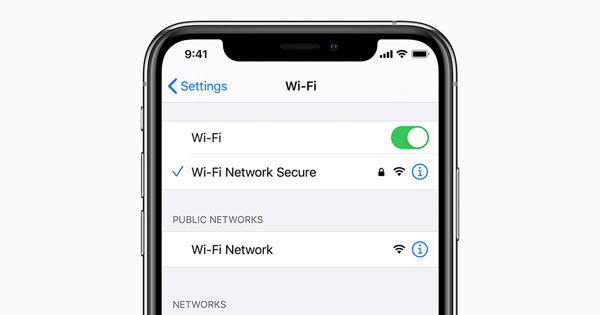
As mentioned above, unreliable or unstable network connection frequently result in iMessage waiting for activation error. In this way, you are supposed to check the network connectivity and the signal strength.

To do that, just head to Settings on iPhone/iPad > Wi-Fi, then see if the signal strength is full. If it isn't, you could switch off it and re-connect it again.

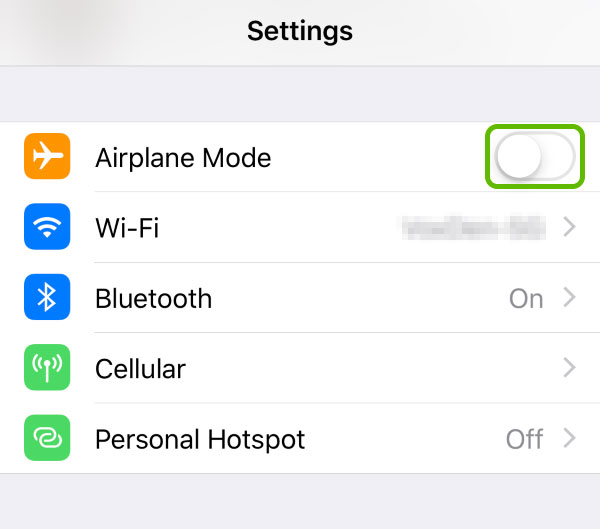
Solution 2: Toggle on and off Airplane Mode

Also, turning Airplane Mode on and off on your iPhone/iPad could be a good way to fix iMessage won't activate on the iOS devices. Because the operation can remove some technical bugs that prevent the device's incapability to connect network. To achieve that, navigate to iPhone/iPad's Settings > Airplane Mode, then toggle it off and toggle it on after a while. Or you can directly open the control center and find the Airplane Mode icon to proceed.

Solution 3: Set Date & Time correctly

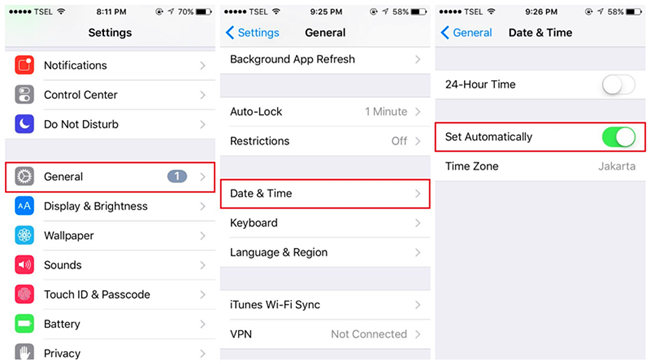
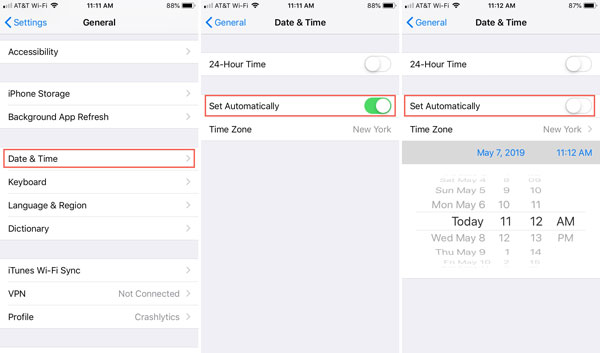
If the Date& Time is set incorrectly, iMessage possibly won't activate on iPhone/iPad. In this case, you need to check it and do as follows.

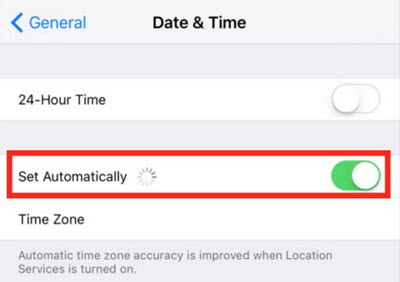
Follow this: launch Settings on iPhone/iPad and tap on the General option, then choose the "Date & Time" and set it correctly, or just enable the "Set Automatically" button.

Solution 4: Reset iMessage settings

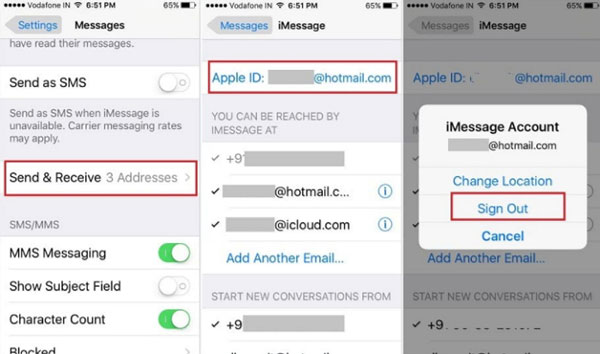
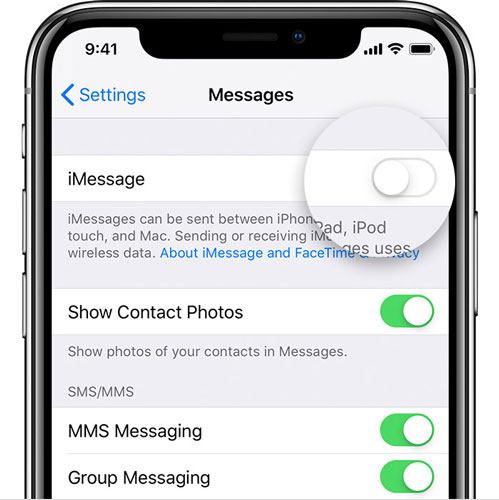
There are also other tips that are worth trying like re-sign in your Apple ID and re-enable the iMessage button. This tip is actually very simple yet efficient to resolve the problem discussed here.

Step 1: Open Settings and choose Messages.

Step 2: Click "Send and Receive" and select your Apple ID to log out.


Step 3: Then turn iMessage button off and on under the Messages option.


Step 4: Sign your Apple account again.

Solution 5: Software update

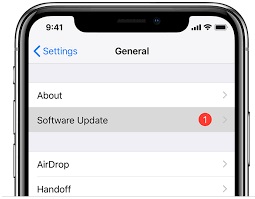
Have you done the software update on your iPhone or iPad? If not, then you are suggested to check this and update your device to the latest iOS version, thus settling iMessage won’t activate matter. To begin with, go to Settings > General > Software Update, then tap on the Download and Install button.

Solution 6: Fix iMessage bugs

If the iMessage waiting for activation error still appears, then you may have to fix iMessage activation bugs. Here the best iMessage waiting for activation fix called TunesKit iOS System Recovery is recommended. Why? Because this powerful software, without causing any data loss, can resolve more than 50 kinds of iOS issues such as diverse iTunes errors and so on. Besides, this tool is fully compatible with all iOS devices and iOS versions including iPhone 12 running iOS 14. Finally, with an easy-to-operate and user-friendly interface, TunesKit iOS System Recovery can easily fix the iMessage waiting for activation issue on iPhone/iPad.

Steps to fix iMessage waiting for activation error on iPhone/iPad.

Step 1: Connect the iPhone to PC and launch TunesKit.

Connect the iPhone with computer. Open TunesKit iOS System Recovery. Click on the blue Start button. Then choose the Standard Mode.


Step 2: Download the Firmware package.

See the information about your device is correct or not. Next, tap on the Download button to let the program download the firmware package matched with your device.


Step 3: Fix iMessage waiting for activation

When you have downloaded and verified the firmware package, hit on the Repair button to fix the iOS. After the fixing is completed, the iMessage won't activate gest solved.

Part 3: How to activate iMessage app on iPhone/iPad?

In conclusion, your device may have turned normal and the iMessage waiting for activation error has been resolved after the above methods. Lastly, other people might want to know how to activate iMessage service on iPhone/iPad. In fact, this will not take too much time and what you have to do is logging in your Apple account and password when setting up your device, then inputting the contact information.

Nov 19, 2020

Complete Fixes to FaceTime Waiting for Activation

We can make video calls and the like on FaceTime. However recently, many users find the FaceTime keeps waiting for activation and they cannot use the app. In this article, we will illustrate what does this message mean and the most effective Facetime waiting for activation fix methods.

1. What Does the FaceTime Waiting for Activation Means?

iPhone facetime waiting for activation problem has many causes. Normally, the FaceTime activation will be completed automatically when you're connected to the Internet. FaceTime needs a network connection at all times to be activated, and in most cases, the activation error results from poor or no connection. This happens most often when we use a new device. However, the causes can also be wrong time zone settings or software errors.

After trying the solutions below, remember to wait 24 hours so that the activation can be completed.

2. Solutions to the FaceTime Waiting for Activation Problem.

1.1 Check Network to Fix FaceTime Waiting for Activation iPhone

As we just mentioned, the activation needs to be done online, and poor or no connection will naturally hinder the procedure. Therefore, the first thing we need to fix is the cellular data or WiFi that you are using.

To do that, go to Settings > WiFi. Now you should see that you are connected to a WiFi network, otherwise, you should find your WiFi and connect to it. If you don’t have access to WiFi, then you should turn on the cellular data. Just go to the Settings > Cellular, then toggle on the Cellular switch.


1.2 Fix the Time Zone Settings

To ensure that FaceTime can work properly, you must ensure that your time zone is set correctly. To do that, go to Settings > General > Date and Time. You should see a list of time zone options to which you can set your iPhone. Make sure that you have it set to the correct one.

You might also notice there is an option saying "Set Automatically". You can turn this on to let your phone corrects your time zone on its own. However, if the automatic time zone setting goes wrong, it's better to adjust the time zone manually.

1.3 Fix the FaceTime Bugs Easily – TunesKit iOS System Recovery

With the simple solutions tired, your FaceTime might or might not resume to normal. If the problem persists, here is the easiest FaceTime waiting for activation fix for you. TunesKit iOS System Recovery is one of the best iOS repair tools. It can help you get rid of most iOS system errors easily. It is highly user-friendly – even amateur users can easily use this program to fix their FaceTime activation problem on their own. All you have to do is to click a few buttons.

Tutorial to Use TunesKit iOS System Recovery.

Step 1: Download and install TunesKit iOS System Recovery and open it. Use an Apple USB cord to connect your iDevice to your computer, and the program should recognize your device. Press the "Enter Recovery Mode" button, and the program will put the device into recovery mode. Press the "Start" button to continue.


Step 2: Two repairing modes will be displayed on the screen. Click on the "Standard Mode" box so that your iDevice will be fixed without any data loss (The "Advanced Mode" will erase all the data and fix more advanced issues). Press the "Next" button to proceed to the next step.


Step 3: Some basic info of your device will be shown on the screen. Please check and ensure that all is correct, then press the "Download" button to download the matching firmware.


Step 4: The final step is to push the "Repair" button to unzip the firmware and initiate the repairing process. It will be finished minutes later. By the time it ends, unplug the iDevice from the computer and check whether FaceTime works properly.

1.4 Turn Off FaceTime and Restart the iDevice

The reason you see the FaceTime waiting for activation message is probably that FaceTime or your device malfunctions temporarily. In that case, try turning off FaceTime and open it again. If it refuses to open, then just restart the phone and open FaceTime again to see if it works.

For users of iPhone X or later version, you must press and hold down the Side button and the Volume Up button. The Slide to Power Off slider will show up on the screen. Slide it to the right to turn off the device. Then, press and hold the Side button until you see the Apple logo.

For users of older iPhone, just hold the Side button until the slider appears on the screen. Similarly, slide to power off your device, then hold the side button until the Apple logo appears on the screen.

1.5 Update iOS to the Latest Version

The system errors and bugs that cause the activation problem can be solved by updating iOS. In fact, the update package often contains fixes to old glitches. So whenever you find something wrong with your iPhone or iPad, don’t hesitate to update.

To update your iOS, go to Settings > General > Software Update. Here the iDevice will automatically check for new updates, and if there is one available, download and install it. After the update, check and see if your FaceTime has been activated.

1.6 Contact Your Carrier or Apple Support

If the problem persists after you have tried all those solutions above, chances are that something wrong with your paid-up plan, or your devices seriously malfunction that it can only be fixed by Apple Support. Some guides may suggest users reset their iDevices or restore without telling them to back up the data. Our advice is that the restoration can only be done after consulting Apple Support.

3. Summary

The FaceTime waiting for activation problem has many causes. With the 6 solutions listed above, you should be able to get your FaceTime back to normal again.

Nov 16, 2020

5 Best Methods to Fix iPhone Not Showing Recent and Missed Calls

In recent times, some people have been complaining that the recent and missed call logs disappear from their iPhone and they cannot see them. Well, this is indeed an unusual problem and given the situation, this article is aimed at providing the reasons to explain why the recent calls not showing up on iPhone and the simple yet effective solutions to deal with it.

Part 1: Why does the recent and missed calls not show up on your iPhone?

As for the reasons why does the recent and missed calls disappear from iPhone, there are three possible conditions. As the situations vary from different iOS devices, you could check out the following causes according to your problem.

1. Wrong settings on iPhone. For some iPhone 6/7 models, if there are some settings going wrong, then the iPhone could not log the recent and missed calls. In this case, you had better examine some settings on your iPhone including storage space, network settings, time zone and so on.

2. A failed iOS update. For iPhone 8 and other customers, if you find the recent or missed calls often disappearing from your iPhone, then it might be the new iOS update replaces the existent settings and remove some data on iPhone such as the call traces.

3. Invalid iCloud/iTunes backups. If iPhone not showing recent and missed calls problem happens after your recover data from iTunes or iCloud backups, then you may do it in the wrong way.

Part 2: How to fix the recent and missed call logs disappearing from your iPhone?

Fortunately, there are some methods to solve the recent and missed calls not showing up on your iPhone, and the ways below are all the most complete and effective ones.

Way 1: Set Date & Time as Automatically

The wrong Data and Time settings may pose negative influences on the call history on your iPhone. To make it update by itself, please do the following steps to set it as "Automatically".

Step 1: Navigate to your iPhone's Settings > General.

Step 2: Scroll down to find the Date & Time option and switch the Set Automatically button on.

Way 2: Check iPhone storage space

Insufficient iPhone storage space might give rise to your iPhone not showing the recent and missed calls. To have much left room on iPhone, you could follow the steps as presented here.

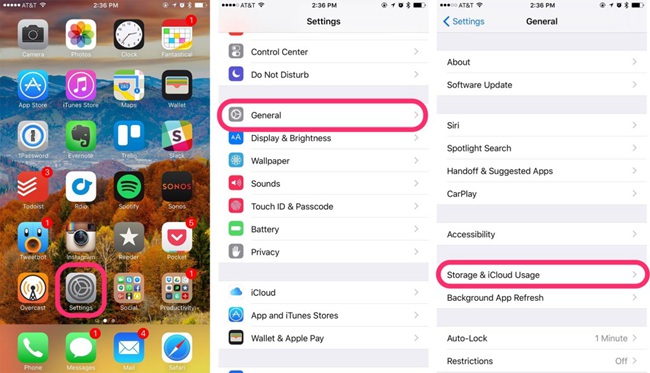
Step 1: Go to Settings > General on your iPhone.

Step 2: Click Storage & iCloud Usage > Manage Storage.

Step 3: Delete some unwanted apps or data to free up the space.

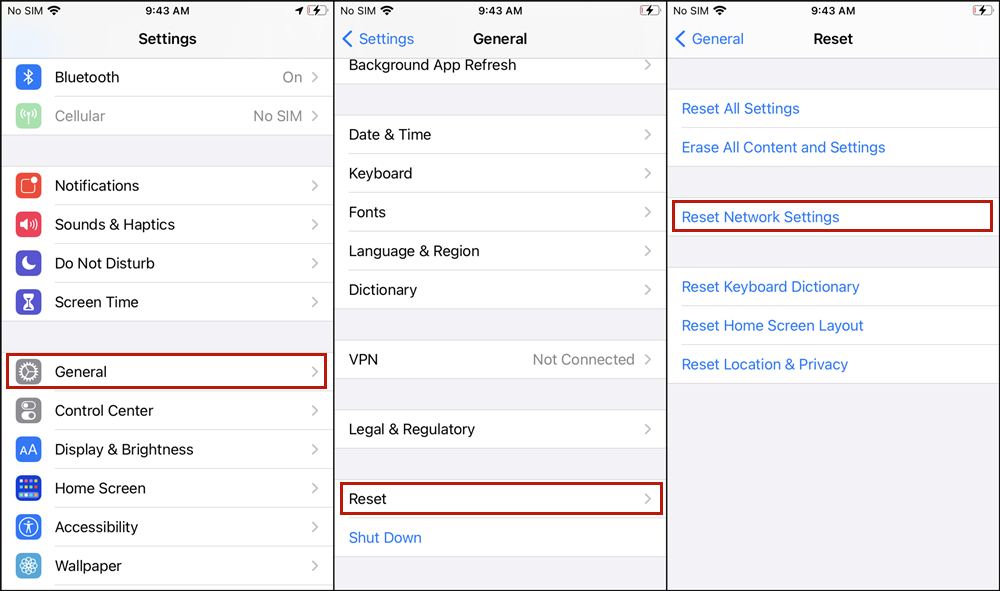
Way 3: Reset network settings

Resetting the network settings on your iPhone is also a favorable way to fix your iPhone not logging recent and missed calls, as the network plays an important role in the process.

Step 1: Launch Settings on iPhone and go to the General option.

Step 2: Tap on the Reset button.

Step 3: Choose the Reset Network Settings.

Way 4: Force restart your iPhone

Force restarting your iPhone can be helpful in getting rid of some software bugs that may cause the recent and missed calls disappearing from iPhone.

To reboot iPhone X/11, press the Side and the Volume buttons at the same time until the Slider appears, then drag on the slider to power off the iPhone, finally hold the Side button to open your device.

To restart iPhone SE (2nd) /8 /7/6, hold the Side button until the Slider shows up and pull the slider to switch off the iPhone, finally press the Side button to switch on the device.

To reopen iPhone SE (1st) / 5 and former, hold the Top until the Slider pops up, then pull on the slider to close the iPhone, finally reboot your device again by pressing the Top button.

Way 5: Fix it with TunesKit without data loss

Your iPhone still not showing the recent and missed calls after trying out the above methods? If it is this case, then you are suggested to fix the iOS system with professional iOS system repair tools, for instance, TunesKit iOS System Recovery. This powerful can help you to find out the recent and missed calls disappearing from your iPhone. Besides, during the reparation process, you will not lose any data on the device.

TunesKit iOS System Recovery Key Features

1. Resolve 50+ iOS issues.
2. Fix iOS/tvOS problems with no data loss.
3. Offer two repair modes - Standard/Advanced Mode.
4. One click to enter or exit the recovery mode for free.
5. Easy to use with friendly interface.

So how to fix iPhone not showing recent and missed calls with TunesKit iOS System Repair?

Step 1: Connect iPhone to computer and open TunesKit. First, connect your device to the computer with an original USB cable. Then launch TunesKit iOS System Recovery on the computer and it will detect your iPhone automatically. Click the "Start" button to begin and then choose the Standard Mode to fix iPhone not showing recent and missed calls without data loss.

Step 2: Download and verify firmware package. Confirm your device info and correct it manually if anything is wrong. Next click the "Download" button to get relevant iOS firmware package downloaded and verified. Wait a while until the process completes.

Step 3: Start to fix iPhone not showing recent and missed calls. Once the download is done, you can click the "Repair" button and start fixing the problem. Do not plug out your device while it's repairing iOS system, or it may cause other problems. After a few minutes, your device may come back to normal.

Part 3: Final words

After using the above workable ways, your iPhone can successfully show the recent and missed calls, but you might have thought about your older calls disappeared. If you want to bring them back through one-stop solution, then professional iOS data recovery tools such as TunesKit iPhone Data Recovery are highly recommendable.

Nov 9, 2020

Top 6 Ways to Fix iPhone/iPad Screen Too Dark and Other Brightness Issues

iPhone/iPad screen too dark, the auto-brightness feature not working, the brightness level keeping up or not going up, etc. matters. are the brightness problems. In fact, such issues do happen on iOS devices such as iPhone and iPad, and these issues often occur when the devices update to iOS 11, etc. Do you also encounter the above troubles or other brightness ones on your iPhone or iPad? Well, take it easy, as this tutorial will give you a hand to deal with them with ease no matter what kind of brightness problems you come across.

How to fix: iPhone brightness problems

These issues we are talking about maybe attributed to iOS update failure and other unknown errors. To resolve them, 5 quick fixes are afforded below and you could start to give it a shot right now.

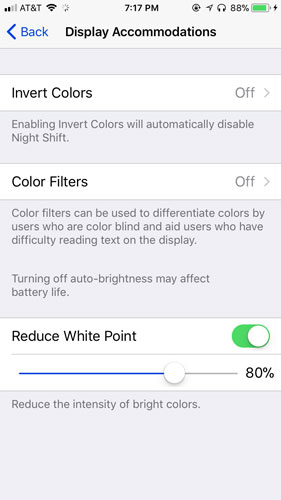
Fix 1: Disable Reduce White Point

If your iPhone or iPad becomes too dark, then you are suggested to disable the Reduce White Point feature, which is set to decrease the intensity of bright colors on your iPhone/iPad. If you turn it on, your device screen may get dim. To reverse it, try out the following procedures.

Step 1: Navigate to "Settings" > "General" > "Accessibility" on your iPhone/iPad.

Step 2: Then locate the "Display Accommodations" option.

Step 3: Turn off the "Reduce White Point" button.

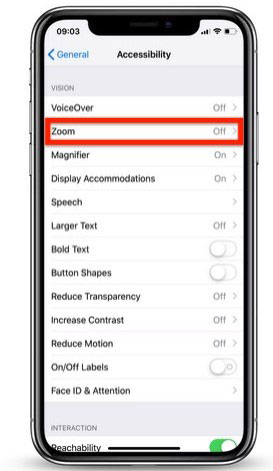
Fix 2: Turn off Zoom

Also, turning on the Zoom function on your iPhone/iPad, the screen turns dim and dark or other brightness problems will appear. In this case, you had better to turn it off and the related steps are as presented here.

Step 1: Head to iPhone/iPad "Settings" > "General" > "Accessibility".

Step 2: Find the Zoom function.

Step 3: Disable it by swiping it to the left.

Fix 3: Restart your iPhone/iPad

A long time of not rebooting the iPhone/iPad will lead to some errors including the brightness issues. So, you can have a try restarting your iPhone/iPad.

Rebooting iPhone

#iPhone X/11# hold down the Side and the Volume buttons in the meantime until the Slider is shown, then pull on the slider to turn off the iPhone, finally press the Side button to turn your device on.

#iPhone SE (2nd) /8 /7/6# press down the Side button until the Slider is displayed and drag on the slider to close the iPhone, finally press down the Side button to open the device.

#iPhone SE (1st)/5 and former# hold down the Top until the Slider appears, then drag on the slider to switch off the iPhone, finally switch on your device again by holding the Top button.

Restarting iPad

#iPad with Home button# hold the Home and Power buttons down at the same time until the Apple logo appears on the interface.

#other iPad versions# quickly press and release volume up and down buttons respectively, then hold the top button until the Apple logo appears on the screen.

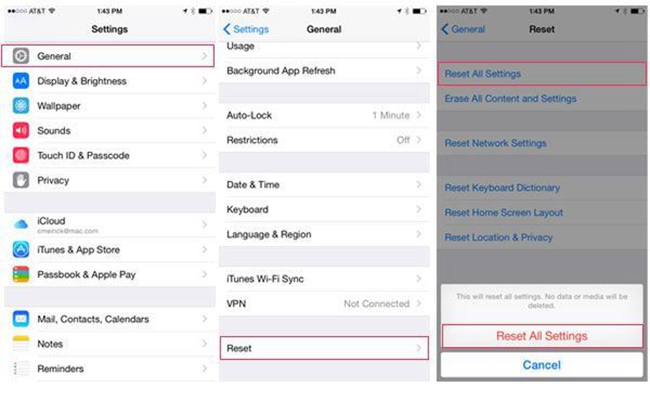
Fix 4: Reset all settings

If there are some wrong settings and you have no idea about the specific one that cause the brightness not working on your iPhone/iPad, try to reset all setting son your iPhone/iPad.

Step 1: Hit on Settings app on your iPhone and go to the General button.

Step 2: Click the Reset feature and tap the Reset All Settings option.

Step 3: Enter the passcode and confirm the order.

Fix 5: Restore your iPhone/iPad via iTunes

Of course, you could attempt to restore your iPhone, and one recommendable way to do that is to restore it via iTunes. But before proceed in the steps below, it is worth mentioning that this will erase all of the data on your device.

Step 1: Launch iTunes and connect your iPhone/iPad with the computer.

Step 2: Tap the iPhone/iPad icon when the device appears on iTunes successfully.

Step 3: Hit "Restore iPhone" in the column of Summary.

Step 4: Click the "Restore" button again.

Bonus tip

Besides the above possible solutions, another workable alternative to fix your iPhone/iPad screen too dark or other brightness problems is to use professional iOS system repair tools such asTunesKit iOS System Repair. This powerful program can also resolve other problems, for instance,iTunes errors and the like without data loss. You can also check out its other spotlights in the following framework.

Key Features of TunesKit iOS System Recovery

1. Fix more than 50 types of iOS issues
2. All iOS devices supported like iPhone,iPad, iPod, etc.
3. All iOS versions supported including the iOS 14.
4. Recover iOS to normal all by yourself in 3 steps

Step 1: Choose repair mode. Connect your iPhone/iPad with computer through an original USB cable. Then run TunesKit iOS System Recovery. Press the Start button on the interface, next, choose the Standard Mode.


Step 2: Download Firmware Package. Read and check the information about your device given on this page. Once you are sure that all of them are correct, click the Download button to download the firmware package matched with your device.


Step 3: Repair iPhone/iPad brightness problems. Tap on the Repair button to fix the iOS and wait until it tells you the repair completed. After that, restart your iPhone or iPad, your problem will be worked out.

Verdict

These are the 6 best methods to fix your iPhone/iPad brightness issues including the screen too dark. There is always a workaround that suits you and hope your problem successfully gets solved. If you have other better ideas or some other confusions, please be free to connect with us or give your comment below, we will give you a reply as soon as possible.

Nov 5, 2020

Effectively Fixed: iOS 14 Update Failure on iPhone/iPad

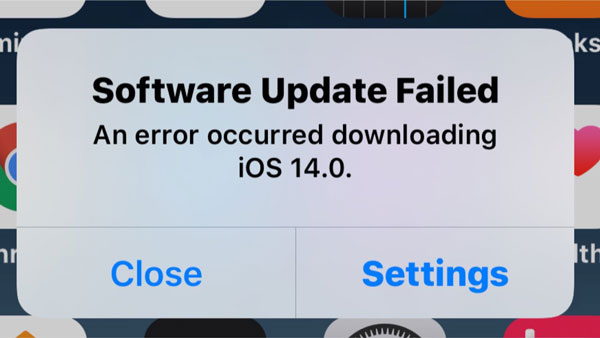
When I updated my iPhone to the iOS 14 version a few days ago, a message that reads Software Update Failed appeared. Though fortunately this issue has been fixed, yet I find that there are many other individuals beset with this problem. So, to help them and you who are facing the iOS 14 update failure, 6 effective methods are concluded below.

Why does your iPhone/iPad have the iOS 14 update failure?

To begin with, let us figure out why your iPhone/iPad says the iOS 14 update failed. The reasons are nothing but the ones presented here.

1. Insufficient available storage memory on your iPhone/iPad.

2. Failure to reach the update server.

3. Incomplete update process.

4. Long time of downloading the iOS 14 update.

How to fix failed iOS 14 update failure on iPhone/iPad?

Now let's get to the solutions to the iOS 14 update failure on your iPhone or iPad problem.

1. Close and update later

It is generally accepted that this way is the simplest one to get rid of the predicament. There are two options on the "Software Update Failed" message is shown: "Close" and "Settings". Press on the "Close" button to exit the update process, then wait for a while to go to the Settings > General > Software Update, and click on the "Download and Install" to update again.

2. Check network connection

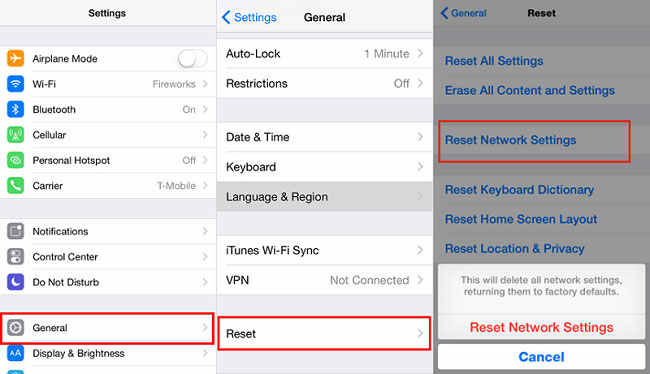
Whenever you update the iOS version on your iPhone or iPad, a stable Wi-Fi network connection is necessary. So, if the iOS 14 update failed after a long time of downloading, then you might have to check the network connection. Or you can directly boost it by resetting the network settings. To do this, just head to Settings > General > Reset > Reset Network Settings.

3. Clear space storage

Actually, if there is not enough storage space on your iPhone or iPad, the iOS 14 update failure can also happen. In this case, you are suggested to clear up some space by deleting not needed photos or apps. Or you can remove caches through navigating to Settings > General > iPhone Storage, and manage the space.

4. Update through iTunes

Also, you can try to update your device via iTunes. The operating procedures are rather easy and you can do it by yourself.

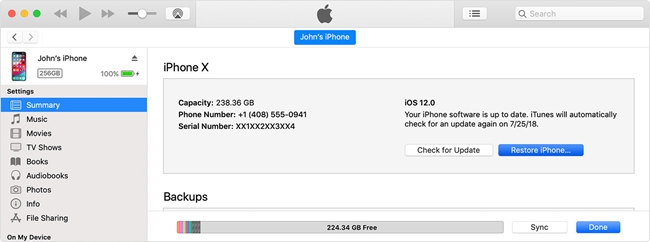
Step 1: Launch the latest iTunes on your computer and connect your iPhone/iPad with the computer through a USB cable.

Step 2: Tap on the iPhone/iPad icon on the right-left corner.

Step 3: Click on Check for Update option on the right column and get to the "Download and Update".

5. Manual update

If the above fixes don't work out, then you could update the iOS 14 manually. But this process can be a little complicated and it will delete all of your data on the device. If it doesn’t bother you, here are the related steps to guide you.

Step 1: Download the correct iOS 14 IPSW file on the ipsw.me website.

Step 2: Open iTunes and connect your iPhone/iPad with the computer.

Step 3: On the Summary tab, press the Shift button for Windows (Alt/Option key for Mac) and hit the Restore iPhone/iPad button.

Step 4: Choose the downloaded IPSW file and iTunes will begin to install the latest iOS 14.

6. Use TunesKit to restore your iPhone/iPad (no data loss)

Finally, the ultimate yet most useful fix is to use related iOS system recovery tools such as TunesKit iOS System Recovery. Besides resolving your iPhone/iPad iO 14 update failure, TunesKit can solve all iOS and tvOS system problems, including iTunes errors, a series of screen problems, and so on. If your iPhone, iPad, iPod touch, or Apple TV, etc. other iOS devices have any system issues, just use it and you will be happy to see the satisfying results. Moreover, it offers two modes, Standard Mode and Advanced Mode to settle common and difficult troubles respectively. Of course, easy operations and a customer-friendly interface make it more appealing.

The followings are the three simple operating steps of TunesKit iOS System Repair.

Step 1: Launch TunesKit. Connect the iPhone with your computer and launch TunesKit iOS System Recovery. Then click on the Start button.


Step 2:
Choose Mode. Press on the Standard Mode and then the Next button to go to the next step.
(No data loss will be brought under this mode.)

Step 3: Download Firmware. Check the information which belongs to your iPhone and tap on the Download button. You are now downloading the firmware package matched with your device. When it ends, click on the blue Repair button to fix your device.

Wrapping up

All in all, the above ways given are going to do you a favor to fix the iOS 14 update failure or error. If you have succeeded in dealing with this matter through them, please share it with your friends who encounter the issue. Finally, welcome to leave your thought below.