Aug 31, 2020

How to Rip DVD for Plex

Many of us like to watch DVDs so much for its high quality, so we own multiple DVDs and enjoy them by the DVD player.  However, sometimes we also want to play them on our iPhones and tablets. So, we use Plex, a software that can play videos on many devices.  A question comes: how to play DVDs on Plex?


What is Plex?

Before getting started to rip DVD to Plex, I would like to give a simple introduction to Plex. Plex is a powerful software whose main function is to let users stream all their content from computer to all other devices. To use it, we need to set up a Plex Server on the computer and Plex APPs on other devices.


How to Transfer DVD to Plex?

Since Plex cannot read the format of DVD, what we should do is to convert the DVD to other formats that Plex can support. Therefore, we need a DVD ripper for Plex. Some may choose famous software like Handbrake. But I will recommend TunesKit Video Converter. Why? That is because software like Handbrake can only change the format of DVD but cannot decrypt the protected videos, whilst TunesKit is able to remove the copyright protection of DVD and convert DVD or other videos to over 250 kinds of formats at 60X faster speed without quality loss.

And we can play the output video on 68+devices like Apple, Samsung, Huawei, Game Consoles, Smart TV, and the like. This versatile software enables us to edit videos too. We can also split a long video or audio file into many clips, add effect and frame, embed watermark, and use subtitles of our own. To copy the DVD to Plex, we need to download and install this DVD ripper first.


Step 1. Launch TunesKit and Add DVDs

Having finished the installation, we need to open this converter. We can have a double click or use a right-click and choose the Open button. Do not forget to put the DVD into the DVD driver of the computer.


 On the top part of the interface located three orange icons. Click the first one, then a pop-up appears. Add DVD files through it. An easier way is that we can just open the DVD folder and then drag and drop the target files to the program.


Step 2. Set Target Format

Now we can choose to edit this video if we want. Whether to edit video is all up to the user. We should start to pick the target format we want. When we look at the bottom of this interface, we will see the Format button. Click this button and the target format. Clicking the OK button after the operation above is necessary.


Step 3. Start to Rip DVD for Plex

Click the Output button and then we need to decide a proper place to put side the video. Then click the Convert button and wait for the conversion. Then just click the Converted button which we have introduced at the first step. We can see the video that has been converted from DVD to the format we want.


These are the 3 steps of transferring DVD. Next part we will learn how to upload the videos we just converted to Plex Server.


Summary

After reading this passage, have you understood how to play DVDs on Plex? Yes! we need to rip the DVDs to the formats that Plex supports. So we need a DVD ripper like TunesKit Video Converter. TunesKit is able to remove the copyright protection of DVD and convert DVD or other videos to over 250 kinds of formats at 60X faster speed without quality loss.  Don't believe it? Download and try it!

For more: https://www.tuneskit.com/video-converting-tips/rip-dvd-for-plex.html


Aug 30, 2020

iPhone YouTube Videos Can't Play over Wi-Fi? Fixed!

Nowadays, many people use YouTube to watch videos, etc. However, this application may not work at times, that is, the videos on Youtube have trouble playing over Wi-Fi. This usually happens during the process of updating iOS 12/13, while other programs perform normally. So when we meet with this issue, how do we fix it?

Tip 1: Restart iPhone

The first thing you should do when our iPhone or other devices meet some glitches is restarting them. This is the easiest way, usually, also a useful one. So never underrate the power of restarting.

For iPhone 8 and models issued earlier: Push and hold down the Power button until "slide to power off" shows. Then just swipe the Power icon. Wait for a while, turn on the iPhone by pushing and holding the Power button.

For iPhone X and models issued later: Push and hold the Volume button and the Side button at the same time until "slide to power off" appears. Then swipe the power icon like the operation above. Finally, turn on the iPhone.

Tip 2: Reset Network Settings

Resetting the Network Setting is another way to fix the problem--YouTube videos can't play on Wi-Fi at iPhone.

Go to the Settings of your iPhone>click "General"> choose "Reset" > "Reset Network Setting". Something you must know before doing this fixation is that resetting the Network Setting will erase all the network info on your iPhone. Having a backup is necessary for you.

Tip 3: Use the Airplane Mode

We all know we should open the Airplane Mode on planes. Some may wonder why it helps when fixing YouTube videos can't play on Wi-Fi. That is because opening and then closing it will eliminate all the network connectivity on the iPhone.

How-to-do: First open the Control Center. Next, click the Airplane Mode. Wait for a while, turn it off.

Tip 4: Update YouTube or Reinstall YouTube

Maybe your YouTube just was not updated to the latest model and then lead to iPhone won't play YouTube videos on Wi-Fi. So, you can try to update this APP. If that still not works, reinstall YouTube.

How to update YouTube: Go to the APP Store and click the Update button beside YouTube.

How to reinstall YouTube: Click and hold the YouTube APP for a while at the home screen of your iPhone. Then click on the cross icon on YouTube to uninstall it. The next step is going to the APP Store to install a new one.

Tip 5: Use a Third-party Software

Still cannot fix your problem?This one must work! This useful software-- TunesKit iOS System Recovery focuses on solving the system errors of the iOS, supporting iPhone, iPad, iPod touch, and Apple TV.

TunesKit can fix 50+ iOS system issues, including iPhone stuck in recovery mode or becoming black/frozen/white screen, etc. It offers two modes for you: Standard mode and Advanced mode to fix the common issues and serious issues correspondingly. There is no data loss when you use the Standard mode.

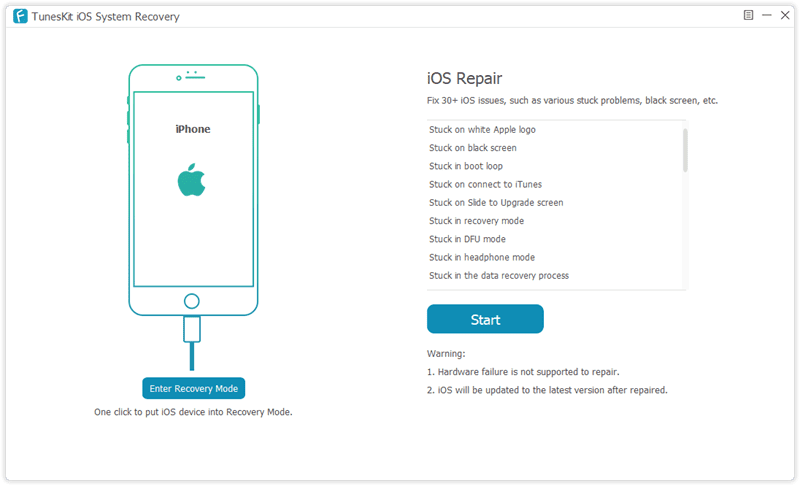
Step 1: Connect the iPhone with iOS System Problem to PC. You can connect the iPhone to your PC with the help of the USB cable. Use a double click to start TunesKit iOS System Recovery. Then you can enter or exit Recovery Mode by clicking the Enter/Exit Recovery Mode button which is blue. Click "Start", another blue button.


Step 2: Fill Information of Device and Download Firmware. This page is to collect some info of the device with any iOS system problems to better fix it later. What you should do now is to check the information on your iPhone. If it is right, tap the "Download" button. If not, you edit it before you click the "Download" button.


Step 3: Fix the iOS System Issues on Your iPhone. When the firmware has been downloaded, tap the "Repair" button. The last thing you can do is wait.

Final words

These are 5 methods to fix your YouTube videos that can't play over Wi-Fi on the iPhone problem. Some of them may lead to data loss on iPhone, if you do not want that, then use professional iOS system repair tools are highly recommended.

Aug 27, 2020

Troubleshooting Guides to Fix iPhone Ghost Touch

 iPhone ghost touch means that the iPhone pops up being touched by itself as if it is operated automatically or by other people we cannot see. This may seem a little scary yet it can be fixed by many easy methods. So just check out this article.

First, why does the iPhone appear ghost touch? many models including iPhone XR, iPhone 8,7, and etc showing ghost touch may be attributed to a wrong display, injured screen factors, software glitches and errors, defective digital manufacturing, and the like. 

The Best Way

Now let's look at the best way to solve the iPhone ghost touch. That is using TunesKit iOS System Recovery. It is a relatively popular program to bring your iOS system back to normal with almost every problem solved. It fixes all iOS and tvOS system issues including iPhone recovery mode, white Apple logo, black screen, Apple TV issues, etc. Besides, there is no data loss after the reparation with standard mode. Moreover, it supports diverse devices like iPhone, iPad, iPod touch, and Apple TV, and all iOS versions, including the latest iOS 13. Finally, it has a simple interface that is easily understood and operated by customers.

To repair the iPhone ghost touch screen issue, you just follow three steps.

Step 1: Firstly, open TunesKit iOS System Recovery for Windows on your computer. Then you have to connect your iPhone till it's detected. Next, click the "Start" button. Next, choose the "Standard Mode" and "Next". You have to select which device you've connected. Then follow the instructions from the interface and let your device is into DFU mode. After that, click the "Next" button.
Step 2: The application will download the firmware package matched to your device after finishing the first step. Before that, you have to make sure the device info is correct, including the model version, iOS version, etc. You can correct it if there's anything wrong. If all information is correct, click the "Download" and it will start downloading and verifying the firmware.

Step 3: When the firmware has been downloaded successfully, you just click the "Repair" button and the program will automatically begin to fix your iPhone. Don’t disconnect your device until the process is completed. Otherwise, the device might become bricked.

Other Methods

1. Clean the Touchscreen of Your iPhone

You may wonder why cleaning iPhone touchscreen works. It is because some dust and particles on your iPhone may make the device act on its own, especially when the dust is accumulated after a quite long time. It is simple for you to clean the iPhone touchscreen. Before starting, you have to switch the iPhone off and unplug all connected cables. Then you are supposed to get a clean and uncouth cloth or tissue paper with some water. Lastly, you can begin wiping your device’s screen from the top to the end in a gentle manner.

2. Remove Your iPhone Screen Protector

Although the screen protector is usually employed by users to keep the iPhone from scratch, it may sometimes cause some issues about operations like ghost touch. Under such circumstances, you have to take off your iPhone’s screen protector to get the problem solved. Take it from one corner and then step by step, slowly remove it completely.

3. Take off Your iPhone’s Case

Similar to the screen protectors, iPhone’s case also leads to ghost touch problems. When you find that your device’s screen is slightly twisted, you can take away the case of your iPhone. As the hard case may occasionally twist your iPhone’s screen. The iPhone ghost touch screen problem may be fixed after removing the case.

4. Restart Your Device

Whenever the iPhone gets wrong, most people always let their iPhone power off and restart them first. You can also have a try to restart your iPhone after having used above quick fixes which cannot solve the problem as expected.

If you use iPhone X and later, press the slide and volume button. When the slide to power off signal shows, slide it to the right.

If your device is the iPhone 8 and earlier, press the top button and you will see a power-off sign, then swipe it to the right.

5.  Recover iPhone by Putting it into Recovery Mode

If restarting iPhone doesn’t help you, to put your iPhone into recovery mode may also do the trick. But recovering iPhone might cause some data loss. So you are suggested to do data backup before putting the iPhone into recovery mode.

Please follow these steps to get the iPhone into recovery mode.

Step 1: Click iTunes on your computer and connect your device.

Step 2: Hold and release the volume up and down button respectively.

Step 3: Press the side button and enter the recovery mode.

Step 4: Finally click update or restore.

6. Factory Reset Your iPhone

A factory reset usually can fix the problem of ghost touch on the iPhone, because it can remove some settings that cause the problem. But this method will remove all data of your iPhone. So you are suggested to backup data before you try the following steps.

To factory reset your iPhone, go to Settings, then the General, next to the Reset, and finally Erase all Contents and Settings. Enter the device's passcode when prompted and then click on "Erase iPhone" to complete the process.

7. Restore Your iPhone via iTunes

If the above methods don’t work, then you are suggested to try to restore your iPhone in iTunes. If you don’t mind the data loss, you can follow the following steps:

Step 1: Open the iTunes and connect your iPhone to the computer.

Step 2: Click the iPhone icon when the iPhone appears in iTunes successfully.

Step 3: Click “Restore iPhone” in the column of Summary.

Step 4: Click “Restore” again to make sure the process works well and then iTunes will restore the device connected to the factory settings.

8. Contact Apple

If you got this far, it might mean the problem is not solved yet. Then the final try should be bringing your iPhone to the Apple store. The store will provide free and authorized service to make the ghost touch on your iPhone fixed. But first, you have to make sure you have got data backups by iTunes and iCloud.

We sincerely hope this full guides to solve iPhone ghost touch can be useful for you. If you feel it's good, you can share this post with your friends or relatives who have the same problem. And if you have any questions, leave your comment below.

Aug 26, 2020

Complete Guides to iPhone Error 29

Like other iPhone errors, iPhone error 29, also known as iTunes error 29, is also a kind of systematic problem. Do you come across this issue and wonder how to fix it? Well, this passage will provide you the best solutions to solve iTunes error 29. 

Part 1: Potential reasons for error 29

1. Hardware problem. It usually happens when we use the battery that is not original.

2. Outdated version of iTunes. Sometimes when our iTunes stays at an outdated version, error 29 will occur.

3. Antivirus software. When antivirus software is outdated, error 29 may happen, too.

4. Other reasons.

Part 2: How to fix

Here comes something you care about most. Specific ways to solve this problem.

Method 1: Restore Your Battery

This method suits those who didn't use an original battery and caused error 29. You need to remove your battery and change an original one. It is recommended that you should go to the Apple store to buy a new one and of course, ask for some help.


Method 2: Update Antivirus Software on your iPhone

If there is no problem with the hardware such as your battery, the antivirus software on your iPhone may need to update. Antivirus software protects your iPhone from being attacked. When it is outdated, error 29 may occur to your iPhone. Thus, what you need to do is go to iTunes and update your antivirus software. Do remember that you should always keep it updated, or the same error may appear again.

Method 3: Update iTunes

Your iTunes can be the real factor leading to error 29. When iTunes is outdated, the answer to how to fix iPhone error 29 is obvious: go to update iTunes. Here are specific steps of updating iTunes on windows.

Step 1: Launch iTunes.

Step 2: Click Help button > Check for Updates.

Step 3: Follow the instructions to update iTunes to the latest version.

Method 4: The Best Fix

You may feel too tired of guessing and trying the methods listed above one by one. I would like to suggest to you a useful software——TunesKit iOS System Recovery. This is a professional software that focuses on solving the system errors of the iOS system. Therefore, when you find the problem is not caused by hardware (battery or SIM card), you can use the program to solve all the iOS system problems.

This software can fix 50+ iOS system issues, including Apple logo, black screen, etc. Most importantly, there is no data loss during the repairing process. So, you don't have to worry that you have to reset everything on your iPhone. It provides two modes for users to solve different issues: Standard mode and Advanced mode. The former one is to solve some common issues and the other one is for serious issues.

Only 3 steps can you fix iPhone error 29 using this software.

Step 1: Launch TunesKit iOS System Recovery on your computer. Then connect iPhone via the USB cable. You can enter or exit Recovery Mode by clicking Enter/Exit Recovery Mode button. Click "Start" to begin your repairing.


Step 2: Here you are suggested to confirm that the device info is correct. If all is correct, click the "Download" button. If not, edit them and click the "Download" button to download the firmware package.


Step 3: When the firmware is downloaded, simply click the "Repair" button to finish your repairing.

Part 3: Final words

In this article, we have offered you 4 best ways to resolve iPhone error 29. Different fron other 3 methods, the last one, that is using iOS system repair tools is your top choice, which is more effective and won't cause any data loss. Finally, if you have any question, please give your comment below.


Aug 23, 2020

iPad Red Screen? Solved!

 One of the most common problems of the iPad is the red screen of death. When the issue of iPad red screen occurs, people are alarmed by this color and they have no idea about what to do to fix this matter. Want to know the methods to fix the red warning color on the iPad? This blog is just what you need.

The first way is to hard reset your iPad. If your iPad with a red screen can be turned off, though this is not very likely, you should do so. And if not, a hard rest will do. A hard reset, also called a hard reboot, may and may not eliminate the ultimate origin of what cause the iPad red screen, but it can definitely serve as an expedient solution, which at least allows your iPad to function for a certain period of time.

To force an iPad to restart, hold the Home button and Power button, which are pointed out in the picture below, at the time until the Apple logo appears on the screen.

The second fix is the most useful and efficient one to work out an iPad red screen. When the red screen is probably caused by software glitches or corrupted software according to your deduction, your first reaction might be spending time and effort on finding the problematic software. However, there is an efficient tool to save you from all the errands, including trying various methods provided on the Internet. The tool is TunesKit iOS System Recovery.

It is an iOS system recovery tool that covers more than 30 iOS problems, iPad red seen included. The most outstanding feature of this software is that its recovery will not damage your precious personal data. Don't worry even if you are not confident with your ability to use a computer, because it only takes three simple steps to repair your iPad. 

Step 1: Launch TunesKit iOS System Recovery and connect your iPad to the computer with Apple USB cable (to ensure stable connection). Click the Start button after your iPad has entered the Recovery Mode. Then in the mode selection window, choose the Standard Mode, because the Standard Model can perfectly solve your problem without erasing the personal data.

Step 2: In the window shown below, you need to confirm the displaying device info and correct it if anything is wrong. Then press the Download button at the lower right corner to download the repairing firmware matching your device. It is necessary to make sure there is enough space in the target download folder, otherwise, the firmware download will naturally fail.


Step 3: Once the firmware is downloaded, click on the Repair button and wait until the repairing process finishes. Note that a stable connection must be maintained during the process in case your iPad gets bricked.

Finally, if unfortunately above two methods don't work, you can try to ask Apple official support to resolve it. This is solution suits those red screen errors caused by hardware issues. For example, if you see the red screen on the iPad after it was dropped on the floor, then the hardware damage is very likely the culprit. Sometimes, hardware damages may not result from obvious physical damages, and bad using habits, such as using an iPad while it is being charged, will lead to hardware damages.

All in all, for hardware issues, the best solution is to go to the nearby Apple outlets to have the damaged parts repaired or replaced. It's even better if you have a warranty, which can reduce your repairing fee.

In addition, for those who have software or iOS issues and the previous 2 solutions fail to work, Apple's official assistance is recommended as the final method. It is not recommended to iTunes restore the iPad on your own, because that will make you lose all the data. Leaving the decision to the professional technician is a safer choice.

In conclusion, when we meet with the iPad red screen of death issue, don't be fretted! These three ways can be used to easily let you get out of the trouble. Just give it a shot.

Aug 20, 2020

Easily Fix iPad White Screen in 5 Ways

 iPad getting stuck on the white screen is one of the common issues among diverse kinds of iOS problems. There are many reasons behind it, for example, iOS update failure, software errors. But despite the causes that lead to this matter, it is fixable and next we are going to introduce the 5 most effective and useful solutions to work out this trouble.

Way 1: Hard reboot your iPad

Generally speaking, force restarting your device is a simple yet effective method to solve iOS stuck problems. iPad stuck on a white screen is no exception. You can simply hold the Power button and Home button simultaneously for about a few seconds until the Apple logo shows up. It will restart again and you can check whether the problem is solved.

Way 2: Try the three-button trick

This method is not always working, according to the reports from many iOS users. But it still worth a try, what if you succeed? The steps are very simple. Just press and hold the Home button, Volume Up button, and then Power button for a while and wait until the white screen on your iPad disappeared. 10 seconds later, the Apple logo will appear and your iPad will reboot again.

Way 3: Use TunesKit iOS Repair with almost 100% success rate

After trying to hard reset your device by using the two methods above, if the white screen problem still exists, you can consider using a professional iOS system recovery tool to fix it. TunesKit iOS System Recovery is such a comprehensive and efficient iOS repair program that is specially developed to fix up to 30 iOS-related issues. These problems include iPhone stuck on the white Apple logo, iPad won't turn on, iPhone black screen of death, blue screen, red screen, etc. The most powerful characteristic of this tool is that you will never worry about the data loss when using it to fix iOS system problems. What's more, it supports all iOS including the latest iOS 12 and almost all models of iPhone, iPad, iPod touch.

Step 1: Launch TunesKit iOS System Recovery program and use a USB cord to connect your iPad to the computer. Then click the Start button and choose the Standard Mode which will not cause any data loss. Press the Next button to continue.
Step 2: Now your need to check your device info such as model name, iOS version, etc. If nothing is wrong, you can simple hit the Download button to ask TunesKit to download the firmware package you need.

Step 3: Once the download and verification of firmware package is completed, you can start fixing white screen problem by clicking the Repair button. Wait until the process bar ends. Remember not plug your device during the process, or your device may get bricked.

Way 4: Put your iPad into recovery mode

Another solution to fix the iPad stuck on the white screen is to try restoring your iPad with iTunes. It will reinstall iOS on the iPad, so all the data your device will be effaced, but you can use TunesKit iPhone Data Recovery to get them back. Or if you don't mind, you can follow the quick steps below.

Step 1: Open iTunes and update it to the latest version. Connect iPad to your computer via a USB cable;

Step 2: Since your iPad is in a white screen state, it can't be detected by iTunes. You need to put it into the recovery mode. You can first hold the Power and Home buttons at the same time for about 10 seconds, and release the Power button and only hold the Home button until you see the Apple logo. Keep holding it until the Connect to iTunes icon appears;

Step 3: Once your device entered the recovery mode successfully, choose Restore iPad and wait until the process is finished. You can now set up your iPad as a new device.


Way 5: Restore your device in DFU mode

Alternatively, you can also put your iPad into the DFU (Device Firmware Update) mode and then use iTunes to restore it. Also, all the data on the iPad will be erased. Here is how to fix the iPad white screen problem using this method.

Step 1: Connect iPad to the computer and then launch iTunes;

Step 2: Switch off the iPad and hold the Power button and Home button simultaneously for 10 seconds. Then release the Power button and keep holding the Home button. If you see the "Plug into iTunes" message, you need to repeat the process; if the screen turns black, your iPad has entered the DFU mode now;

Step 3: iTunes will ask you to Restore the iPad and confirm the action. After it's done, your problem should be solved.

Verdict

Now you have known the best and most full solutions to fix your iPad screen becomes white problem, quickly give it a shot, and if you have any questions or confusion during the process of repairing, welcome to connect us or leave your comment below.


Aug 19, 2020

3 Best Ways to Recover WhatsApp Messages from Broken iPhone

 WhatsApp Messenger is a widely accepted application in the world. It saves a lot of vital files including chat history and photos. If we lose these important data, it must be a very annoying thing. But don't worry, this article will provide you top 3 methods on how to easily and efficiently recover WhatsApp messages from a broken iPhone.


Before we get to the solutions, I have to recommend a WhatsApp recovery tool that you will need in the following. That is the TunesKit iPhone Data Recovery. What makes this software stand out from all iOS data recovery solutions is its fastest speed of restoring the lost and deleted files on iPhone, iPad, and iPod touch. It's the most comprehensive iPhone data recovery with three smart data recovery modes to ensure the utmost possibility of safe and through data retrieval on iOS devices, which means that you can recover WhatsApp messages from iPhone without backup or restore them from iTunes/iCloud backup file. You don't have to worry about the success rate of this program as it is capable of rescuing deleted iOS files in various data loss cases, whether it's because of device lost, jailbreak error, factory reset, or other factors. Besides, it recovers over 20 types of lost data from the iOS devices including photos, videos, contacts, notes, Kik messages, voice memos, etc. and allows users to preview all deleted files one by one to decide whether to recover all data or only part of them. Moreover, it is compatible with almost all models of iOS devices ranging from iPhone 4 to iPhone XS Max, all models of iPad, iPod touch 6, etc.

Way 1: Retrieve from broken iPhone directly

If the screen of your iPhone is working normally and you can still open your device, then you are able to do the recovering of WhatsApp messages from your device directly. It can still achieve recovery if you have not created any backups to your iPhone before.
Step 1: Launch TunesKit iPhone Data Recovery and connect your broken iPhone to the computer with a USB cable. Leave the recovery mode as the default one - "Recover from iOS".
Step 2: When the program succeeds to detect your device, click the Scan button and it will start scanning all the deleted files on your iPhone, which takes a while to finish, depending on the storage of your device.

Step 3: All recoverable files will be listed in different categories after it completes scanning. You can preview them one by one, choose the WhatsApp messages you want and click on Recover to bring them back to your computer at once.

Way 2: Recover from iTunes backup

If your device cannot boot properly but you have already backed up your iPhone to iTunes before, you are suggested to restore lost WhatsApp messages from iTunes backup. Here's how to recover WhatsApp data from broken iPhone via iTunes backup.
Step 1: Open TunesKit iPhone Data Recovery on your computer and choose "Recover from iTunes Backup" mode on the interface. Wait for a while until it detects all iTunes backup.

Step 2: All iTunes backup will be displayed on the window, select the appropriate one, and click the Scan button. You can also tap the "gear" icon of the backup column and select WhatsApp Messages & Attachments to extract them from the iTunes backup selectively.

Step 3: When the scan is done, all recoverable files including existing and deleted files will be shown on the interface, you can view all items and select the specific WhatsApp files you want and then click Recover to revert it back to your computer instantly.

Way 3: Retrieve from iCloud backup

This mode is highly recommended if your device cannot open normally but you have already created backups of your iPhone to iCloud before losing WhatsApp data. Simply follow the instructions below to learn how.
Step 1: After launching TunesKit, switch the recovery mode to "Recover from iCloud Backup". Enter the Apple ID and the password as required to log into your iCloud account.

Step 2: Select the iCloud backup file that contains the lost WhatsApp messages on your iPhone from the interface and tap on the Download button. Then choose the type - WhatsApp Messages & Attachments and click "Next" to continue.

Step 3: After it finishes scanning, all lost and existing data will be listed on the interface letting you to preview and select the WhatsApp files you want, click the Recover button after selection to restore them to your computer in seconds.

Bottom Line

That's all about the fixes to recover WhatsApp messages from a broken iPhone in this article. With TunesKit iPhone Data Recovery, you can get the data back from iPhone directly, from iTunes backup and from iCloud backup. Next time, when your friend meets with this issue, you can be very confident to tell him or her about this.