Apr 29, 2020

Can I Watch iTunes Movies on Firestick?


In the current streaming media player market, Amazon's Fire TV Stick is another one besides Apple TV, Roku, and Chromecast, etc. It can be used to stream multiple online media content such as Amazon Instant Video, Netflix, etc. to TV for playing. But when you start to stream iTunes movies, you may be disappointed.
This is because all iTunes movies and TV shows are encoded in an M4V format, a special format developed by Apple and protected by DRM, which is not supported by the Fire Stick device. To watch iTunes movies on Firestick, you need to remove Apple's DRM protection while converting iTunes movies to MP4 or other DRM-free video formats. You can then transfer these common iTunes movies to an external storage device for playback on the TV via Fire Stick.
That's why TunesKit M4V Converter comes here. With this smart program, you can easily remove the DRM restrictions of iTunes videos (including movies, TV episodes, music videos, etc.). It also enables users to convert DRM-protected iTunes movies to MP4, AVI, WebM, or other common video formats while maintaining lossless quality. In this way, you can get a 1080p HD iTunes video in MP4 format and then project it to the Amazon Fire Stick.

Part 1. How to Remove DRM and Convert iTunes Movies with TunesKit

Step 1 Import iTunes movies to TunesKit
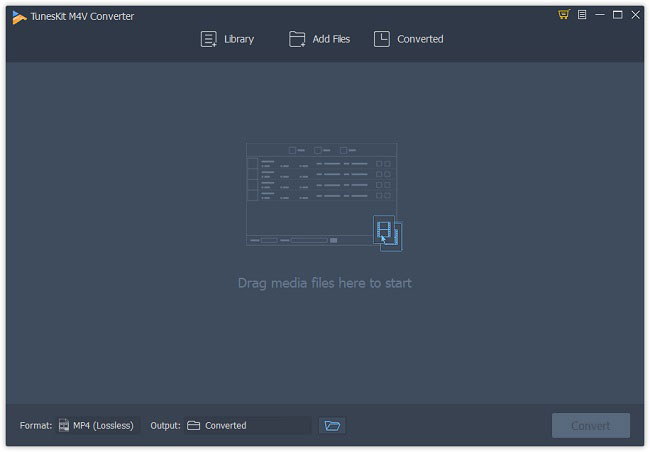
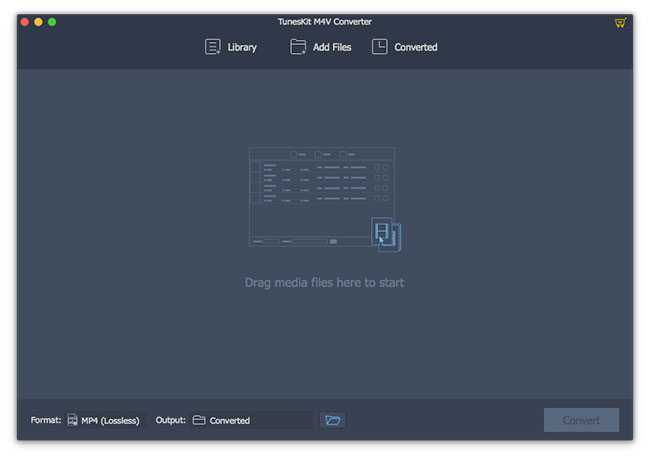
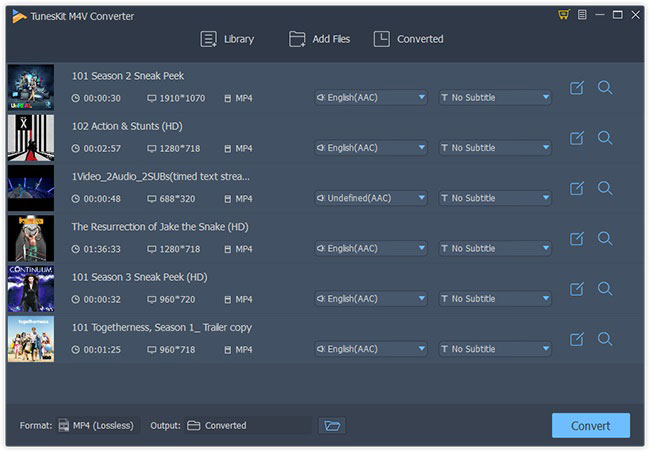
add itunes movie files
After launched TunesKit M4V Converter on your computer, you can simply click the "Library" button to add all iTunes movies that you want to get rid of the DRM from. If your downloaded iTunes movies are stored on other directory or external driver, you can just drag and drop them to TunesKit program.
Step 2 Choose output format
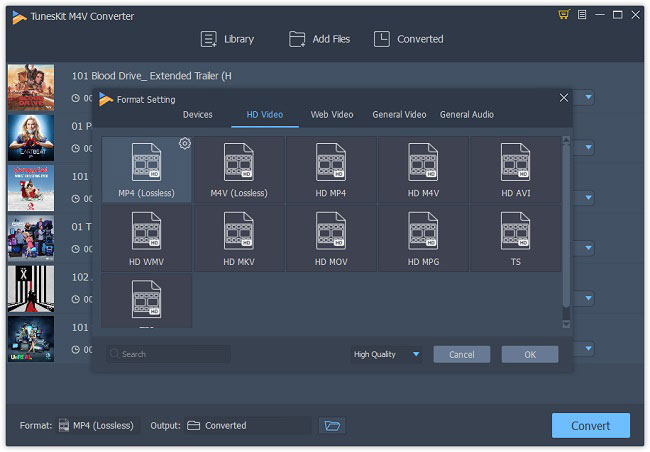
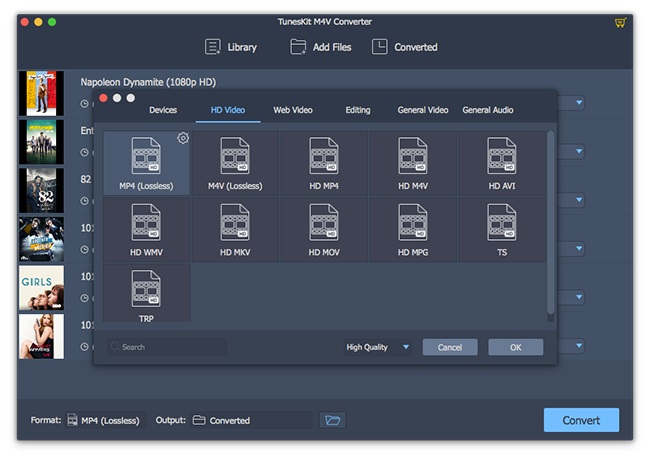
select output format
Next press the "Format" panel adn you will see a lot of output formats for you. Amazon Fire TV Stick supports multiple video formats with the codec such as H.264, H.265, VP 9, etc. Here you're suggested to select "MP4 (Lossless)" under HD Video as the output format, which is supported by Firestick and will not cause any quality loss.
Step 3 Remove DRM and convert iTunes to MP4
convert itunes movies to firestick
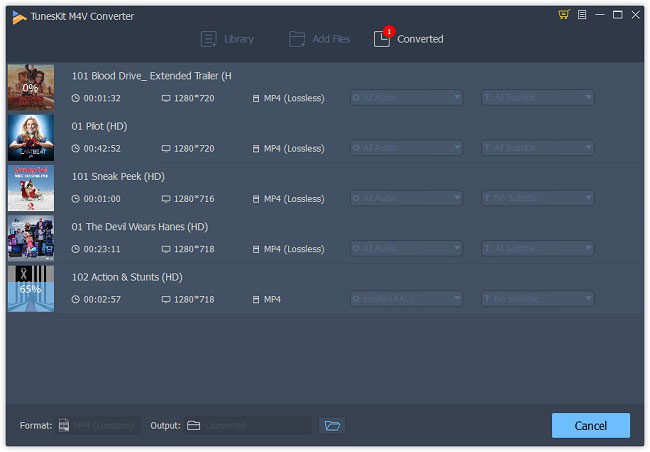
After everything is set, now click the "Convert" button and TunesKit will start to strip off the DRM protection and convert iTunes movies to MP4 format as wish. Wait a while until the process completes. You can then find all DRM-free iTunes movies on the "Converted" folder.

Part 2. How to Stream iTunes Movies to TV via Amazon Fire Stick

Now you can freely enjoy your iTunes movies on any TV as you like. Just follow the steps below to stream these converted iTunes videos to TV via Firestick. There are several methods and here we pick an easy one to cast videos to Firestick from PC.
Before starting to stream, please make sure you've done the following things:
* Amazon Firestick is plugged into your TV's HDMI port
* Your Firestick and computer are connected to the same Wi-Fi
* You have got your Firestick Remote with you
* You have logged in your Amazon account on the device

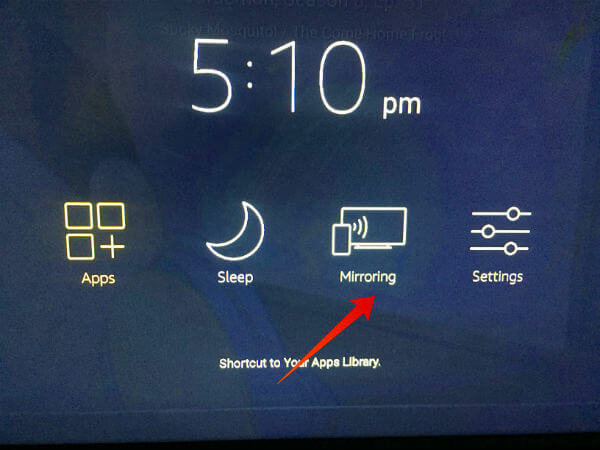
Step 1. Press and hold the "Home" button on your Remote for several seconds. Then select the "Mirroring" option on the menu.
mirror itunes movies to tv via firestick
Step 2. On your computer (Windows 10 or 8), find the Notifications icon at the lower right corner of the screen and select it, and then click "Connect" to proceed.

Step 3. Now you should see your Firestick on the screen. Click on your Firestick device icon to connect your computer to the Firestick device. When the casting process is done, you can then watch your iTunes movies on the big screen TV amazingly.
For more details, please visit the source page: 
https://www.tuneskit.com/drm-m4v-to-media-players/watch-itunes-movies-on-firestick.html

Apr 24, 2020

[Review] 4 Best iOS System Repair Tools

Our iPhones may get stuck in the white Apple logo, keep restarting or stop charging, etc. from time to time. At this time, a quick solution is to reset the device but you may lose your data. Now you're suggested to try a professional iOS system repair tool which will help solve the issue without causing any data loss. Here I'd like to pick 4 top-notch ones for your reference.

1. TunesKit iOS System Recovery

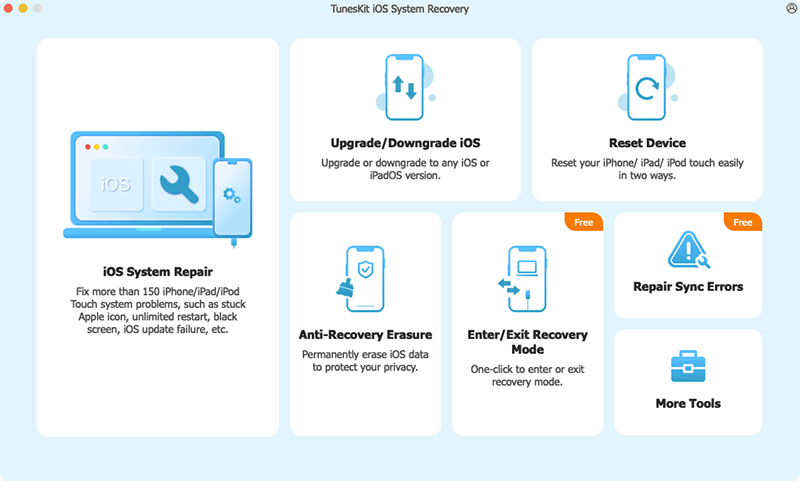
tuneskit ios system recovery
TunesKit iOS System Recovery for Mac/Windows ranks the top of the best iPhone repair software list. This tool is well designed to reach into the iOS/iPadOS/tvOS systems and fix various issues caused by it, which includes iOS software update failure, iPhone stuck in recovery mode, camera not working on iOS 13, iPad black screen, etc.
It offers two repair modes - Standard Mode and Advanced Mode. The former allows you to fix all kinds of common iPhone problems without erasing any data on the device, while the latter can help you repair some severe iOS system problems like the iPhone is disabled or locked, etc.

2. Dr.fone - Repair

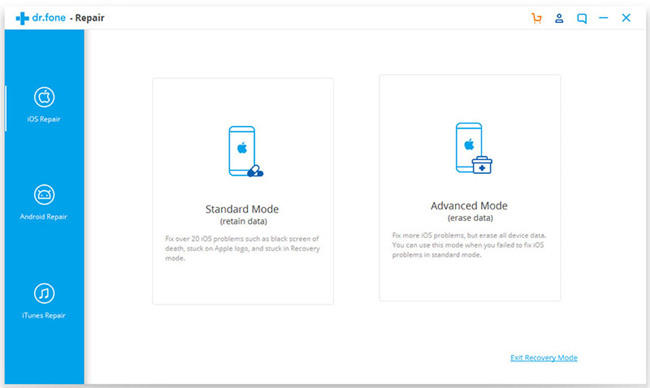
drfone-repair
Wondershare has introduced a powerful iOS toolkit to help mobile users better enjoy their device and Dr.fone - Repair (iOS System Recovery) is one of them. It enables users to repair types of iOS problems without any technical skills when you meet the iPhone white screen of death, Siri not working on iPhone, iPad won't turn on, iPhone recovery mode not working, etc. Similarly, this smart program works well with all iPhone, iPad, iPod models.

3. Joyoshare UltFix

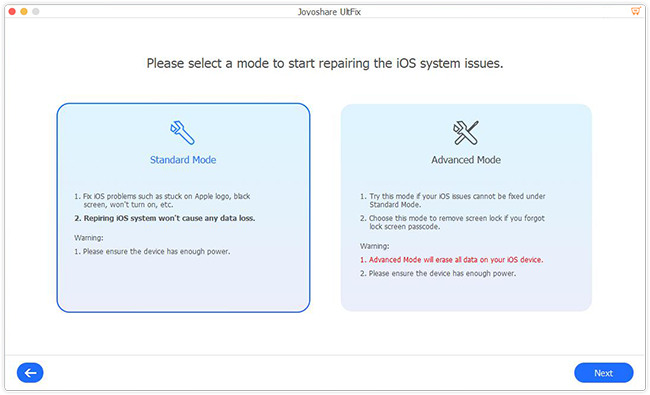
joyoshare ultfix
Now let's come to the next useful iPhone repair software whose name is Joyoshare UltFix. This is a safe and trustworthy iOS system recovery tool that has the ability to fix over 30 different common or serious iOS issues such as iPhone stuck on a black screen with spinning wheel, GIFs not working on iPhone, iPhone gets bricked, etc. More importantly, Joyoshare UltFix is able to repair the problem without causing any data loss.

4. Tenorshare ReiBoot

tenorshare reiboot
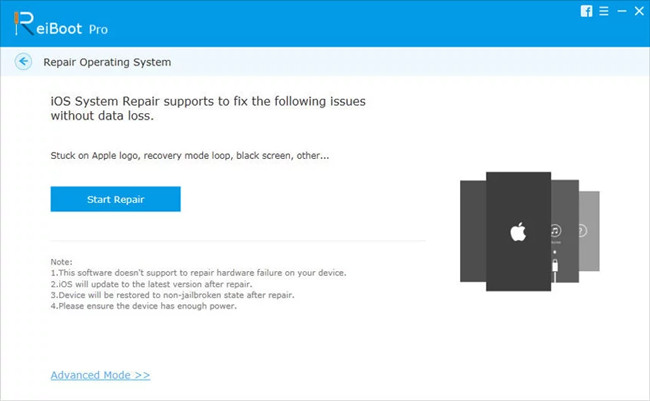
The last one for the best free iPhone repair software is Tenorshare ReiBoot. Actually, it only gives you a free option to enter or exit the recovery mode. When you start to repair your iOS issues such as iPhone stuck on Apple logo, recovery mode loop, screen is locked and won't turn on, you need to pay for it. Anyway, this iOS repair program can help you repair your iOS to normal without losing the data.
If you want to learn more about all these tools, you can refer to the source page here:
https://www.tuneskit.com/ios-repair/top-iphone-repair-software.html

Apr 17, 2020

3 Free iTunes Removal Software You May Like


As it is known, Apple has created a FairPlay DRM (digital rights management ) technology to particularly control the use of its digital content sold in the iTunes Store, including movies, TV shows, music, audiobooks, etc. Generally, all these media files downloaded from iTunes are encoded with FairPlay. As a result, all protected iTunes videos and audios, even if you’ve purchased them, are restricted to be played only on Apple’s device such as iPhone, iPad, iPod touch, Mac, or on up to five authorized Windows computers with iTunes.

Are you annoyed by the FairPlay DRM? Do you want to remove DRM from iTunes movies, TV episodes, songs or audiobooks? You should try some dedicated iTunes DRM removal software. If you have a little budget, you’re in the right place. Here we have tested 3 free iTunes DRM removal apps for you to bypass DRM protection from all iTunes media, thus you can play all iTunes videos and audios on any media devices you want.

#1 Requiem (Windows & Mac)

Requiem (out of development since 2012) is a powerful free solution that can remove DRM from iTunes movies free, as well as songs and iBooks. It decrypts the audio and video data of iTunes files by authenticating with the DRM library using the secret credentials used by iTunes itself. Therefore, it's able to keep the 100% lossless quality of original iTunes movies and other media without decoding and re-encoding the content. The converted movies and music are allowed to be played on non-Apple-approved devices like Samsung, HTC, Nokia, LG, Xbox 360, PSP, Zune, and so on.

However, due to the copyright issue, Requiem was stopped upgrading since iTunes 11. In other words, if you are using higher iTunes versions, Requiem won't work anymore.

Extra tips: If you have the higher version iTunes and you have a large number of iTunes movie purchases and rentals, you are recommended to try TunesKit DRM M4V Converter - the best Requiem alternative. It's one of the best iTunes DRM removal tools, which is able to remove DRM from all purchased and rented iTunes movies and TV episodes with 100% original quality.

#2 myFairTunes (Windows)

myFairTunes is a free iTunes DRM removal tool that empowers you to unlock iTunes FairPlay-encrypted songs and albums on Windows OS. It comes with a user-friendly interface and converts the iTunes songs from DRM-ed M4P to DRM-free MP3 format easily.

#3 FairGame (Mac)

FairGame is an iTunes music DRM remover freeware designed to run on Mac OS X. It adopts the same conversion technique as Apple iMovie does to convert the DRM-encrypted iTunes AAC audio tracks to un-protected AAC with original audio quality and all ID tags preserved.

The Final Thought

These are 3 free tools to help you get rid of DRM encryption from iTunes movies, TV shows, songs etc. If you don't mind the output quality, you can get any of them to remove iTunes DRM for free. But if you are serious about the audio or video quality after conversion, you can take TunesKit into account, which won't let you down.

Apr 8, 2020

Easy Way to Watch iTunes Movies on Android Smart TV


When you plan to play iTunes movies or TV shows on your Android smart TV, you may find that you can't do that. This is because all the iTunes videos you purchased or rented from the iTunes store can only be played on a computer via iTunes, on an iOS device such as iPhone, iPad, or Apple TV, etc. Do you want to watch iTunes movies on your Android TV such as Samsung, LG smart TVs? Here I'd like to share an easy solution for you.

TunesKit M4V Converter is a professional iTunes DRM removal application that enables users to remove the DRM and convert iTunes TV shows from special M4V format to common video format such as MP4, AVI, WMV, MPEG, etc. It works at a 30X conversion speed while keeping 100% original quality including AC3 5.1 Dolby audios, CC subtitles, etc.

Key Features of TunesKit iTunes M4V Converter:

  • Remove DRM from iTunes movies and TV shows losslessly
  • Convert iTunes videos at up to 30X conversion speed
  • Convert iTunes M4V to MP4, AVI, MOV, WMV, 3GP, MKV,  etc.
  • Keep all original subtitles and AC3 5.1 audio tracks
  • Friendly UI and simple to operate

Simple Guide to Convert iTunes Movies with TunesKit:

Step 1: Launch TunesKit and add iTunes TV shows

Download and install the TunesKit M4V Converter first, and then launch it on your Mac or PC computer. Next, click the "Library" icon on the top menu bar to import iTunes videos to TunesKit.

add itunes movies
Step 2: Select output audio tracks and subtitles

When all the iTunes movies are loaded into TunesKit, you can now choose the audio tracks and subtitles for each file. If some movies have different languages, you can manually select the language you want for the output videos, so you'll get the right language when you play the iTunes TV shows on your Android TV.

Usually, the default output format is Lossless MP4, which has great compatibility while keeping lossless quality. If you want to customize the output settings, you can click the "Format" button on the lower-left corner of the interface to select the one you want.

set output audio tracks, subtitles
Step 3: Remove DRM and transfer to Android TV

After all the settings are done, you can click the "Convert" button on the bottom right corner to let TunesKit start removing the DRM and converting iTunes videos to MP4 without quality loss. Wait a few minutes and you can then find all converted iTunes movies in MP4 format.

Then you can simply transfer them to your Android TV by copying and pasting to the USB drive. Afterwards, you can enjoy the iTunes movies on Android TV freely.

You may also like:


Mar 27, 2020

iPhone Recovery Mode Not Working? Fixed!

iPhone recovery mode can be used to resolve some software glitches on your iPhone device. For example, if you can't update or restore your iPhone, you can put your device in recovery mode and then restore it by using your computer. However, the recovery mode itself sometimes is not available. If you come across such an issue, you can read the post and get 4 possible solutions to make it work again.

1. Update iTunes App

This can be a simple solution to iPhone recovery mode not working problem. Sometimes all iOS issues can be easily fixed by updating the iTunes program version. The following is the quick steps.
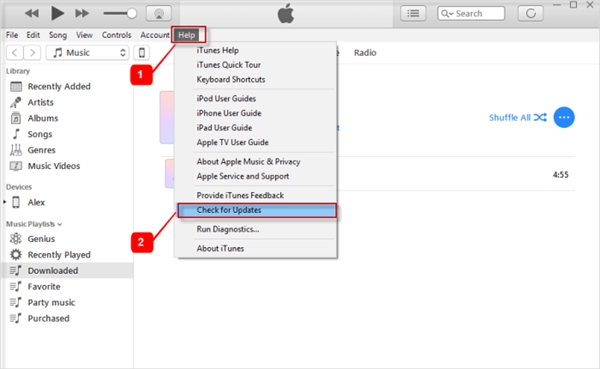
update itunes
For Windows, open iTunes and go to the Help on the top menu bar > Check for Updates > Install. If your iTunes program is downloaded from Microsoft Store, it will be automatically updated.
For Mac, launch the iTunes app and navigate to Updates. If there is an iTunes update available, just click on Update.

Tip 2. Force Restart Your iPhone

If your iPhone recovery mode not working still exist after updating iTunes, you can then try to force reboot your device. This can resolve most minor problems with iPhone. Different models have different procedures, yet it is still simple to operate. Here it is:
force restart ipad
For iPhone 8, X and newer series, press the Volume Up button and then quickly release it. Do the same for the Volume Down button. Then hold the Power button until the Apple logo is visible.

Tip 3. Use DFU Mode Instead of Recovery Mode

If your iPhone recovery mode does not work when you try to use it to repair your device software problem, you can still use another mode named DFU Mode to fix the iOS problem. DFU is short for Device Firmware Upgrade, which can be used to fix serious software-related problems on your device. So it can be an effective option to recovery mode. However, putting iOS device into DFU mode is much difficult and many users have reported that they failed to do so. Besides, the data on the device might be lost. Anyway, if you don't mind you still have a try.
Step 1. Launch the latest version of iTunes on your Mac or PC computer. Use a USB cable to connect your iPhone to the computer.
Step 2. Manually put your device into DFU mode. When it succeeds, you will see a message on your screen, saying "iTunes has detected an iPhone in recovery mode".
Step 3. Click the OK button and then press the Restore iPhone button to confirm your action. Wait a while until the process completes.

Tip 4. Use TunesKit iOS System Recovery Instead of Recovery Mode

As mentioned above, if you use DFU mode to fix iPhone, iPad recovery mode doesn't work, you're in a big risk of losing the data on your device. So if you don't want any data loss, you can try this iTunes alternative - TunesKit iOS System Recovery.
It is a professional iOS repair tool that is able to fix over 30+ types of iOS problems, which covers almost all issues that recovery mode can resolve, including iPhone recovery mode not working problem. Moreover, you can use this program to put iPhone into recovery mode in one click for free. In addition, this program allows users to repair iOS problems without data loss in a few clicks only.
Now follow the simple steps below to effectively fix iPad/iPhone recovery mode not working issue with TunesKit iOS System Recovery.
connect ios device
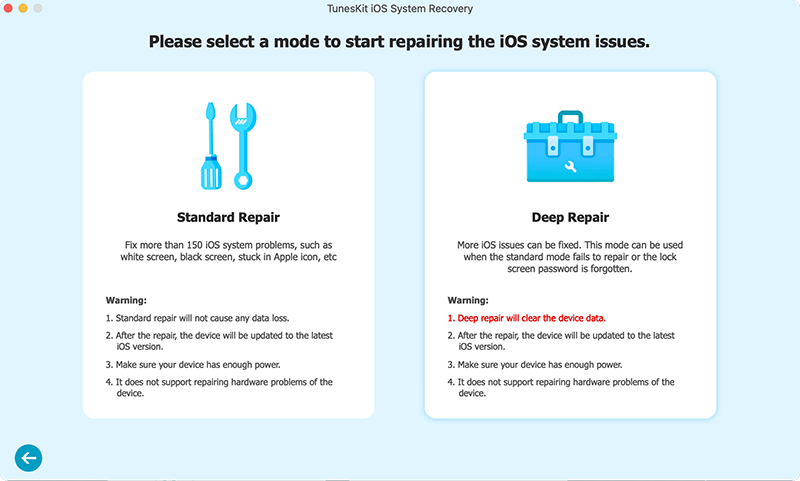
Step 1. Open TunesKit iOS System Recovery on your computer after finished installation. Connect your iPhone or iPad to the computer with a USB cable. Click the Start button on the main interface once it's recognized by the software. Choose the Standard Mode and click on the Next button to proceed.
select standard mode to repair without data loss
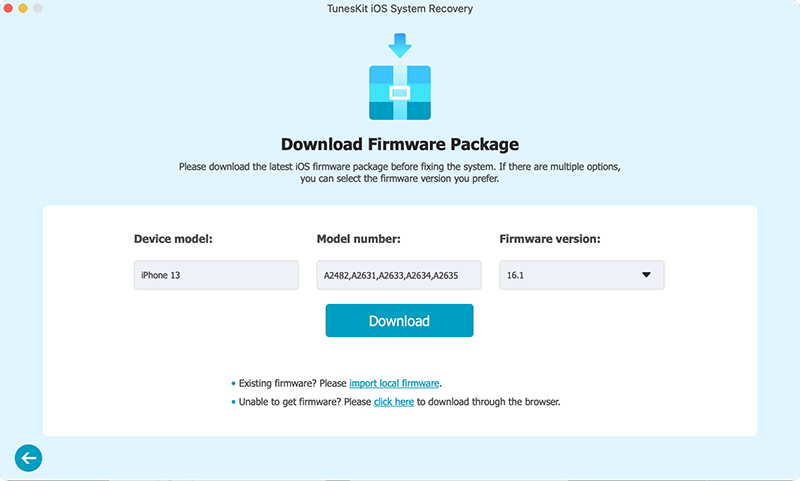
Step 2. Check the device information and manually correct it if there is wrong info detected. Next press the Download button and ask TunesKit to download the related iOS firmware package and then verify it.
confirm information
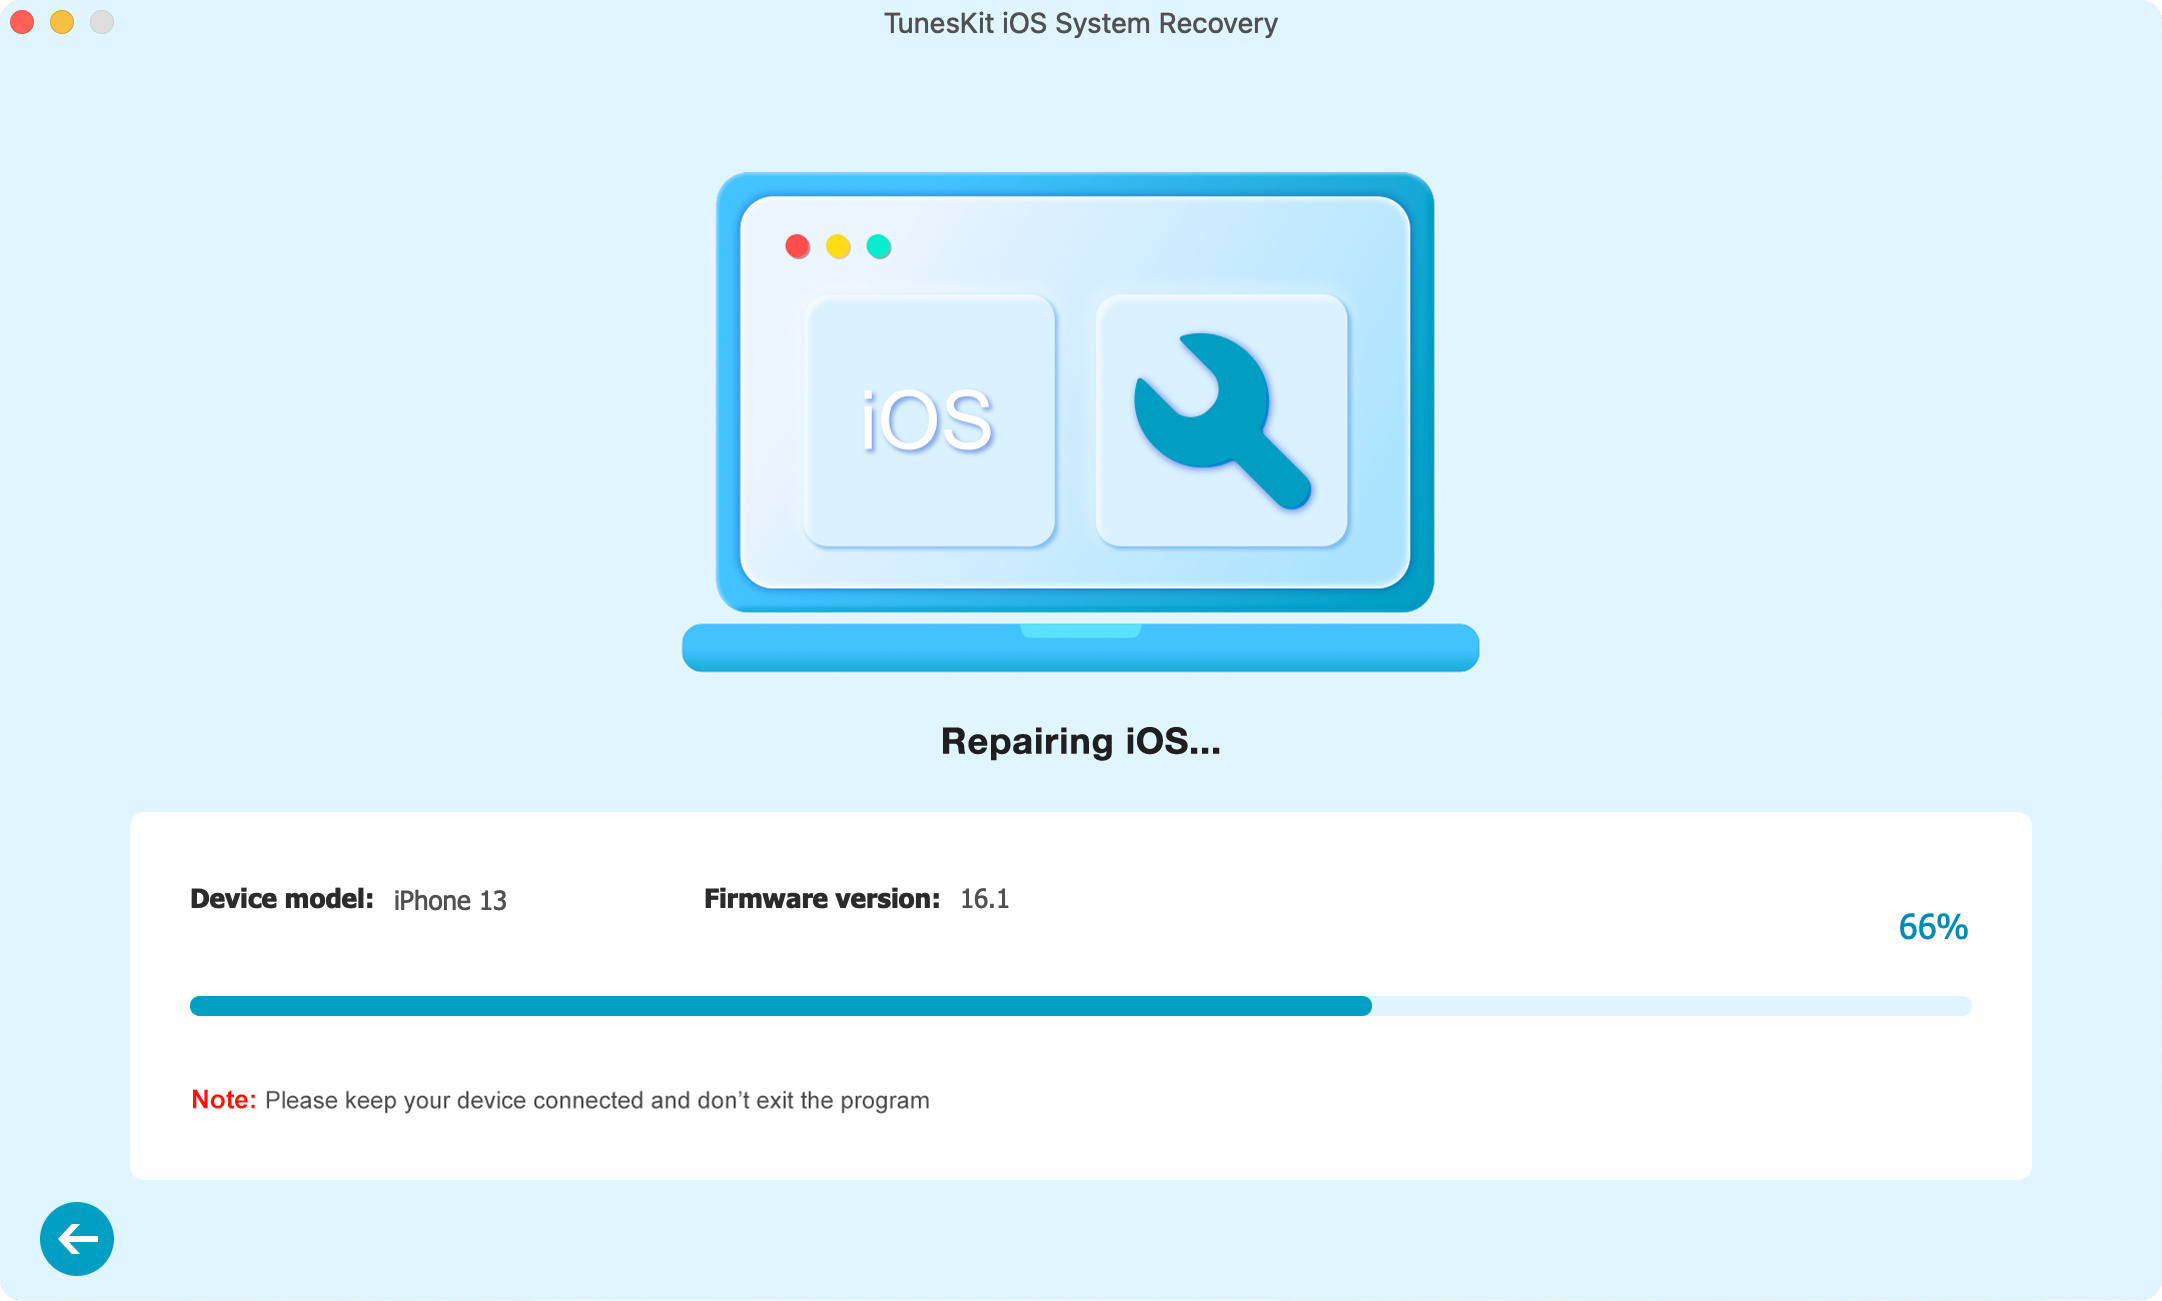
Step 3. When the download is done, click on the Repair button and the program will start fixing the iPhone recovery mode not working issue. Wait for the process to complete and you can then use your device as usual.

fix iphone recovery mode not working
If you want to learn more, you can visit the source page: https://www.tuneskit.com/ios-repair/ipad-iphone-recovery-mode-not-working.html

Mar 18, 2020

How to Keep iTunes Rentals Permanently

Only iTunes movies offer you a chance to rent them instead of buying, which saves users a lot of money. No matter you're in the US or other regions, you're only given 30 days to keep your iTunes movie rentals. Moreover, you have to finish it within 48 hours once you start watching it. Do you want to keep iTunes rentals forever? This post will tell you how.

The tool you'll need:

To realize this purpose, you need to remove DRM from iTunes rentals and then convert rented movies to other common formats. TunesKit M4V Converter is the right tool that you're looking for. It's capable of stripping the DRM restrictions from iTunes rental movies permanently, so you can then freely save them on Mac or PC computer, iPhone or iPad, Samsung Galaxy, Surface Pro, Xbox One, and may other devices forever. Besides, TunesKit will preserve 100% original quality including Dolby 5.1 AC3 audio tracks, CC subtitles, etc. while converting iTunes rentals at 30X fast speed.

How to keep iTunes rentals forever

Step 1. Open TunesKit and import the rented movies from iTunes library
add itunes videos to tuneskit
Launch TunesKit M4V Converter application on the desktop and then press the "Library" button on the top menu bar to add the iTunes rental movies you want to keep forever to the program. You can also import your target iTunes video files by drag-and-drop.

Step 2. Set output format, audio tracks and subtitles
adjust output format and settings
When all iTunes movie rentals are loaded, you can select the audio tracks and subtitles for each film. Then click the "Format" button and a new window will pop up. Here you can choose an output format according to your needs. If you don't want any quality loss, MP4 (Lossless) under the HD Video is highly recommended.

Step 3. Start to remove DRM and convert iTunes rentals to MP4
convert itunes movies and keep forever
Once all the settings are done, you can then click the "Convert" button to let TunesKit start the conversion. Wait for a while and all the iTunes movie rentals will have no DRM restriction at all and be converted to MP4 format. You can then locate them on the "Converted" folder and save iTunes rental movies forever on a computer or any other device you like.


To learn more info about iTunes rentals, you can read this source page: https://www.tuneskit.com/reviews/keep-itunes-rentals-forever.html

You may also like:

Mar 6, 2020

Fixed: iOS 13 Camera Not Working

Last night, I found that my iPhone camera not working anymore after I updated to iOS 13.2. To fix the issue, I searched on the Internet and got some tips. Finally, my camera can work normally again. Now I want to share the methods for you if you're also suffering from the issue. 

Method 1. Check iPhone Storage

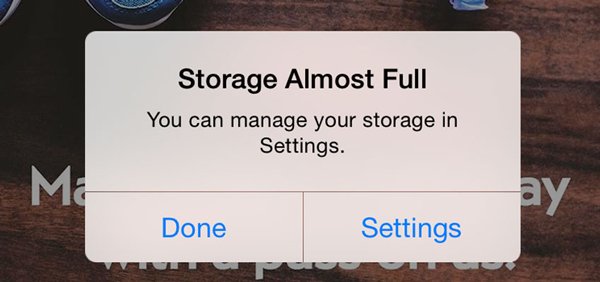
If your iPhone storage is almost full, there will be no more space for you to take photos. So you can first check your iPhone storage to see whether it's running up. Just go to the Settings app > General > About > Available to see if there is a suggestion showing 'iPhone Storage Almost Full'.
check iphone storage

Method 2. Close Camera App and Reopen

Sometimes, your camera app stops working is just because of the interference with other apps. So you can try to close the Camera app first and then reopen it.
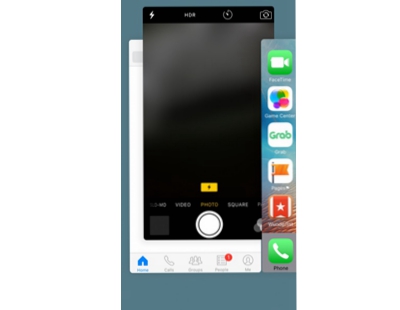
close camera app
Step 1. Tap on the Home button twice (for iPhone models with Home button) or swipe up on the screen for a few seconds (for iPhone models without Home button), and you will see all the apps you've been using.
Step 2. Swipe to the left side and find the Camera app. Then swipe up on it to close the app. Open the Camera app again to see whether it works now.

Method 3. Reboot Your Device

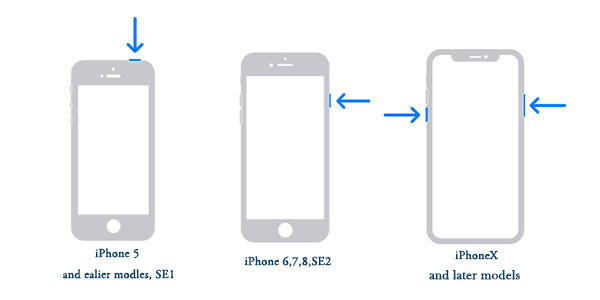
Another simple method you can try to fix camera not working on iOS 13 is to reboot iPhone. It will close all the programs running in your device and give it a fresh restart. Different models have different procedures and the following is how.
restart iphone
For iPhone X and later, keep pressing the Side button and Volume Up (or Volume Down) button and release them until the slider to power off appears on your screen. Then drag the slider to turn it off. Next press the Side buttons for a few seconds and release it when you see the white Apple logo.
For iPhone 8 and former, the procedure is almost the same. The difference is that you only need to press and hold down the Top (or Side) button to command the slider or Apple logo appear.

Method 4. Force Restart iPhone

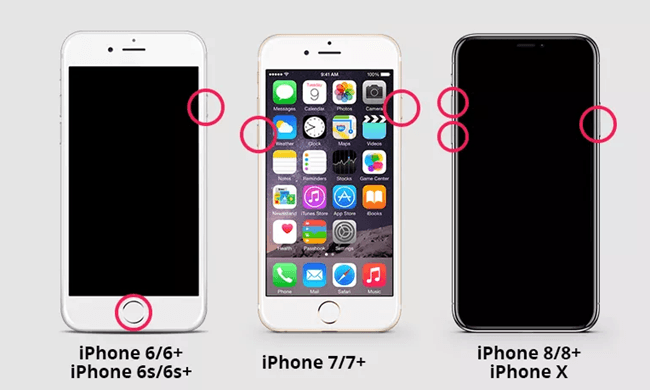
If the simple restart failed to resolve iOS 13 camera not working problem, you can then try to force restart it. This could be the most straightforward way to solve almost all iOS glitches. Now follow the quick guide below.
hard reboot iphone
For iPhone 8 and above, you can press the Volume Up button and release it quickly. Then do the same for the Volume Down button. Next press and hold the Side button until the white Apple logo is visible.
For iPhone 7 and 7 Plus, keep holding the Volume Down and Power buttons at the same time and release them once you see the Apple logo come out.
For iPhone 6s and earlier, press the Home and Power buttons simultaneously. Release both until the white Apple logo appears on the screen.

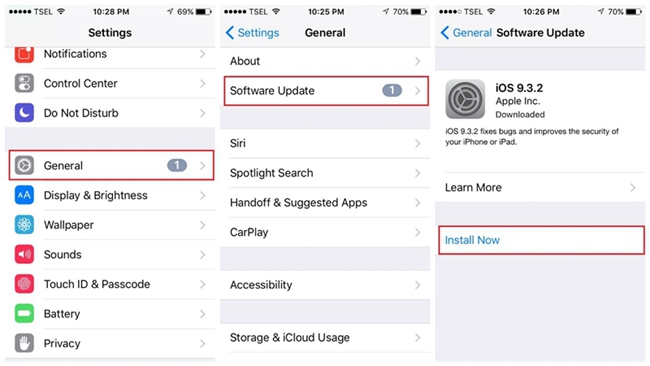
Method 5. Update iOS Version

If your iOS 13 is just the debug version for Apple developers, you can then try updating to the latest one, in which some issues may have fixed, such as iOS 13 camera and flashlight not working.
update ios version
Step 1. Open your iPhone and go to Settings > General > Software Update.
Step 2. Tap it and press Download and Install if there is any update available. Keep your device in full power during the process.

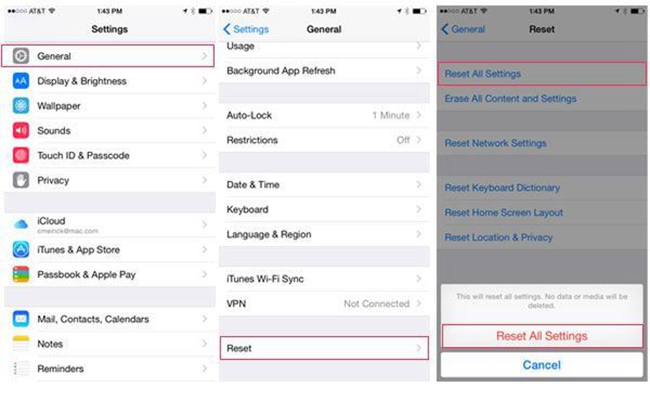
Method 6. Reset Your iPhone

At times, your camera not working problem may be caused by the settings on your device. You can try to reset the iPhone settings to get it fixed. It will not cause any data loss on the data loss, but we still recommend you to make a backup for your data in case of any accident.
reset all settings
Step 1. Open you iPhone and go to Settings > General > Reset.
Step 2. Tap the Reset All Settings and confirm the action.

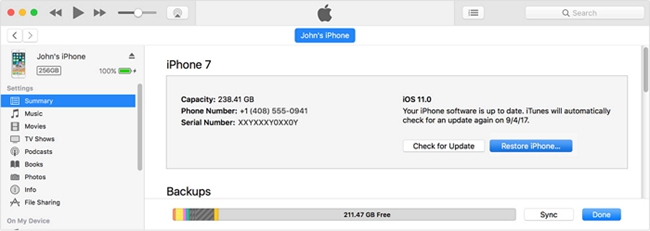
Method 7. Restore iPhone with iTunes

If resetting iPhone settings has not solved the camera not working after iOS 13 update, you can then try to restore iPhone completely. This will cause data loss, so always remember to back up your important data before using this method.
restore iphone with itunes
Step 1. Open the latest version of iTunes app on your computer and connect your iPhone to it with a USB cable.
Step 2. Find your device and then go to Summary > Restore iPhone... Confirm the action and iTunes will start to restore your device and set it up as a new iPhone.

Method 8. Fix iOS 13 Camera Not Working without Data Loss

The last and efficient method recommended here is to use a professional iOS repair tool like TunesKit iOS System Recovery to fix your camera not working problem.
This program is a dedicated to help users solve all kinds of iOS problems on iPhone, iPad and iPod touch, such as iPhone/iPad stuck in recovery mode, Siri not working, won't update software, black screen of death, etc. Most importantly, it will fix the problem of the camera not working on iOS 13 without causing any data loss.

Step 1: At first, open TunesKit iOS System Recovery on your computer after finished the installation. Use an original USB cord to connect your device to the computer. Then click the Start button to begin and choose the Standard Mode on the next window.
connect iphone
Step 2: Next you can check your device info and correct it when you see some errors. Then click the Download button to download the required iOS firmware package for repair.
download firmware
Step 3: Once the download process comes to the end, you can click the Repair button and TunesKit will start the repair. Wait a while and your device will get fixed.
fix ios

All these are very simple methods. You can try them one by one. I hope your camera problem can be solved. Any experience or idea, you can share with me.

Feb 27, 2020

iPad Mini Won't Turn on? 6 Tips for you!

My iPad Mini couldn't turn on and became unresponsive when I woke up. Before this, everything went well. I searched on the Internet and got some solutions to fix it. Now I'd like to share these six tips for you.

Tip 1. Charge the iPad

One reason why won't my iPad Mini turn on is that the device battery is low. So if your iPad mini can't turn on, make sure that it has enough charge to turn on. You can connect your device to the power outlet and charge your iPad mini for at least 30 minutes.

Tip 2. Increase the Brightness

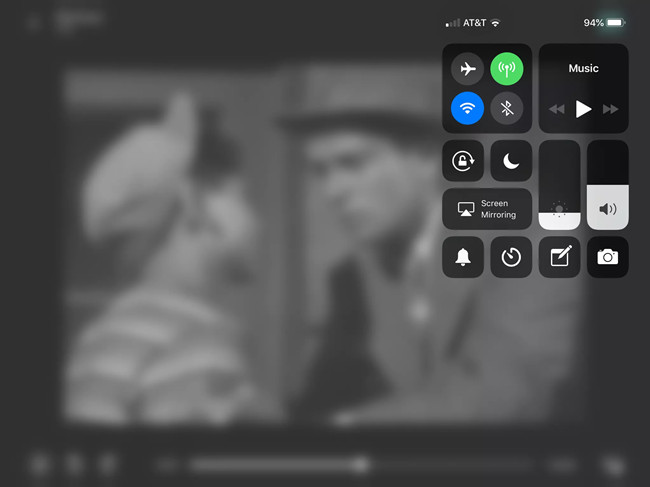
Sometimes when you thought your iPad Mini can't turn on, it just because the tablet screen is too dark. You can open the Control Center of the iPad and turn up the brightness. How to open the Control Center? In iOS 12 and later, just swipe down from the top right corner; in iOS 11 and former, you can swipe up from the bottom.
increase brightness ipad

Tip 3. Restart iPad Mini

If your iPad Mini won't turn on or charge, you can try restarting it. This method can be simple yet effective.
Step 1. Press and hold the on/off button until you see the red slider and then drag the slider.
Step 2. Press and hold the on/off button again until you see the white Apple logo appear on the device to turn it on.

Tip 4. Hard Reset iPad Mini

If your iPad Mini won't turn on issue still exists, you can then try rebooting your device. This will not remove any app, contacts or other data on your iPad.
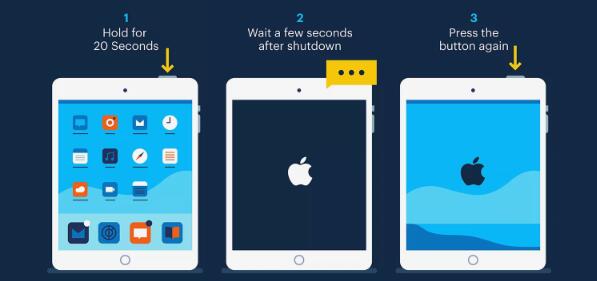
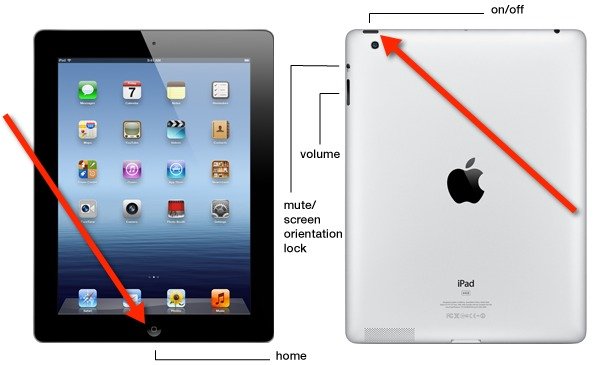
Step 1. Press and hold the on/off and Home buttons simultaneously for at least 10 seconds.
Step 2. Continue holding the buttons after the slider comes out on the screen. Release both buttons when you see the white Apple logo appear.
force restart ipad

Tip 5. Restore iPad with iTunes [Data Loss]

If the aforementioned solutions can't solve your problem, you can restore your device with iTunes. Yet you should be noted that restoring the device will erase all the settings, media and data on your iPad. If you don't care, you can follow the quick steps below.
Step 1. Open the iTunes app on your computer. Make sure it's the latest version.
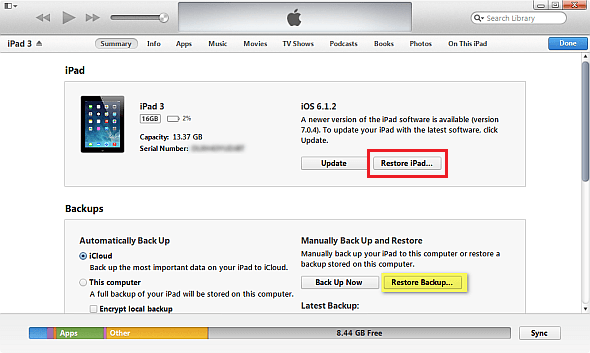
Step 2. Connect your iPad Mini to the computer and it will be detected by the iTunes. Hit your device icon and go to the "Summary" tab and click on the "Restore" option. Confirm the action to restore it.
restore ipad with itunes

Tip 6. Fix iPad Mini Won't Turn on with TunesKit [No Data Loss]

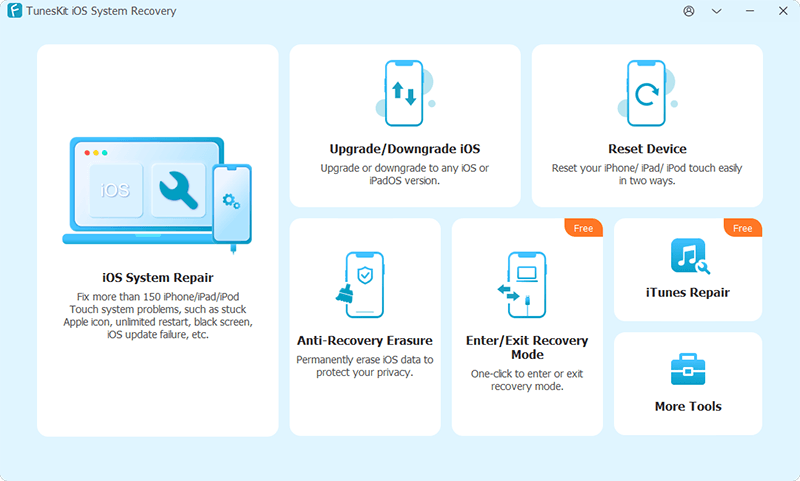
TunesKit iOS System Recovery is a professional iOS repair tool that can fix over 50 different iOS/padOS/tvOS system issues including iPad Mini won't turn on and responding, iPad stuck in recovery, iOS update failure, white screen, red screen, blue screen, iPhone stuck in reboot loop, etc. With the adoption of advanced technology, TunesKit is capable of repairing various system problems without causing any data loss. Besides, this powerful tool can also help you bypass iTunes errors, downgrade iOS to the lower version, and enter/exit the recovery mode in one click, etc.

connect iphone
Step 1. Connect your iPad Mini to your PC or Mac computer with a USB cord. Download and install the TunesKit iOS System Recovery on the computer and then open it.

Step 2. The program will detect your device automatically. Click the left "Enter the Recovery Mode" option and your device will go into the recovery mode. Then click the "Start" to begin. In this next interface, select the "Standard Mode" to let TunesKit fix your problem without data loss.
Next click the "Download" button after confirm your device info. Wait for a while until TunesKit finished downloading and verifying the iOS firmware package for your device.

Step 3. After the download of firmware package is done, you can then click the "Repair" button. TunesKit iOS System Recovery will begin to fix your iPad system problem at once. When the process is completed, your device shall start up like normal. If not, you can repeat the process once again.

Jan 19, 2020

TunesKit Releases Video Converter to Convert Videos and Rip DVDs

Hong Kong, Jan. 20, 2020 – As an innovative software developer, TunesKit recently added a new member to its multimedia product line - Video Converter to help both Windows and Mac users convert and edit videos and audios, as well as rip DVD movies in a simple way.
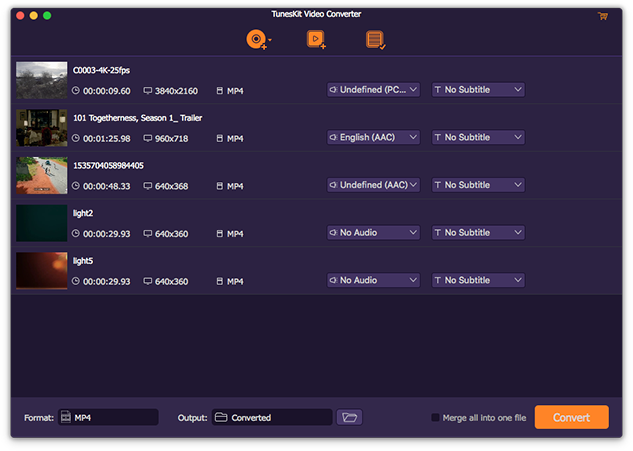
tuneskit video converter
"TunesKit Video Converter is an all-in-one media converting tool that incorporates all the basic and advanced features that users need, including converting videos, merging videos, editing videos, ripping DVDs, etc." said Henry Ramon, the Product Manager from TunesKit. "Besides, it also provides broad media format support, customized presets for portable devices, the ability to convert or extract audios, etc., to meet users’ needs as much as possible."
To solve the incompatibility and help users better enjoy their favorite videos and DVDs for phone or tablet, TunesKit programmers have developed a Video Converter tool for both Windows and Mac platforms. With it, users can convert various video files to over 250 formats at 60X super fast conversion speed with no risk of losing the quality. If you have some commercial DVDs, you can also use it to rip DVDs to some common format or a supported format for your device. Moreover, TunesKit Video Converter offers multiple powerful video editing features to help users make videos more amazing, such as trimming and cropping, customize the preferences, adjust the parameters, insert watermarks and subtitles, as well as apply special effects.

Key Features of TunesKit Video Converter for Windows and Mac:
  • Convert videos to more than 250 file formats with HD quality
  • Add support for editing videos and audios in an easy way
  • Rip both common and commercial DVD movies and videos
  • Convert videos for many devices at up to 60X faster speed
  • Convert audio files or extracts audio tracks from videos
  • Merge videos with different formats into one file
  • Support to convert videos individually or in batch

Price and Availability

TunesKit Video Converter provides a free trial version for both Windows and Mac users to test the software before buying, but users can only convert the first one-third of the files. To unlock the limit, users need to purchase the full version, which ranges from $39.95 for a personal license, $59.95 for 2-5 PCs to $79.95 for unlimited use. All the packages are provided with free technical support and lifetime software. In terms of availability, the program is compatible with both Windows and Mac platforms, including almost all versions such as the latest Windows 10, macOS 10.14 Mojave, and 10.15 Catalina.

Contact

Contact: support@tuneskit.com
Official Website: https://www.tuneskit.com/

About TunesKit

TunesKit Software is a professional and innovative software developer, providing easy-to-use yet powerful multimedia software and iOS utilities for Mac and Windows users. At present, the company has already developed some popular programs such as media converter, video cutter, screen recorder, iOS system recovery, iPhone data recovery, and some other freeware. All products have received numerous satisfied customers from more than 150 countries worldwide.

Jan 9, 2020

6 Best YouTube Music Downloaders for Windows and Mac in 2020

If you're seeking for great music, YouTube must be one of the best places as it offers a great number of music tracks from both professionals and amateurs. You can easily upload any music and share it with others on the platforms. However, if you want to download the music from YouTube, you can't do it directly. With the help of a third-party YouTube music downloader tool, you can easily download any song you want from YouTube.

1. TunesKit Audio Capture (Windows & Mac)

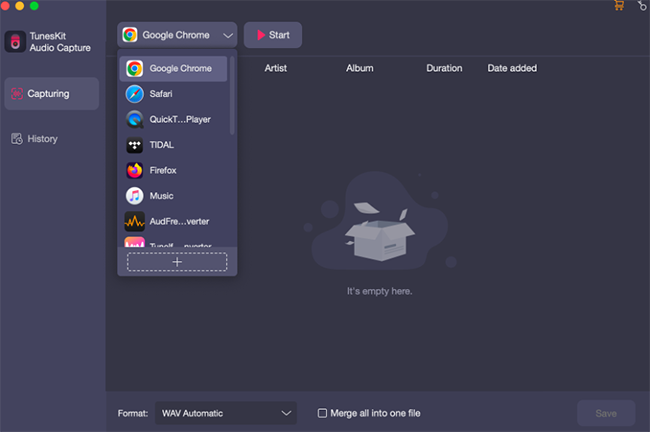
tuneskit audio recorder
The first good YouTube music downloader is something like an audio recording tool named TunesKit Audio Capture, a great option to download music from YouTube. It can help you record the songs from YouTube with ID3 tags and convert them to MP3, WAV, and other common formats so that you can enjoy the music on any device offline.
Apart from a YouTube audio recorder, it can also capture any other sound plays on your PC with original quality. You can record multiple tracks simultaneously as it detects each tracks intelligently. Once recorded, you are able to edit the sound quality, split and mix the tracks as you like.

2. Aimersoft iMusic (Windows & Mac)

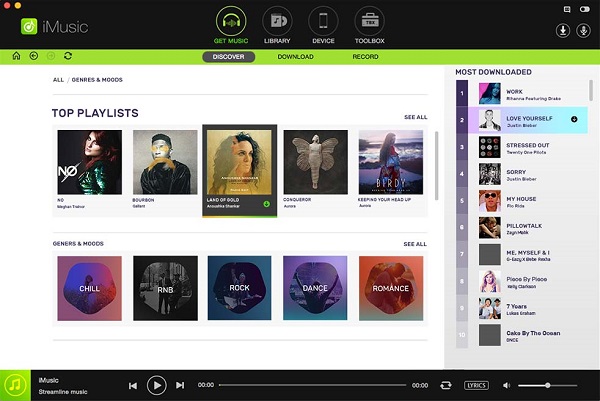
imusic downloader
As an all-in-one music downloader, iMusic makes it easily for you to discover, record and download any music from more than 3,000+ sites and transfer them between iPhone/iPad/iPod/Android phones and iTunes/Mac/PC. It enables you to directly download MP3 from YouTube and other sites, saving the songs to your iTunes Library for enjoyment or management. In addition to downloading, it also supports recording any music with ID3 tags saved.

3. Any Video Converter Free (Windows & Mac)

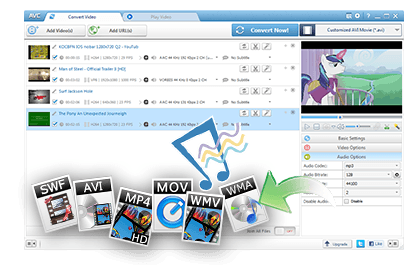
any video converter free
If you are looking for a freeware to download YouTube music on your computer, you should take a look at Any Video Converter Free, a free video converter tool with a built-in YouTube downloader. It can be used to download music tracks from YouTube and 100+ sites while saving the songs as MP3s and other formats. With this free YouTube music converter, downloading MP3s is as simple as pasting in the URL of a YouTube song and waiting for the download to complete. It also helps you to extract audio from YouTube videos in any format.

#4. Freemake YouTube Downloader (Windows)

freemake youtube downloader
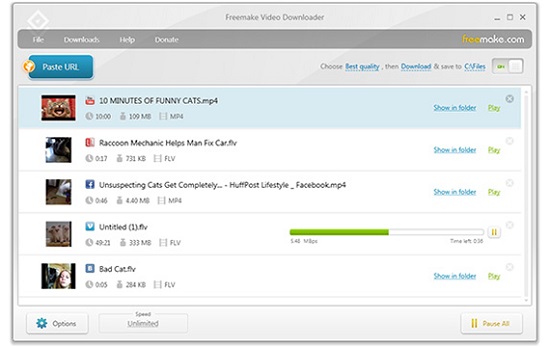
As the name suggests, Freemake YouTube Downloader is dedicated music downloading tool for YouTube. It downloads any YouTube videos and music in original quality without re-encoding. You can select to save the downloads as MP3 or others. Besides, Freemake YouTube Downloader supports downloading music from 10,000 other sites for free. Once downloaded, it lets you directly sync the songs to Dropbox, Google Drive, etc.

5. ClipGrab (Mac)

clipgrab youtube downloader
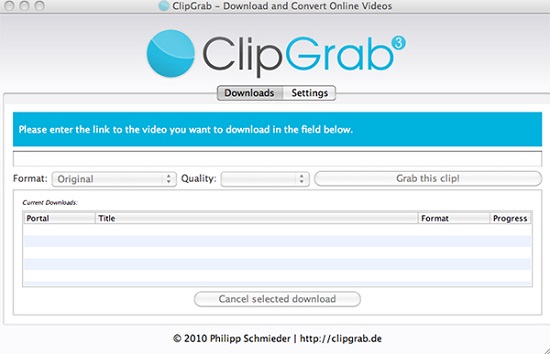
If you are looking for free best YouTube downloader for Mac OSX, ClipGrab is a great option you should try. It brings complete support for YouTube, Vimeo, and Dailymotion, while also allowing you to convert the videos to multiple formats which include MP3, OGG, WMV and MPEG4. You may be surprised by the download speed as it's much faster than most other freeware. The wonderfully simple interface gives you a pleasing hint of just how easy things are going to be. Simply insert the YouTube link onto the main window, choose the output format and quality, then press the Grab this Clip button to start.

6. MediaHuman YouTube to MP3 Converter (Windows & Mac)

mediahuman youtube converter

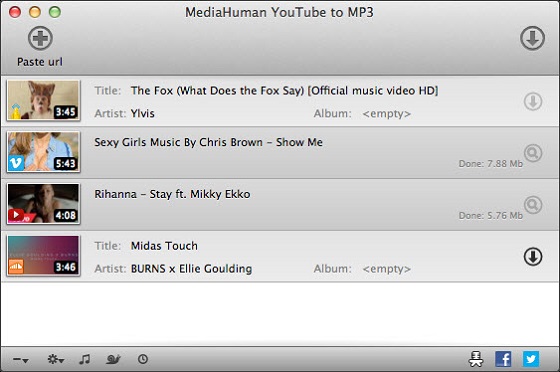
MediaHuman YouTube to MP3 Converter is another great choice if you want to listen to YouTube or SoundCloud music offline with any device. As a free YouTube music downloader, this software stands out of the crowd thanks to its strong ability to download and convert YouTube audio as MP3. The audio quality of the downloads remains the same as the original. Besides, it brings playlist support, iTunes import support as well as simultaneous downloads.

This article is written by Nick Orin from TunesKit, you can read the original one to get more details:
https://www.tuneskit.com/reviews/top-10-youtube-music-downloader.html