If you have a raw video by recording, it is unwise to upload it to some social media sharing platforms like Instagram or YouTube. What you need to do after recording, is to trim the video shorter because a long, boring and dull video may attract fewer users to watch. If you want to keep the attention of your audience, you need to make your video funny and interesting.
The easier way is to trim off the unwanted parts of a video, which is the basis for video editing. What do the unwanted video parts mean? For example, the video may include some error scenes, meaningless footages, and also the unnecessary parts. Now you don't need to worry about those conditions. In today's content, we will talk about how to get rid of unwanted video parts. The tool you will need is TunesKit Video Cutter, an easy-to-use and intuitive video cutter for beginners.
TunesKit Video Cutter supports you to trim any parts of one video file in a lossless way. And if necessary, you can trim multiple sections of the same video and then merge them together. TunesKit promises you a fast speed to trim video or audio files, up to 60X faster speed. And it supports a great number of video and audio formats. Apart from cutting, you can edit, convert, extract media files as you want.
Key Features of TunesKit Video Cutter
- Cut out video and audio into parts with zero quality loss
- Save the videos with 100% original quality
- Edit the video according to your needs
- Combine video clips from the same source
- Export the trimmed videos at 60X faster speed
Step 1 Import Video into TunesKit Video Cutter
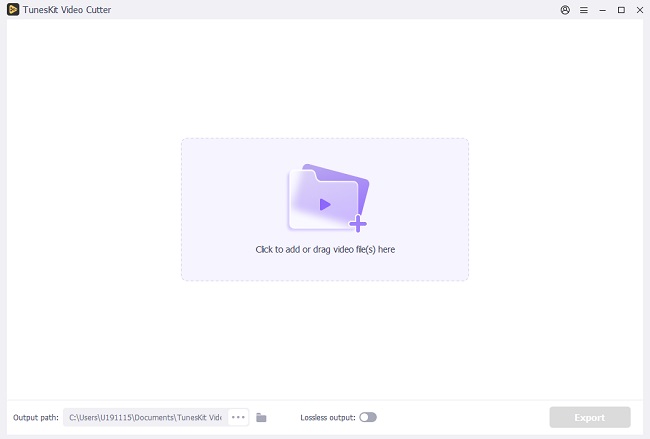
First of all, you should come to the official website to download and install TunesKit Video Cutter in the Windows version or Mac version. After that, launch TunesKit on your computer. Then you can click the "Open" button on the left to load a video. From the pop-up window, select the video you want to import. Of course, you can also open the file folder parallel to the cutter, and then drag and drop the video file to the cutter. Note that TunesKit supports one video each time.
Step 2 Set Time Segments
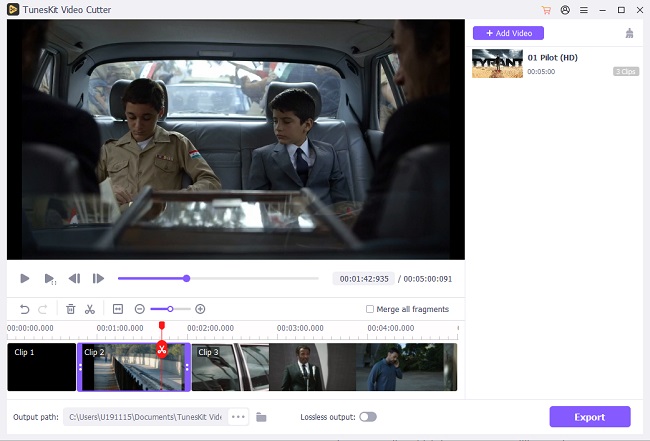
Once the video finishes loading, it will begin to play automatically. Now, you can move the yellow slide bar to set the time segment. In this way, you can select the clip you want to keep and leave out those unwanted parts. If necessary, after that, you can press on the "+" icon under the "Open" button to create new segments from the source video and trim multiple parts as you want.
Step 3 Cut Out Unwanted Video Parts
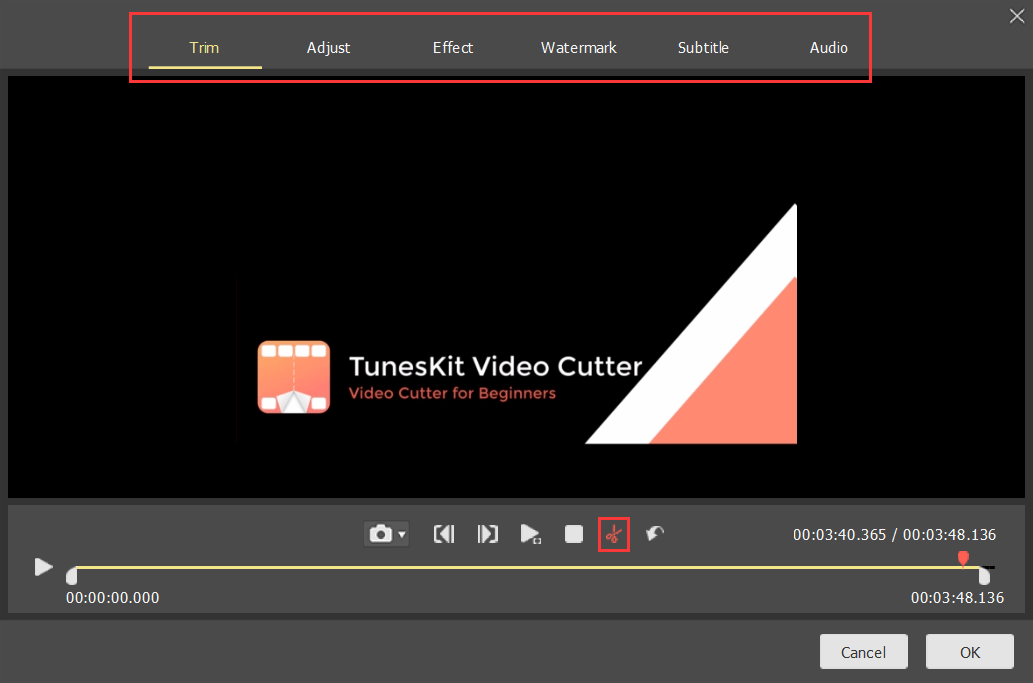
After trimming unnecessary video parts from these clips in step 2, you can edit your videos if you like. Just click the "edit" icon on the right of every column of the segments to open TunesKit's built-in video editor. Here you can also use the slide bar to pick the part you want to keep and click the "scissor" icon to cut out those unwanted parts in a more accurate way. Apart from that, you can rotate, crop videos, add background music, subtitles, and watermark, apply video and audio effects.
Step 4 Set Output Format
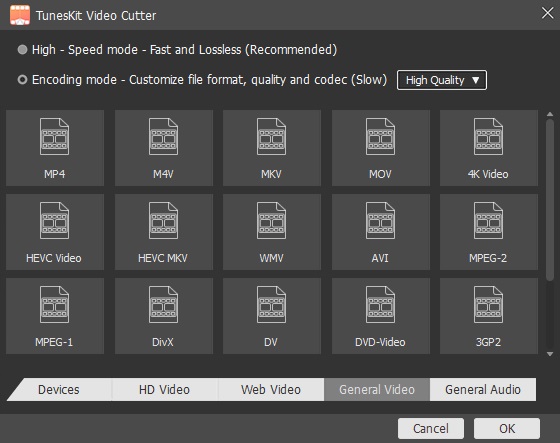
In this step, you simply click the "Format" button to open its format selection. There are many options and you can choose the output format or device as you want, like HD MP4, MKV, MOV, 4K, WMV, DivX, MP3, OGG, WMA, some compatible devices, and more. You can use the output video and audio format, which is different from the source. What's more, TunesKit supports you to customize the media parameters like codec, size, bit rate, etc.
Step 5 Merge and Export Video Clips
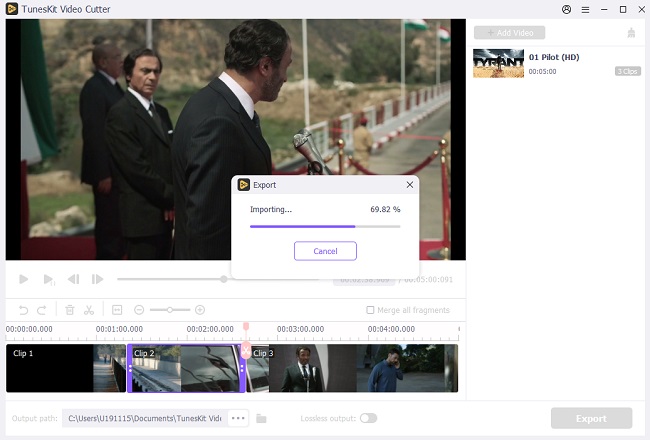
Before exporting the media file, you can merge all the video clips into one by checking the box of "Merge Segments". Then it is time to click the "Start" button on the right corner on the interface of TunesKit Video Cutter. Then your split video or audio can be exported at 60X faster speed.
The Bottom Line
Do you think that TunesKit Video Cutter is really user-friendly? I use it for the first time without any experience, but I can trim videos without hassle. This software is suitable for beginners like me. Hope you like this sharing!
You may also like:
No comments:
Post a Comment