WMV is a video format, which is usually used in Windows Media Player. As its name shows, it is a short form of Windows Media Video. I guess many Windows users know that WMV is one of the most popular formats to save video in Windows. For example, if you need to download a video from the Internet or a video your friends shared with you via USB or email, you will find that the video format is usually WMV. Some people may be confused about WMV and WMA. Actually, the latter is the Windows Media Audio format.
Since WMV is a common video format, cutting WMV files is also a great demand. There are a number of video cutters on the Internet. You can spend time selecting a suitable one. In that case, I think you may be mad at so many options but you cannot decide which one to use. But if you continue to read, you will get one tool to cut WMV without re-encoding - TunesKit Video Cutter. Let's check how this software to cut WMV video losslessly.
Key Features of TunesKit Video Cutter
- Trim WMV videos into segments in a precise way
- Convert the trimmed WMV videos to any formats
- Save the split WMV files with 100% original quality
- Edit the WMV videos with special effects, watermark, and subtitles
- Merge WMV video clips from the same source file
Step 1. Add WMV Video to TunesKit Video Cutter
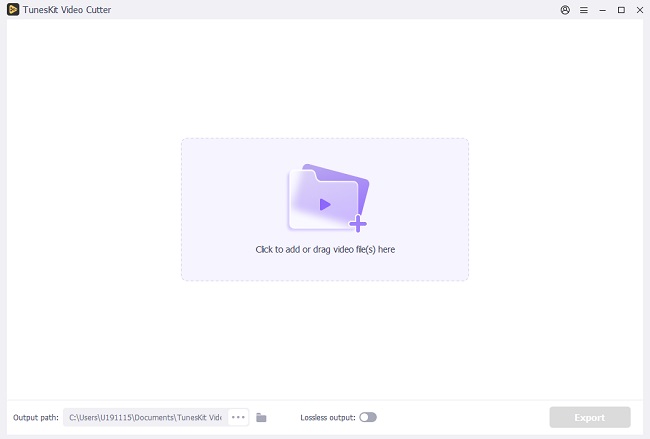
To begin with, download, install and launch TunesKit Video Cutter. On the left corner of the main interface, hit the "Open" button to select the WMV files to import through a pop-up window. Or try a faster way to add file: directly drag and drop the WMV file to the screen.
Step 2. Set Trimming Duration
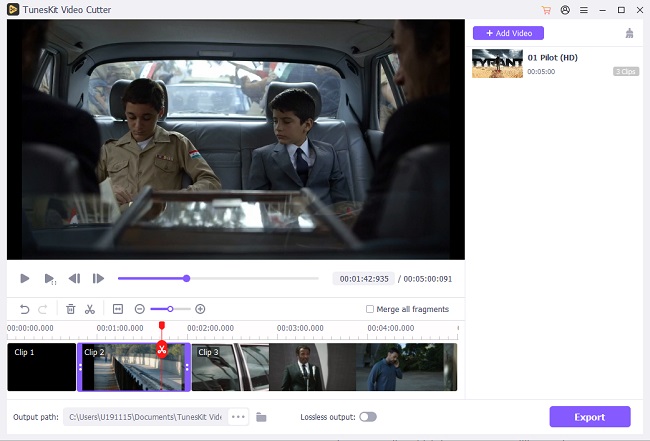
After loading the WMV video into the cutter, set the duration of the segment you want to cut. You have 3 ways to do that. First, move the yellow sliders to set the approximate duration. Second, adjust the start time and end time through the two bracket shape buttons. And the last but not least, you can input the start time and end time manually to cut WMV more precisely. If you want to cut other parts of this WMV video, press on the "+" icon to create new segments.
Step 3. Edit the Video with Multiple Features
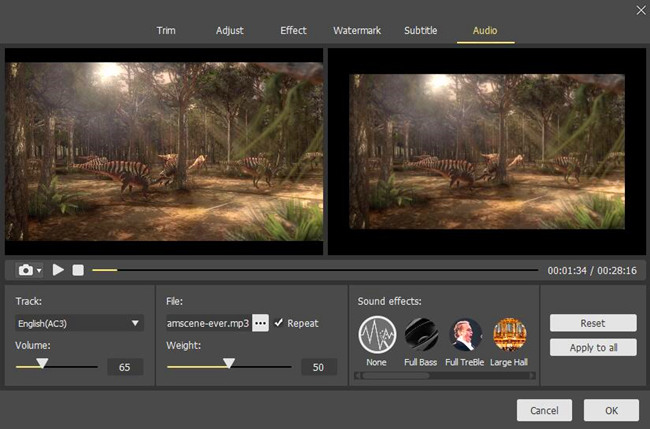
TunesKit Video Cutter supports you to edit the video clips before cutting. You just need to hit the "Edit" icon of each segment, and the inbuilt video editor interface will pop up. With various editing tools, you can trim, adjust, add watermarks, subtitles, etc.
Step 4. Set Output Format
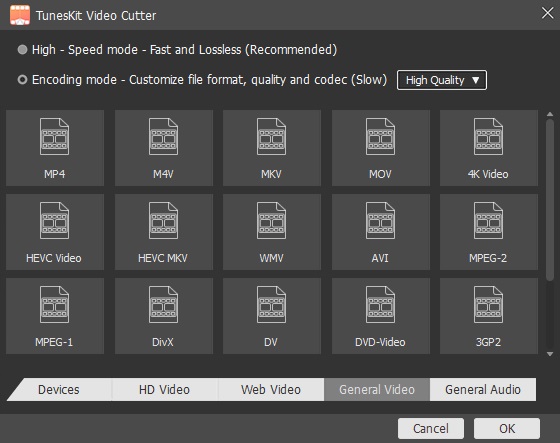
After that, return to the main interface. Click the "Format" button to select the output format or device. To cut WMV without re-encoding, you should choose the "High-Speed Mode". Or you can also customize the media parameters like codec, size, bit rate, etc.
Step 5. Start Cut the WMV Losslessly
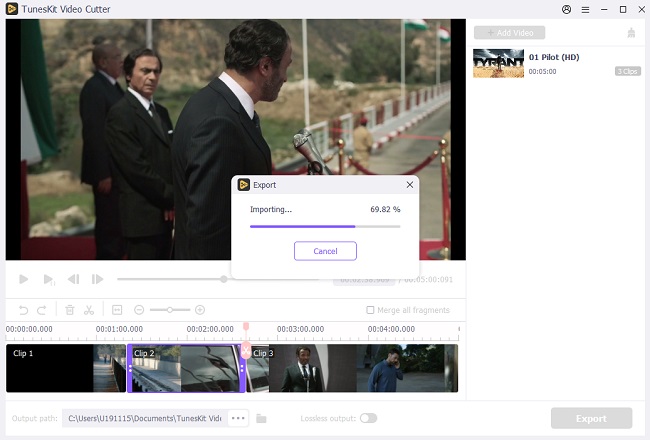
Press on the "Start" button to trim WMV at 60X faster speed. If you've trimmed off multiple segments from the source video, you can check the option of "Merge Segments" before starting the cutting process. In this way, you can merge all the parts into one file.
Conclusion
If you have read here, I guess you have gained the detailed information of TunesKit Video Cutter. Are you interested in this lossless video cutter? I have used TunesKit for a long time. It can not only satisfy my needs to trim videos without degrading any quality loss, but also provides a wide range of video editing tools to make my videos better.
Or if you have any other lossless WMV trimmers to recommend, welcome leave your comment!
You may also like:
No comments:
Post a Comment