Aug 17, 2020

6 Proven Methods: Fix iPad Screen Flickring

The Apple company launches the iPad as its the "smartest" tablet computer in the world. Thus it has become wildly popular among many people, as they enjoy its beautiful design, powerful performance, and convenience. However, there are also glitches such as iPad screen flickering that occurred on this electronic device. Did you meet with this issue before? If you did, take it easy, in the following, we will guide you on how to solve this problem step by step.

Tip 1: Restart your iPad

Rebooting is one of the most common fixes for a variety of iPad problems as well as any other computers. Restarting helps one override the software glitches that may be inhibiting normal software functioning which may be the core of your iPad screen flickering problem.

For iPad with a home button: simply press and hold the Home button and Top button simultaneously until an Apple logo appears then release both buttons.

Other models: Press and quickly release the Volume Up button, repeat the same for the Volume Down button and then press and hold the top button until an Apple logo appears then release the button.

Tip 2: Check if it is in a particular app

If your iPad mini screen flickering problem is not fixed by restarting, then you should proceed to check if the iPad flickers when running a particular application. The flickering could be as a result of a 'misbehaving' application. If you find such an application, force quitting the application is highly recommended. So, how do you force quit?

For iPads with Home button, you only need to press the Home button to open the app switcher then swipe away the particular application.

For iPads with no Home button, slide your finger from the bottom to open the app switcher then swipe away to force quit the application.

Try re-launching the application and if the flickering persists you can proceed to uninstall the application and install it later on.

Tip 3: Check auto-brightness feature

Usually, iPads have an auto-brightness feature that facilitates screen light adjustment according to light in your environment. If enabled the screen could appear to flicker depending on the change of the surrounding light. However, this may not be issued. To be sure, you need to disable the feature. To disable follow the following steps;

Step 1: Click on "settings" on the interface.

Step 2: Scroll down to tap the "Accessibility" button. 

Step 3: Select 'Display Accommodations' from the options.

Step 4: You will find the auto-brightness feature, move the slider to disable. After disabling the screen light will remain constant.

Tip 4: Reduce motion and transparency

In any case that the iPad Pro screen flickering problem is not solved by disabling the auto-brightness feature, you should proceed to disable the motion and transparency feature. It goes a long way in improving the performance of the iPad. To disable follow the following steps.

Step 1: From the main screen click on 'Settings'.

Step 2: Select 'General' and then 'Accessibility'.

Step 3: Select 'Increase Contrast' and then move the slider forward to enable 'Reduce Transparency'.

Step 4: Go back to the 'Accessibility' and move the slider in front to enable 'Reduce Motion'. This way, the iPad screen flickering on and off may stop.

Tip 5: Use iOS system recovery tools with no data loss

If all the above-stated solutions do not work to resolve your iPad screen flickering won't turn on, then the TunesKit iOS system recovery tool is your best chance to resolve the issue once and for all. TunesKit iOS Repair is designed to help you resolve both common and serious iOS errors without losing any data from your iPad. The screen flickering issue at this point maybe as a result of iOS failures. The software provides you with two repair modes namely Standard Mode and Advanced Mode. It is also compatible with all iOS and iDevices including iPads, iPhones among others.

All you need is to download TunesKit iOS System Recovery and then follow the following steps to fix the problem.

Step 1: Connect Device and Select Repair Mode
Launch the application on Mac and then proceed to connect your iPad to the computer. Once it is detected, click on the 'start' tab to proceed to the next window. Select 'Standard Mode' as your repair mode and click 'next'. You will be requested to put your iPad on DFU or recovery mode. Follow the instruction and click 'Next'.
Step 2: Download the Latest Firmware Package
Here, the program will proceed to download the latest firmware package to recover the iOS back to normal. It is crucial that you confirm the device info to make sure it is correct. If not, you can manually correct it. Proceed to hit 'Download' to download.
Step 3: Recover and Fix iOS System
Once the download is complete, click on the 'Repair' button on your screen to initiate the repair process. Make sure your iPad is connected during this time. The repair will only take a few minutes. If the Standard Mode does not work you can proceed to use the Advanced Mode using the same procedure.

Tip 6: iPad screen repair

If at this juncture, your iPad is still flickering then there must be a hardware problem. It is possible that the gadget was dropped on a hard surface or fallen into the water. iPad screen repair is quite a complicated process and hence it is highly recommendable that you seek a professional assistant. Equally, you can visit the nearest Apple service shop for assistance. They will definitely help you out.

Conclusion

The above methods listed are of great significance to fix iPad screen flickering. When you or your friends come across such a problem, you can use these fixes to resolve this issue. But the best way, as far as I am concerned, is still to employ professional iOS system repair programs like TunesKit iOS System Recovery.


Aug 16, 2020

Top 4 Ways to Recover Photos from Locked iPad

 "How to recover my photos from a locked iPad?" Did you search these words on the Internet? When this situation occurred to many people, they will hard reset their iPad. However, this method will delete all your data on the iPad. So after you happened to this problem, don't worry and be hasty, as there are other ways to retrieve your photos from a locked iPad. Check the following 4 simple fixes.

First, you will need an iPhone Photo Recovery tool. It is essential to back up your iOS devices in case a similar case may occur again. But if you are unfortunately to be one of the victims, just stay calm, recovering photos from a locked iPad is easy to accomplish on the condition that you get TunesKit iPhone Data Recovery, one of the most efficient iOS data recovery tool that allows you to preview all the missing files one by one in the original form before the recovery. In addition, this program also implements selective recovery which means that you can choose specific files to recover after it scans all recoverable data, making the recovery more flexible and precise. Moreover, it recovers over 20 types of data including photos, videos, contacts, call history, iMessages, notes, etc. Finally, Supports a wide range of iOS devices including iPhone XS, iPhone 8, all models of iPad Pro, iPad Air, iPad mini, iPad, and more.

1. Retrieve locked iPad photos from iTunes backup

If you only want to recover photos on your locked iPad instead of the entire iTunes backup file, then you can take this method to achieve the goal. Simply follow the detailed steps below to learn how to recover photos from a locked iPad via iTunes backup with TunesKit iPhone Data Recovery.

Step 1: Select iTunes backup files
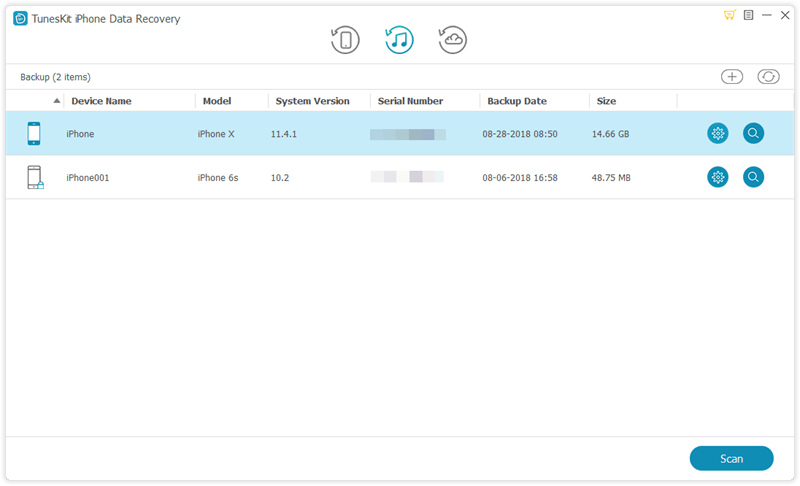
Start by downloading the program on your computer. Install it and select the second mode "Recover from iTunes Backup" from the main window.


itunes backup

Step 2: Scan lost photos
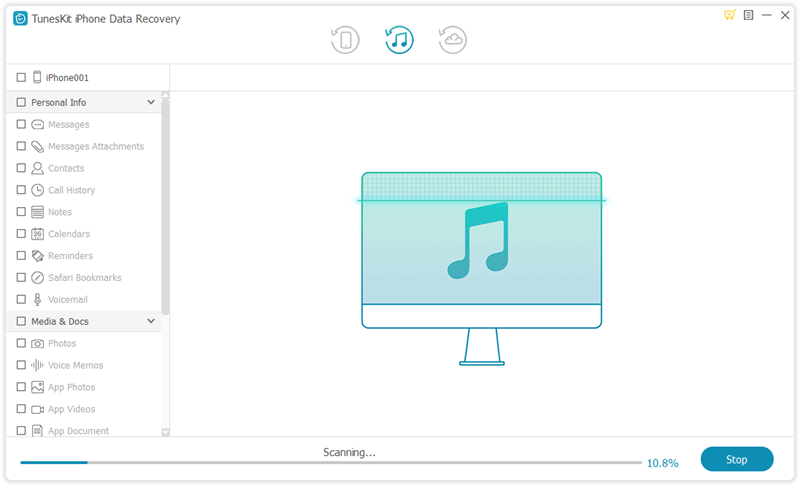
The program will start to detect all the iTunes backup files on your computer. Select the one that contains the lost photos and then tap the Scan button to let the program extracting the backup file for your lost photos.

scan itunes backup

Step 3: Recover photos from iTunes backup
You can preview all the recoverable files one by one after scanning. Select the photos you want and click the Recover option to revert them to your computer at once.

recover iphone data from itunes backup

2. Get them back from iCloud backup

If you have backed up your iPad to iCloud in advance, then you can take this method. Simply follow the instructions below to learn how to retrieve photos from the iPad after restore via iCloud backup with TunesKit.

Step 1: Log into the iCloud account
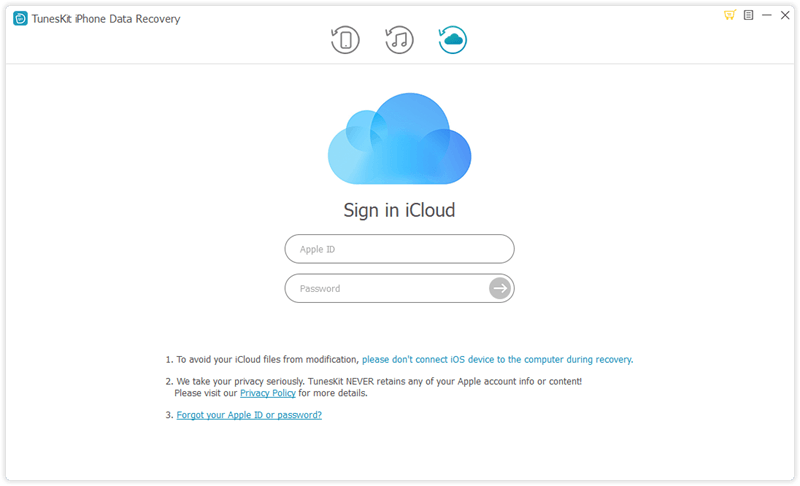
Open TunesKit iPhone Data Recovery on your computer and choose "Recover from iCloud Backup" mode. Enter your Apple ID and password to log into the iCloud account.

sign in icloud

Step 2: Download iCloud backup file
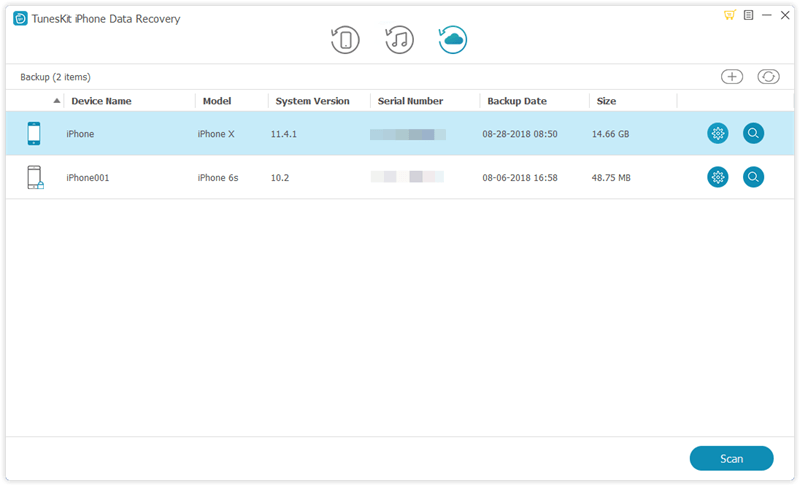
All the iCloud backup files will be shown in the resultant window. Select the appropriate one that contains the lost photos and tap the Download button. From the new pop-up, choose the Photos and then click the Next button to download them.

download icloud backup

Step 3: Recover photos from iCloud backup
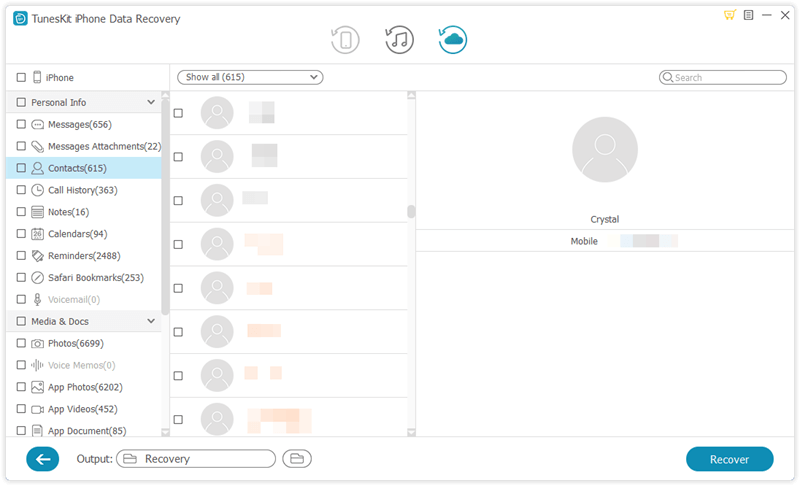
As soon as it finishes scanning, all lost data will be displayed under different categories. Choose the photos you want and then hit the Recover button to get them back instantly.

recover iphone data from icloud backup

3. Reset the locked iPad and recover photos through iTunes

There is another solution to recover photos from a locked iPad which needs you to erase your device before restoring the entire iTunes backup. Here's how to do it.

Step 1: Launch iTunes on your computer and connect your iPad to it with a USB cable.

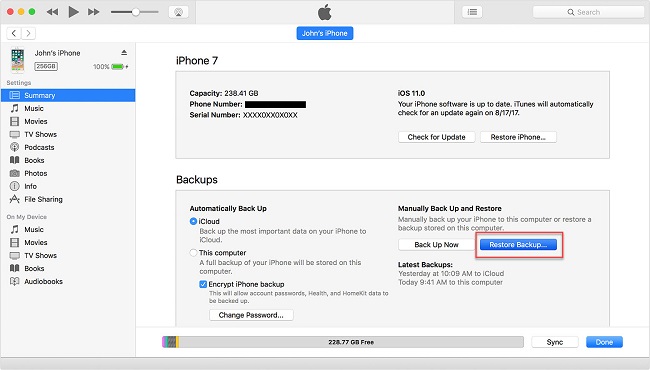
Step 2: Wait until iTunes sync your device successfully. Tap the Restore iPad option and then follow the prompts on your iPad, next select Restore from iTunes Backup in the interface.

Step 3: Choose the exact backup you want to restore your iPad.

restore from itunes backup

4. Reset l the locked iPad and recover photos by iCloud

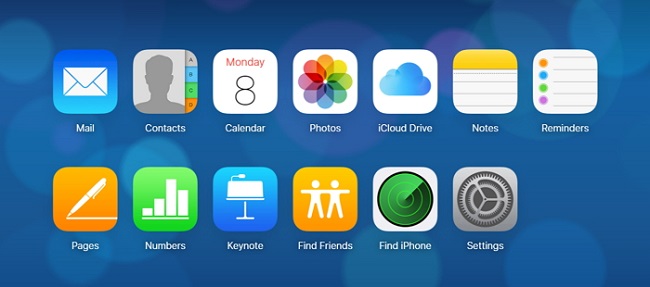
Now that your iPad was locked, you can use iCloud to remove the password and restore it if you have enabled Find my iPhone Feature on your device. Follow the instructions below to do it.

Step 1: Visit the website www.iCloud.com and log into your iCloud account as required.

Step 2: Tap on All Devices button at the top of the interface, select the locked device you want to erase.

Step 3: Tap Erase iPad and the password will be removed, so do the device data. Of course you can restore the device from a backup later.

recover icloud backup

Verdict

Finally, we sincerely hope that this post can help you and you can get a lot of value from it. When you meet with this issue of recovering photos from a locked iPad next time, you can use this reliable iPhone data recovery tool to bring them back.


Aug 14, 2020

Fixes to iPhone X Reboot Loop

The Apple company widely promote iPhone X as its processor is different from that of others. However, during the process of using the iPhone X, some iPhone issues such as boot loop still occur. Are you confused or head-stretched by this problem? Take it easy! This post will give you some valuable tips to fix it.


But now let us move onto the first part -- why the iPhone X bump into the boot loop. The followings are the main reasons.

1. Unsuccessful update: An unsuccessful update may be caused by a bad connection of the internet and the halted update process can easily result in a boot loop. A boot loop can occur even though you've already finished the update.

2. Malfunctioning hardware: malfunctioning hardware could probably be a damaged battery connector or a broken component. Under this circumstance, it's better to repair or replace the malfunctioning hardware as soon as possible.

3. Jailbroken iPhone: Jailbreaking is a double-edged sword. You can acquire extra services after jailbreaking while a jailbroken iPhone X is more likely to be affected by malware or virus attack, which can end up in a boot loop as well.

Now it's time to go to the next part. That is how to fix the iPhone X boot loop. There are 3 methods to troubleshoot the boot loop despite what resulted in it.

Solution 1: Force Restart iPhone X

If your iPhone X stuck in a boot loop, the first thing you should try is to force start it. Force restart on iPhone X, XS, XS Max, or iPhone 8 is quite different from iPhone 6S, 7, and 7 plus. The routine requires a three-button procedure, involving pressing and holding the side button and one of the volume buttons.

Step 1: Quickly press and release the volume up button.

Step 2: Quickly press and release the volume down button.

Step 3: Press and keep holding the side button until the screen turns off and then turns back on. Then you can release the side button when the Apple logo appears. After that, your iPhone X will restart automatically.

Solution 2: Restore Your iPhone X Through iTunes

When force restart does not work with your iPhone X, you can try the following steps to restore it via iTunes.

Step 1: Simply connect your boot loop iPhone X to a computer and launch iTunes.

Step 2: A pop-up window will appear not long after iTunes finish detecting a problem of your iPhone X. Just hit "Restore" to get your device out of the boot loop.

Step 3: If the pop-up didn't show up, you can click on "Summary" and then "Restore iPhone" to restore your iPhone X manually.

Solution 3: Use professional tool without data loss

iTunes provides a quick and convenient fix to the problem, but the unavoidable defect is that it may cause data loss to some extent. Therefore, we have another option for you— TunesKit iOS System Recovery. This smarter and faster program focus on rescuing your iPhone from various scenarios including boot loop, black/blue/frozen/white screen, DFU mode, and recovery mode. No data will lose and it works for most iDevices.
Next, we will present to you how easy using TunesKit iOS System Recovery to repair iPhone X stuck in the boot loop can be.

Step 1: Download the free trial of TunesKit and connect the iPhone X to your PC. After that, launch the program and click "Start" to move forward.

Step 2: In the next window, choose the "Standard Mode" and press "Next" on the right bottom.

Step 3: Download the firm package matched to iPhone X. Once the correct package is downloaded, begin to recover the iOS System and get your iPhone X out of the boot loop.

Conclusion

Your iPhone X may be stuck in a boot loop many times, but don't worry, use the above three fixes to solve it. if it cannot be fixed by force restart and iTunes, TunesKit iOS Repair will be worth trying.


Aug 13, 2020

Why My iPhone Screen Stays Green!!

Today I saw a commercial advertisement which showed that a girl held her iPhone, crying: “Why my iPhone screen stays green?”
iPhone green screen issue is a common error and the girl totally has no need to worry. It is usually caused by the wrong screen option and display features on your iPhone or other issues. Here are 6 methods prepared for her and all the iPhone users. Just follow the instructions and you will find the answer you want.


1.Change the Display Settings

You need to make some adjustments on your iPhone display settings such as brightness, true tone, and other relevant options.

To adjust the brightness of your phone, you should go to Settings > Display & Brightness, then drag the Brightness slider to the left or right.


To enable True Tone, you should go to Settings > Select Display & Brightness > Then tap the switch next to True Tone to enable the feature. With this feature, your iPhone display will automatically adapt the lighting conditions that is suitable for your iPhone, and make colors look consistent in different environment.


2. Remove All the Apps Running in the Background

If too many apps run in the background, your iPhone will also run into the situation that the iPhone screen is green. So, you can also fix this problem by removing apps that are running in the background. First, press the home button twice. Then you will see all the apps you have been running. Next, swipe up the apps from the bottom of your phone.

3. Hard Reboot Your iPhone

You can hard reboot your iPhone according to your device model.

iPhone 8 or later (X/XS): Press and quickly release the Volume up button. Then press and quickly release the Volume Down button. Then press and hold the Side button until you see the Apple logo.

iPhone 7, 7 Plus & iPod touch (7th gen): Press and hold both the Side (or Top) button and the Volume Down button for at least 10 seconds until you see the Apple logo.

iPhone 6s or earlier & iPod touch (6th gen) or earlier: Press and hold both the Side (or Top) button and the Home button for at least 10 seconds, until you see the Apple logo.

4. Update iOS System to the Latest Version

As many technical specialists suggested, updating the iOS system on your iPhone can repair some burn-in issues. If you are running an outdated version of the app or haven’t updated the iOS system on your phone, you may encounter some issues like your iPhone X green screen of death.

5. Reset the Settings on Your iPhone

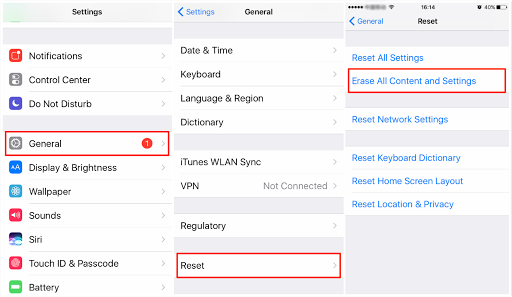
It will be helpful for you to set your iPhone back to the factory settings to clear any customized settings that somehow triggered the iPhone green screen. Doing so will recover your iPhone settings to their original settings. Here are the detailed steps.

Step 1. Go to ‘Settings’ > ‘General’

Step 2. Find the ‘Reset’ button

Step 3. Choose ‘Erase All Content and Settings’

Note: You should aware that all the data on your phone will be erased after resetting, so you must back up your data first with iTunes or iCloud.

6. Fix iPhone Green Screen with TunesKit

If your problem still cannot be fixed after doing the 5 tips above, there is likely something wrong with your iOS system. As a result, you need a professional iOS system repair tool to help you fix this problem. Here we will recommend you to use TunesKit iOS System Recovery.

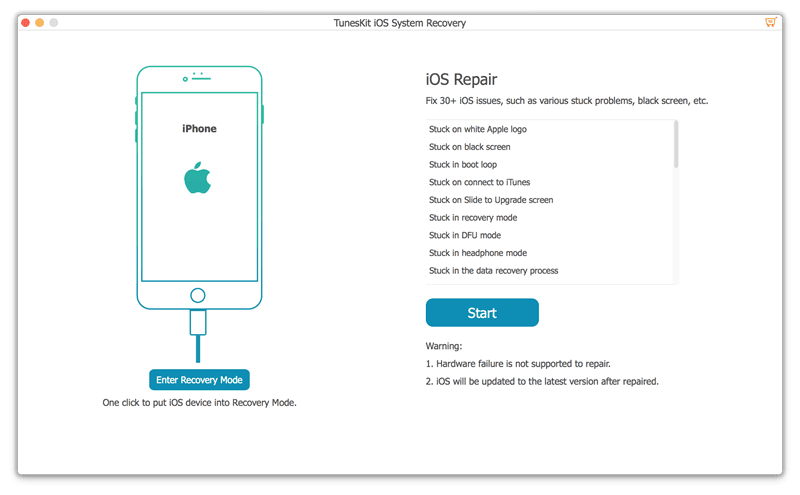
Regarded as one of the best iOS repair software, TunesKit can fix more than 50 iOS issues like the iPhone green screen of death fix, iPhone stuck on white apple logo, iPhone black screen without any data loss. And you even don’t need to back up the data and can fix your problem with easy 3 steps.

Step 1. Open TunesKit and connect your iPhone to PC

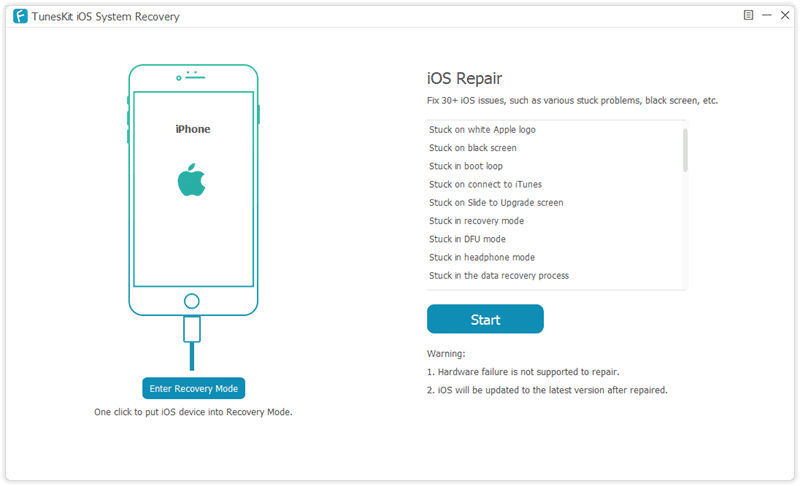
First, you should open TunesKit on your computer. Then connect your phone with computer via a USB cable. Press the ‘Start’ button.

Step 2. Select a repairing mode and Download firmware package

There are two repairing modes you can choose. To fix the iPhone green screen issue, you should choose the Standard Mode first.

Note: Standard Mode can solve the common iOS issues and repair the iOS system without any data loss. Advanced Mode can fix more serious iOS issues but it will erase all data on your phone.

Next, you should confirm your device information is correct and then press the ‘Download’ button.

Step 3. Recover the iOS system

After your firmware package has been downloaded, click the ‘Repair’ button and wait for the recovering process finished.

Summary  

Among the solutions above, you will find that TunesKit is your best choice. It is very easy to operate so you can fix your all iOS issues in minutes without asking for help from technical specialists. The most important is that the standard mode will not cause data loss. Why not download it and have a try?

For more: https://www.tuneskit.com/ios-repair/iphone-green-screen.html                                                                                                                   


Aug 12, 2020

4 Simple Ways to Fix iPhone Stuck on Apple Logo

 Many people complain online that their iPhone stuck on the Apple logo after the process of factory reset. And when they restart the device, the Apple logo is always shown on the interface. As for the problem, how to fix it? Well, this blog will show you 4 best solutions to solve iPhone stuck on the Apple logo.


But first, let's understand why iPhone gets stuck on the Apple logo. The followings are some main causes to explain it.

1. Hardware issues.

2. Software matters including transfer and iOS update.

3. Jailbreak error.

However, no matter what results in iPhone stuck on the Apple logo, the methods below can be used to work out it.

Solution 1: Force restart iPhone

The first option you can try is to force restart your iPhone device. It is also the easiest solution to take when facing common iOS issues like iPhone stuck on the Apple logo. Even if it may not work, it's still worth trying as the operation won't be harmful to anything on your device. Plus you can perform the hard reset without a computer.

For iPhone 6s and former, press and hold the Power button and Home button together until you see the Apple logo appear on the screen.

For iPhone 7 and 7 Plus, press and hold the Volume Down button and the Power button for about 10 seconds. Release them until the Apple logo displays on the screen.

For iPhone 8 and later, quickly press and release the Volume Up button, then hold down and release the Volume Down button. Finally, press and hold the Side button until you see the Apple logo.


Solution 2: Fix Without Restoring


It seems that you've become one of the 99% of users which means that the forcible reboot didn't help to resolve the problem. All you can see from the interface remains the same, the iPhone won't turn on stuck on the Apple logo screen. The good news is, you can get your faulty device repaired with an outstanding iOS system recovery tool specifically developed by TunesKit Studio.

No matter which situation your iPhone is stuck in, this software, TunesKit iOS System Recovery can get rid of them in 2 smart repair modes, Standard Mode and Advanced Mode. It is totally user friendly as what you only need to do is to open it and connect your device. Then the software will handle the rest work for you and recover your iOS to normal causing no data loss or leak. 

Step 1: Connect iPhone to the computer

Open the program and find a USB cable to connect your device to the computer. Tap on the Start option, and then set the repair mode as Standard Mode and click the Next button. After that follow the prompts from the window to put your iPhone into DFU mode and click the Next button once finished.

Step 2: Download firmware package

This software will download the firmware package matched to your iPhone. You need to confirm the device info before that. Correct it manually if any information is wrong. Then press the Download button at the lower right corner, TunesKit will then begin downloading and verifying the firmware.


Step 3: Fix iPhone stuck at Apple logo

As soon as it completes the downloading process, just press the Repair option to let the software fix the error of the iPhone stuck on the Apple screen. Keep your iPhone connected to the computer until the program finishes fixing. Or your device may get bricked unexpectedly.

Solution 3: Put iPhone in Recovery Mode


There's another way to fix the issue of the iPhone won't turn on and being stuck in the Apple logo which is to put the iPhone into recovery mode. However, all the files on your iPhone will be removed if taking advantage of this method. Therefore, just make sure that you've backed up your device to iTunes or iCloud previously. Before you get started, check the iTunes installed on your PC to see whether it is the most current version.

For iPhone 6s and older,

Step 1: Connect your iPhone to PC and launch iTunes. Hold both the Power button and the Home button at the same time.
Step 2: You will see the white Apple logo coming up. Do not release the buttons until the Connect to iTunes screen appears.

For iPhone 7 and 7 Plus,

Step 1: Connect your iPhone to the computer and open iTunes. Press the Power button and the Volume Down button concurrently.
Step 2: Similarly, the Apple logo screen will display. Simply hold them until you see the Connect to iTunes screen.

For iPhone 8 and later,

Step 1: Open iTunes and connect your iPhone to the computer. Press and fast release the Volume Up button, do the same thing on the Volume Down button.
Step 2: Press and hold the side button, release the buttons once the Connect to iTunes screen appeared.

At this time you may need to tap on the Restore option from the interface since you've finished the process of entering recovery mode. Then just follow the prompts to restore your iPhone to fix the iPhone stuck on Apple logo issue.

Solution 4: DFU Restore Your Device


A DFU (Device Firmware Update) restore actually reloads the firmware (controls the hardware of your device) thoroughly but not only the software. This feature makes it different from other restoration types as well as the recovery mode. And it is the deepest type among all the iPhone restore.

To go on with this mode of solving the problem, you will need to connect your device through a USB cable to your PC and sign in to iTunes. For the respective iPhone devices, you will need to initiate the pressing of the keys reminiscent of the force reboot manner. This is until a message pops saying that iTunes has detected a phone in recovery mode. After this release the buttons when the screen goes blank and you will be able to restore your device.

Conclusion


These 4 simple and easy tips can fix iPhone stuck on the Apple logo problem. If you don't want to lose all your data on the iPhone, then you are highly suggested yo use TunesKit iOS System Recovery. Come and have a try.


Aug 11, 2020

How to Recover Contacts on Broken iPhone Effectively


Have your iPhone ever fallen to the ground and it didn't respond no matter how many times you tap it? At this time, you want to open contacts but it won't. Don't worry! This blog will show you how to recover contacts from a broken iPhone with three methods. Whether the iPhone can't be opened or it was damaged, you can get a lot of value from this to get your problem solved.

Way 1: Recover through iCloud


If you have backup your data on the iPhone to iCloud before the broken incident happened, then you try exporting the vCard to get all your contacts back. Please try the following steps.

Step 1: Visit the website iCloud.com and log in to your iCloud account as required.

Step 2: Find contacts and tap the "gear" icon on the upper-left corner.

Step 3: Tap on Select App Option and then click "Export vCard..." At this point, all the contacts stored on your broken iPhone will be back to your computer in the .vcf folder.

Way 2: Retrieve by using the third-party tool


The question of "Can you recover contacts from a broken iPhone?" is common from our website community. In fact, the problem is not difficult to fix as an efficient iOS data recovery tool -- TunesKit iPhone Data Recovery will satisfy your needs to recover lost data by providing 3 smart recovery modes. namely, Recover from iOS, Recover from iTunes Backup as well as Recover from iCloud Backup. In addition to contacts, it is also capable of retrieving other files such as call history, text messages, calendar, photos, notes, videos and others adding up to 20 kinds of data from your device. The functions of preview data and selectively recovery guarantee the flexibility and accuracy of the data retrieval. What's more, it supports both Windows and Mac operating system so that you can use the comprehensive tool to perform recovery according to your needs.

2.1  Recover Broken iPhone Contacts from iCloud Backup Selectively


As is known to us all, the official way Apple offers to complete the restoration using iCloud needs erasing all the current files on your device, which may bring other data loss issues inevitably. With TunesKit iPhone data recovery, you don't have to worry about this problem. Simply follow the step-by-step guides below to recover contacts from broken iPhone via iCloud backup selectively.

Step 1: Log in to the iCloud account

Launch the program and set the recovery mode as "Recover from iCloud Backup" from the window. Then enter your Apple ID and password to log into the iCloud account.

Step 2: Download iCloud backup file

The software will begin to find all your iCloud backups after you logging to the account. Then choose the specific iCloud backup file that contains the lost contacts of your iPhone. Click the Download button, then select Contacts and click on the Next button to download them from the iCloud backup.

Step 3: Recover contacts from iCloud backup

When the scan finishes, almost all lost and existing data will be shown in the main interface. Choose the contacts you want after previewing them, finally tap the Recover button to save them back to your computer as expected.


2.2. Restore Broken iPhone Contacts from iTunes Backup Selectively


This method is highly recommended if your iPhone can neither open normally nor detected by the computer, but you have synced your device to iTunes before it has broken. Now let's start taking a look at how to recover contacts from broken iPhone via iTunes Backup Selectively.

Step 1: Choose iTunes backup file 

Open TunesKit iPhone Data Recovery and select the second mode "Recover from iTunes Backup". Wait for a few minutes while the recovery software is detecting all iTunes backup files on your computer.


Step 2: Scan lost contacts from iTunes backup

Choose the correct iTunes backup file and tap the Scan button, then the program will extract all deleted or lost files from the backup. You can also select Contacts only by clicking the "gear" icon of the backup file.

Step 3: Recover contacts from iTunes backup

When it completes scanning, all recoverable data in the iTunes backup will be listed in different categories. You are allowed to preview them separately and choose the exact ones you want. Click the Recover button after selection to get them back to your computer instantly.

Conclusion


By using the professional data recovery tool, you can recover contacts from a broken iPhone via iTunes or iCloud backup easily and effectively. Moreover, this program can fix your problem without causing data loss. Lastly, it has full compatibility with almost all iOS devices including iPhone 11 Pro Max, iPhone 11,iPhone 7 Plus, etc, all models of iPad and iPod Touch 5. Just give it a try now and you will receive a lot.


Jul 29, 2020

How to Fix 'Find My iPhone' Not Working?


'Find My iPhone' is an important built-in function on the iPhone. When you enable Find My iPhone on your device, Activation Lock will be turned on automatically. Your Apple ID and password will then be required before anyone can erase your device or reactivate it. Activation Lock is designed to prevent anyone else from using or selling your device. And your Apple ID and password is required if you want to turn off 'Find My iPhone' or erase your device. However, many Apple users recently reported that  'Find My iPhone' is not working on their iPhone for unknown reasons.

What's the Common Issues of Find My iPhone Not Working?

The most common issues they have encountered will be listed as followed.

  • Find My iPhone is greyed out
  • The location is not accurate
  • 'Find My iPhone' showing offline
  • Find My iPhone not sharing location
  • Has a server error

Why 'Find My iPhone' Not Working?

After a series of analysis, I come to a conclusion on why will Find My iPhone issues will happen. You can check to see if there are any problems with your phone in any of the following causes.
  • Doesn't have the correct Date & Time
  •  App incompatibility with the browser
  • iOS system hasn't updated or damaged
  • Weak or no network connectivity on your iPhone
  • The restrictions on your iPhone's settings
  • Weak or no GPS signals

How to Fix 'Find My iPhone' Not Working?

Here I will recommend you to use an iOS repair tool named TunesKit iOS System Recovery. Regarded as one of the best iOS repair tools in 2020, TunesKit can help you fix more than 50 iOS issues like Find My iPhone not working, iPhone call failed without data loss. It can also provide you the function like 1-click to enter /exit recovery mode for free, help you downgrade iOS system and fix iTunes error.

Here are the steps on how to use it.

Step 1. Open TunesKit and Connect your iPhone with Computer

First, you need to download TunesKit on your computer and then connect your phone to the computer via a USB cable. After your phone has been detected, press 'Start'.

Step 2. Select a Repairing Mode and Download Firmware Package


To fix 'Find My iPhone' not working, choose the Standard mode first.
Note: Standard Mode can solve the common iOS issues and repair the iOS system without any data loss. Advanced mode can fix more serious issues, but it will erase all data on your phone.


Next, confirm your device information and press 'Download'.

Step 3. Recover the iOS system

After the download process has finished, click the 'Repair' button and wait for your phone being recovered.

Conclusion

If you want to fix Find My iPhone efficiently and without any data loss, TunesKit iOS System Recovery will be your best choice. As a professional and multi-functional software, TunesKit can provide you the highest experience and improve the quality of your life. Why not download it and have a try?

If you want to learn more about all these tools, you can refer to the source page here: https://www.tuneskit.com/ios-repair/fix-find-my-iphone-not-working.html#for-part3


Jul 27, 2020

How to Download Music from Spotify Free

Spotify, one of the most popular music streaming services, has provided millions of songs for music lovers worldwide. If you're a Spotify user, you must know that it has offered two plans - Free and Premium. Free subscribers are allowed to listen to the songs with ads, but cannot download the songs for offline listening, while the Premium users can enjoy this feature. 

Do you want to download music from Spotify without upgrading to the premium plan? Here in this article, I will show you how to do that with ease. 


Tool Required: TunesKit Spotify Music Converter

To download Spotify music with a free account, what you need is a powerful 3rd-party Spotify downloader such as TunesKit Spotify Music Converter.

As a professional and handy tool for Spotify, it's specially developed to directly download any Spotify track, album, and playlist to the computer in lossless quality and super fast speed, with either free or premium account. By downloading the Spotify music as MP3 format, it enables you to listen to Spotify offline even without premium.

Tutorial: How to Download Spotify Music for Free

First of all, you need to download and install the TunesKit Spotify Music Converter on your computer. Then please simply follow these steps to begin free downloading music from Spotify for offline playback without Premium account. 

< Download TunesKit Spotify Music Converter for Windows >

< Download TunesKit Spotify Music Converter for Mac >

Step 1 Drag Spotify playlist to TunesKit

add spotify music

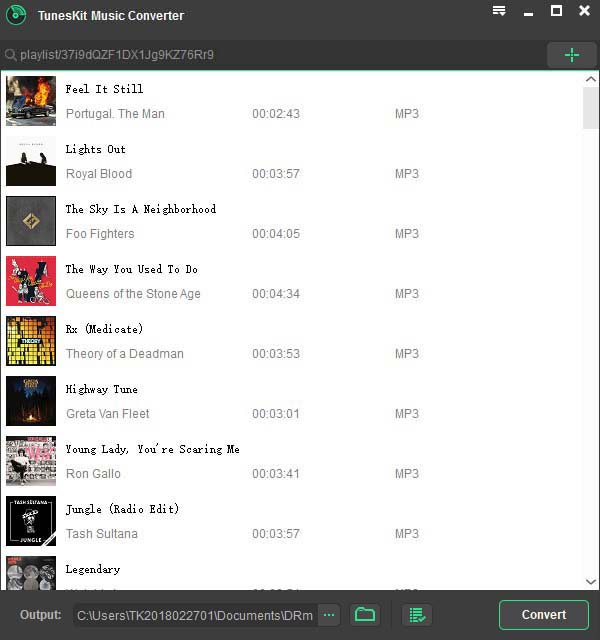
Firstly, launch TunesKit Spotify Music Downloader on your PC or Mac. Upon launching, it will load Spotify desktop app automatically. After that, you can log into your Spotify account and simply drag any track or playlist from Spotify store to TunesKit downloading interface. Or you can paste the track links to the search box to add the songs.

Step 2 Choose output settings

set output profile

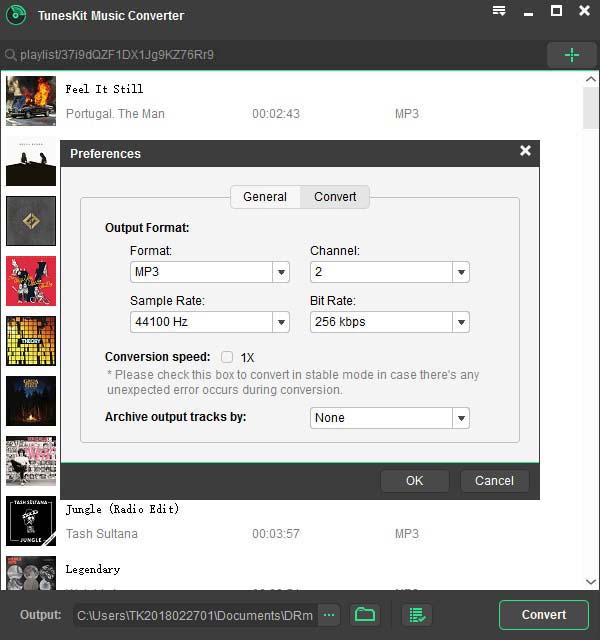
Click top right menu > Preferences to set the basic parameters of the output files, including output format, output quality, bit rate, etc. TunesKit Music Converter for Spotify now supports output formats as MP3, AAC, FLAC, M4A, M4B and WAV.

Step 3 Start to download Spotify songs for free

download spotify music free

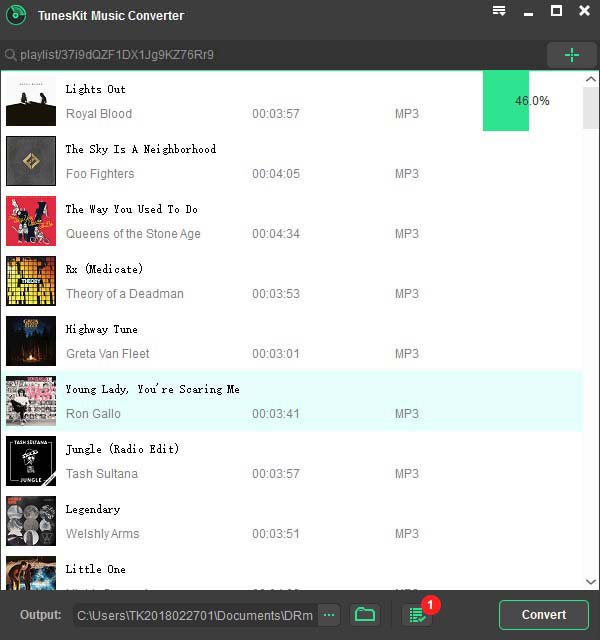
Now click the "Convert" button and the program will begin to download Spotify music free and convert them to the desired format as you like. Once the conversion completes, you can share or save the songs everywhere without limit.

Conclusion

So, now you know how to download music from Spotify for free. Actually, TunesKit Music Converter for Spotify can help both free and premium users download songs from Spotify and save as MP3 format. Unlike Spotify premium downloading features, now you can listen to the Spotify tracks on any device or player without the internet.