
Have you ever cut videos before? I believe most people do that before due to different purposes. Then I guess many people have the same trouble as me: to cut videos in an accurate way, you need to consume much energy. For instance, you may spend a lot of time in defining the cutting points carefully, set the start time and end time as accurate as you can. But to your surprise, when you export the video clips you cut, it turns out to be something slightly different from your expectation. It could be a few seconds extra or a couple of seconds missed than your desired video clips, but it is still not exactly what you want. That sounds like a time-wasted join and finally, you even feel frustrated.
Unfortunately, this condition happens all the time if you are using a video cutter not supporting frame by frame cutting. In general, a compressed video is composed of keyframes and non-key frames. The biggest difference between them is that the former can be displayed independently while the latter has to be displayed along with keyframes. In order to keep the non-key frames and the lossless quality, the video clips may include some undesired keyframes.
But to trim a video accurately is also accessible. What you need is a frame by frame video cutter. Based on my cutting experience, TunesKit Video Cutter is such a frame-accurate video trimmer, which allows you to cut video accurately to the millisecond. Now get more detailed information about this tool.
Key Features of TunesKit Video Cutter
- Cut video and audio into clips precisely
- Save the trimmed videos to any formats with 100% quality
- Edit the video with effects, frames, watermark, and subtitles
- Merge video clips from the same video source
Step 1. Import Video to TunesKit
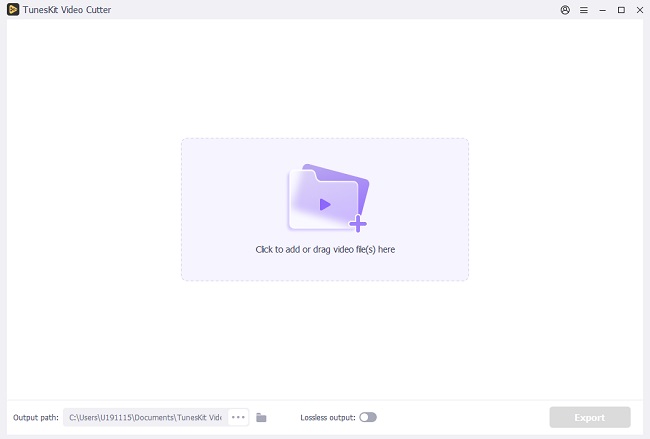
Download, install and run TunesKit Video Cutter. There is the "Open" button on the left corner, click it and choose the video you want to trim to import it to this program. Or you can drag and drop the video file to the screen. Note that TunesKit only supports to add one file each time.
Step 2. Define Cutting Points by 3 Ways
Now that the video is loaded successfully, let's start to customize the segments.
1) First of all, pay your attention to the Time Cursor and Slide Bar. Next, move the Time Cursor left and right to preview the video, and then drag the left slide bar to where you want to set as the start time and drag the right one to the end time. This is the most direct method to get an approximate segment.
2) The second way to define cut points is to rely on the Square Bracket buttons under the time board. Let the video stream and when it gets to where you want to cut, click the left square bracket icon to set the Start Time and use the right square bracket icon to set the End Time.
3) By the two methods above, you can set the approximate segment time. Then you need to adjust the time to make it more precise. To that end, simply click the chevron-up and chevron-down icon next to the time board or enter the time manually.
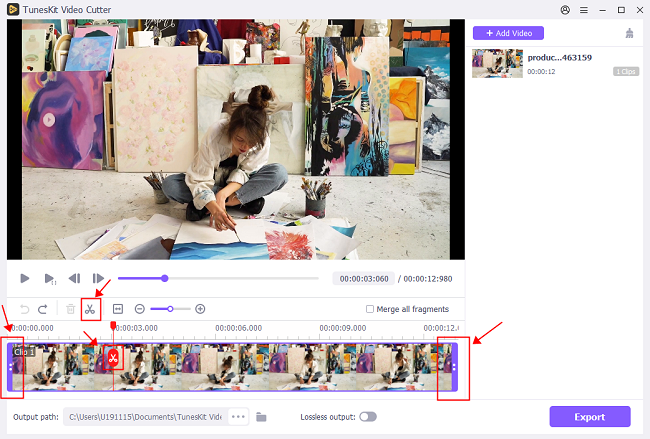
Step 3. Adjust and Edit Video Clips
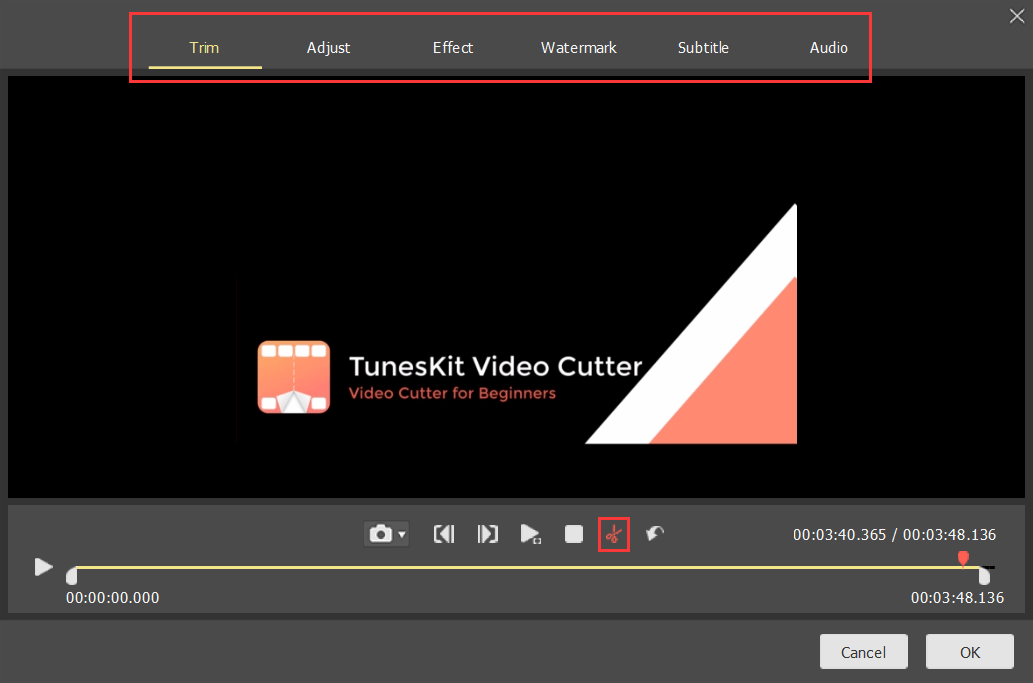
After finishing the basic cutting, you can either keep adjusting the segments or do some editing to it. Click the Edit icon ![]() and an inbuilt video editor pops up. It plays only the segment you have cut on the main interface. That means you can use the scissor icon to exclude the frames you don't want. In addition to that, you can add special effects, subtitles, background music or watermark to your video clips.
and an inbuilt video editor pops up. It plays only the segment you have cut on the main interface. That means you can use the scissor icon to exclude the frames you don't want. In addition to that, you can add special effects, subtitles, background music or watermark to your video clips.
Step 4. Select the Output Format and Export
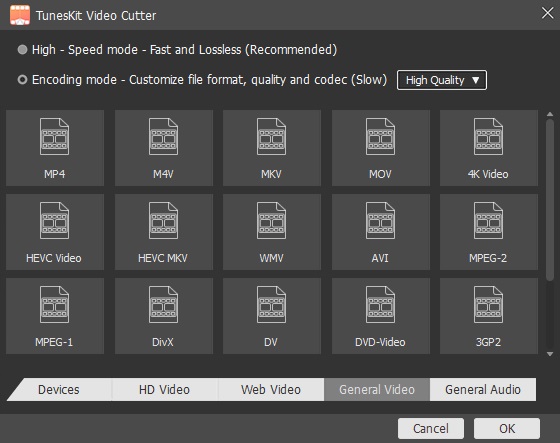
This is the last step. Click the Format button on the main screen. From this format selection, select the "High-Speed mode" to maintain the frame accuracy. This mode is free of re-encoding and supports to export the clip at 60X faster speed. Click the "OK" icon to confirm one output format. And then return to the main interface again, hit on "Start" to export the video clips. If you want to emerge video clips you cut, check the "Merge Segments" box before exporting.
The Bottom Line:
When you read here, you have already known about how to trim videos accurately. The best way is to cut video frame by frame. And to do that, you need to rely on a professional frame by frame video cutter. TunesKit Video Cutter is highly recommended. With this software, you can not only trim videos precisely but also keep your clips in 100% original quality.
You may also like:
No comments:
Post a Comment